Automotive
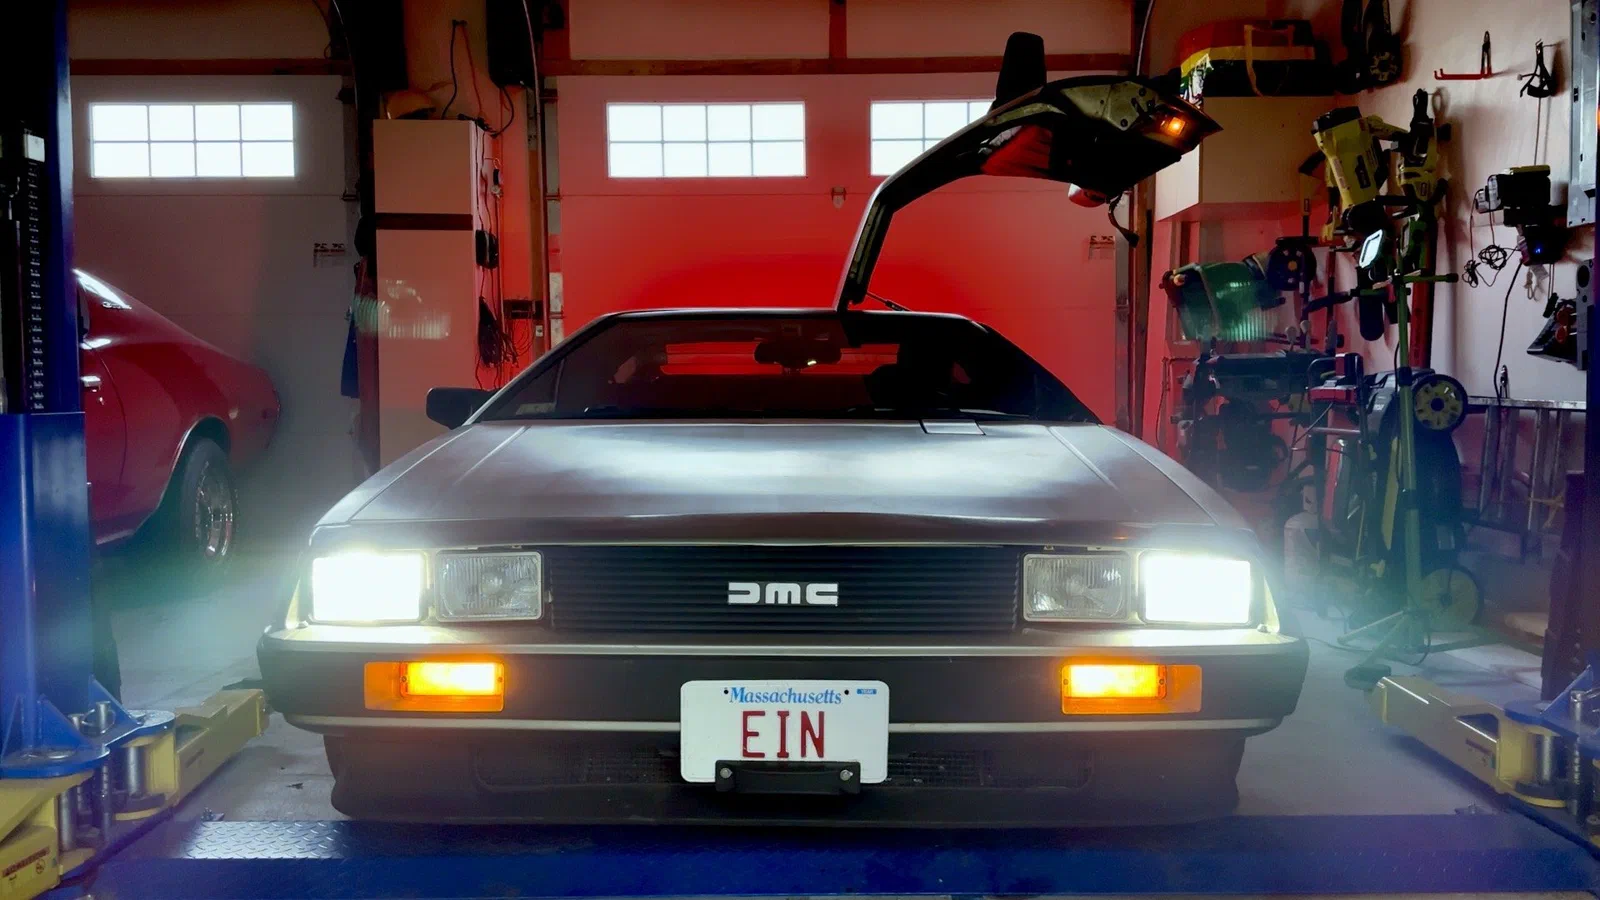
This section attempts to chronicle the repairs and upgrades to my 1981 DeLorean DMC-12, informally known as Ein.
The DeLorean needs routine maintenance and the occasional, more significant refurbishing. Beyond that there are also a number of customizations and upgrades to improve performance, reliability and functionality.
Various scanned documents and links to sites providing DeLorean repair, maintenance and technical information.
Some notes and other information that I can reference when working on the DeLorean.
Recent Repairs, Maintenance and Modifications Blog Posts
2024
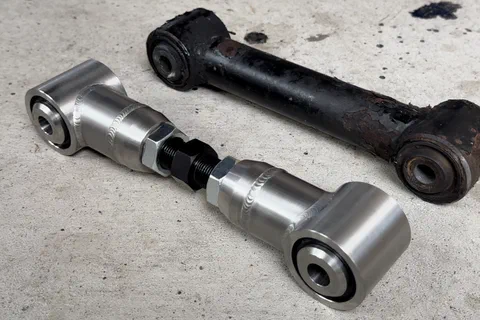
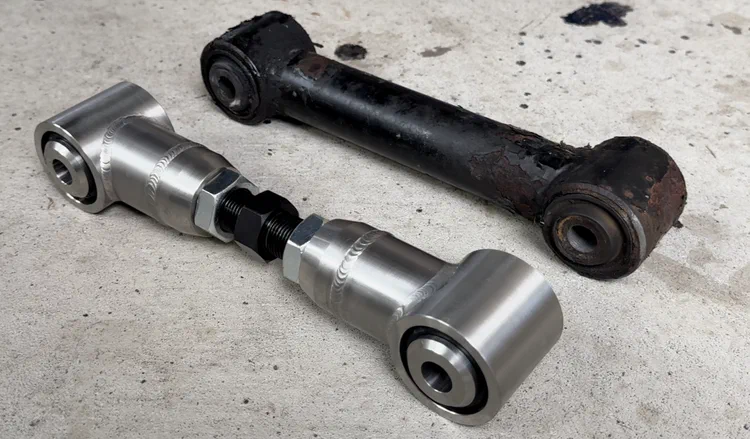
In order to get the rear of the DeLorean aligned, I had to swap out the perfectly good upper link arms with new adjustable ones. It was not as easy as it should have been, but became much easier after I got a new, more powerful impact gun.
October 2023
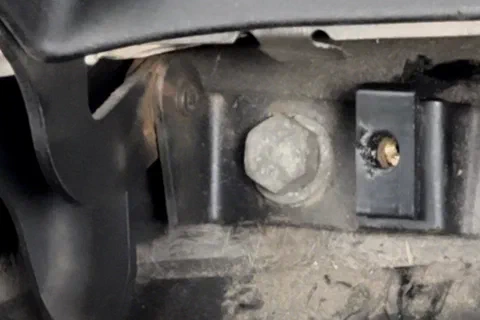
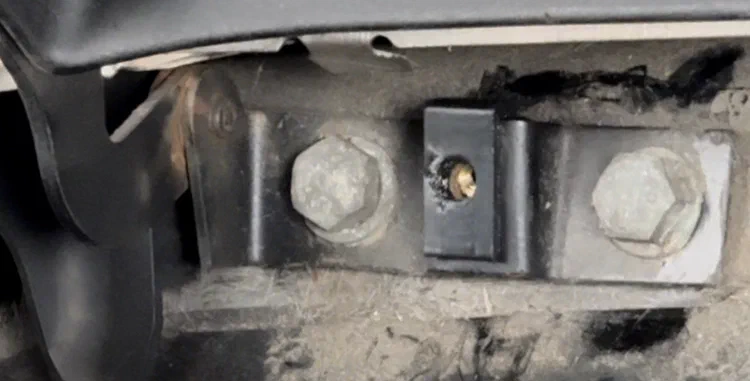
Now that the exhaust noise is fixed, I have to hunt down all the other noises I can hear now. One of them was the T-panel, which was resolved with a little bit of 3D printing.
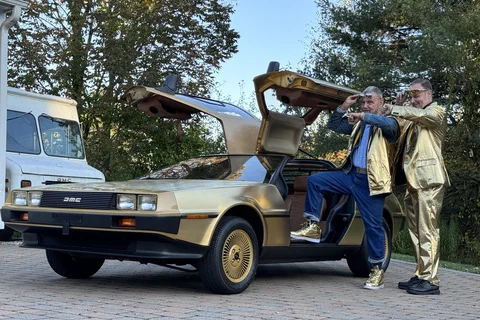
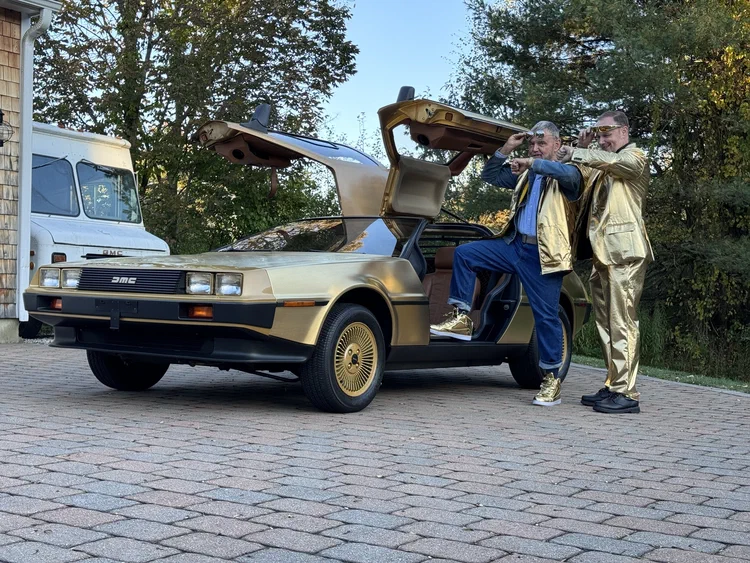
Patrick and Bill Shea are the owners of the only privately-owned gold-plated DeLorean from DeLorean Motor Company itself. I went with North East Region DeLoreans to look at this car up close.
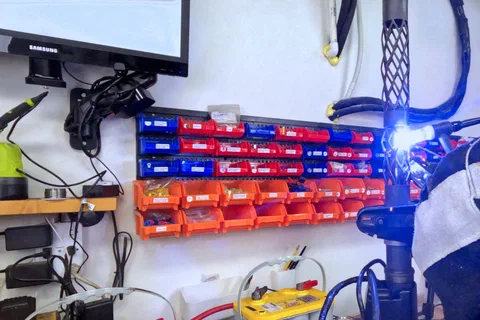
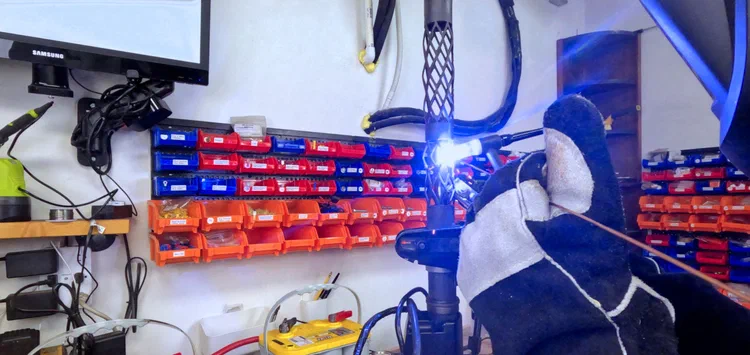
My steering wheel started rattling and sitting low. I went through all the usual suspects before trying to twist the cage, at which point it snapped in half in my hands. A quick bit of welding and it was all set.
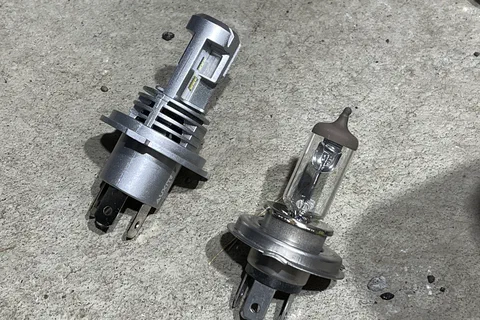
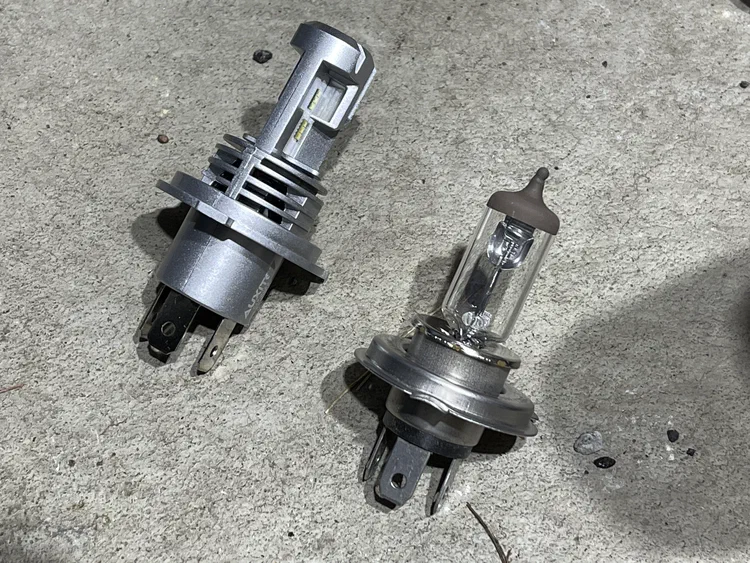
I already had a halogen conversion, so doing an H4 LED conversion was as easy as replacing the bulbs. It’s still pretty easy if you have the stock sealed-beam setup, too.
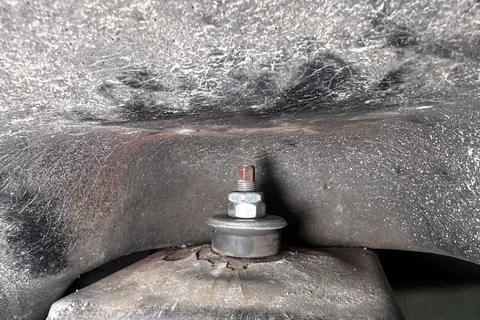
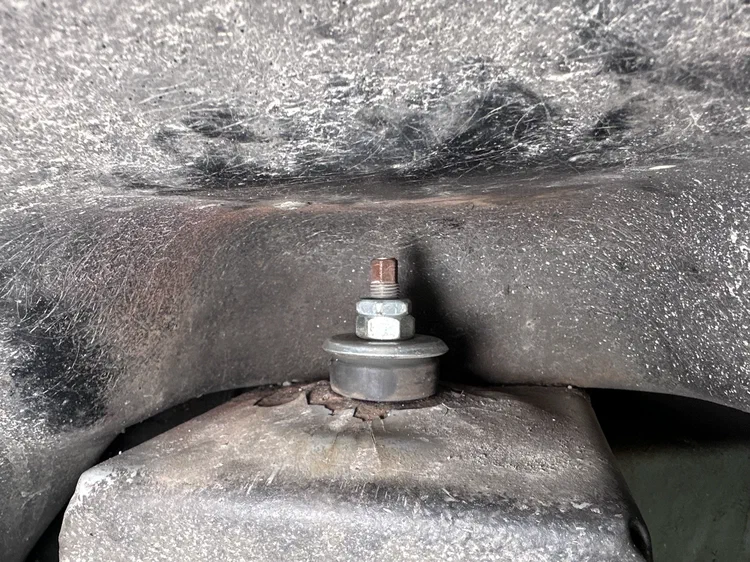
A weird squeaking sound from my rear suspension led me to a failure on the right shock tower that needed to be fixed. The solution was my impact gun, some steel plate, a drill, and a 3D-printed die.
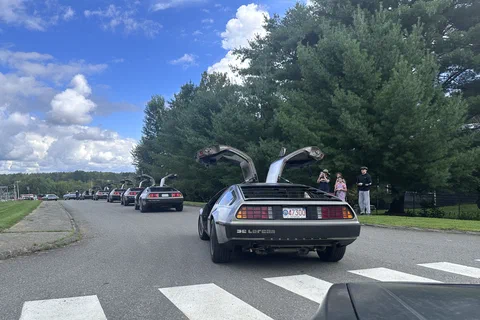
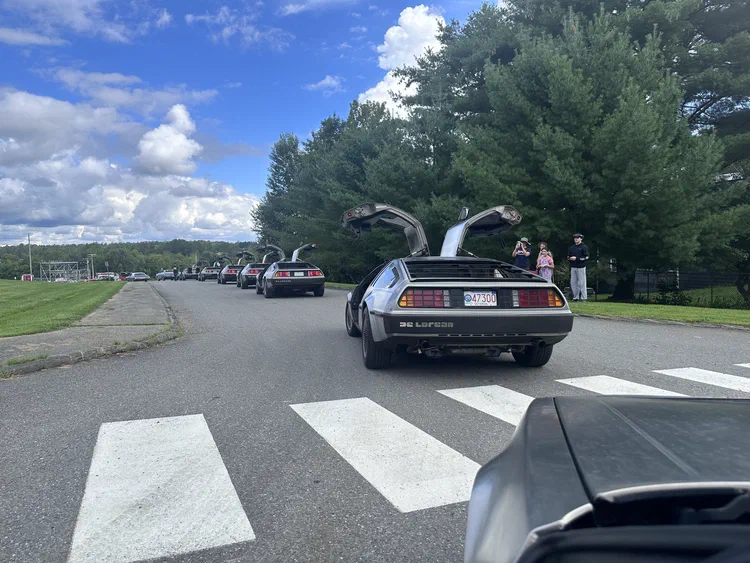
Three weeks and over 3400 miles: how did my DeLorean hold up?
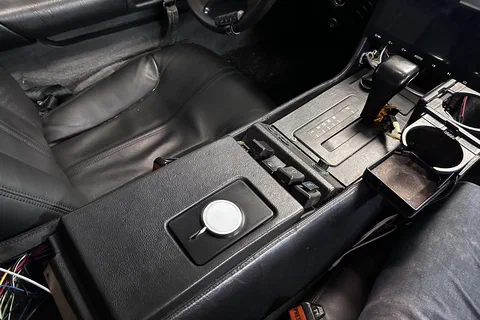
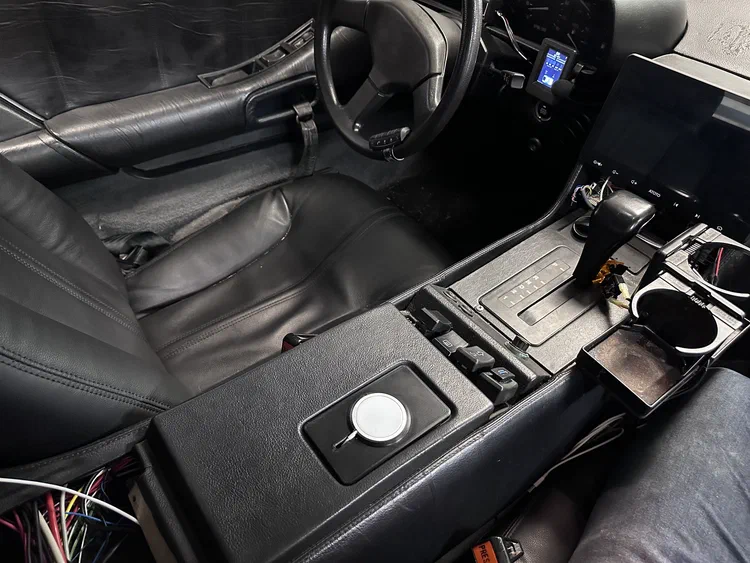
I need to be able to charge my phone in the DeLorean. I’m too lazy to plug in a cable and there’s no good place to rest it anyway, so I 3D printed a holder for the Apple MagSafe charging puck that replaces the ashtray.
September 2023
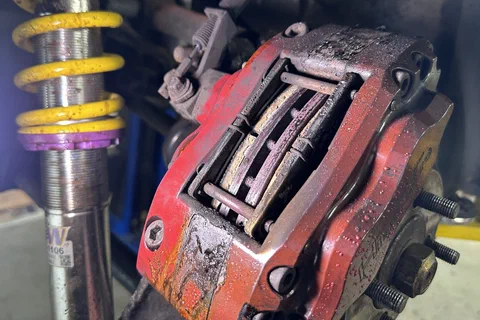
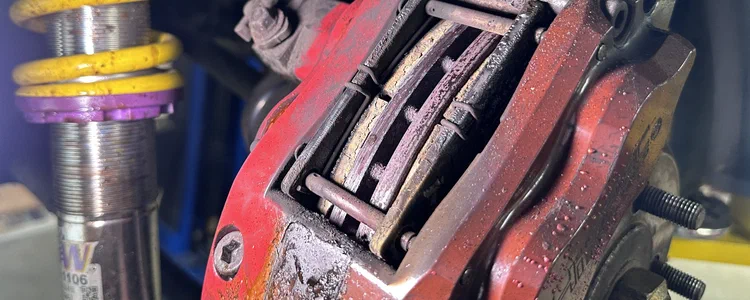
I took my new suspension and exhaust for a test drive, but cut it short when a burning smell and a soft brake pedal told me that something was very wrong. A brake caliper had seized, but it wasn’t entirely clear just what had gone wrong.
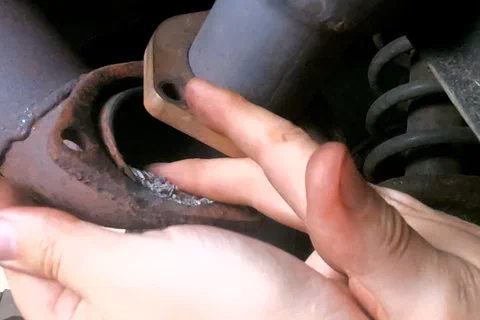
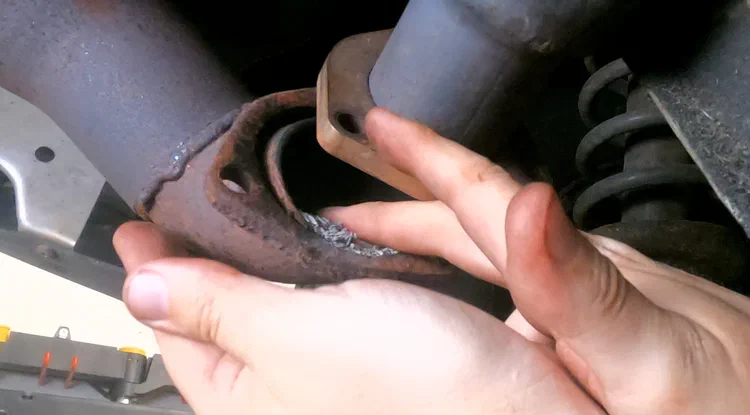
My muffler had gotten rather loud, and then it started rattling. The former was a huge gash in the side of my muffler that I didn’t notice until I fixed the latter — the catalytic converter had broken apart. I wound up rebuilding most of the exhaust, and making it much quieter in the process.
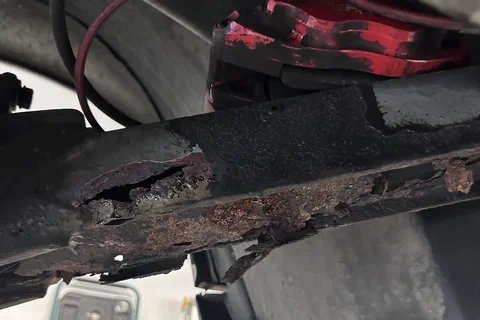
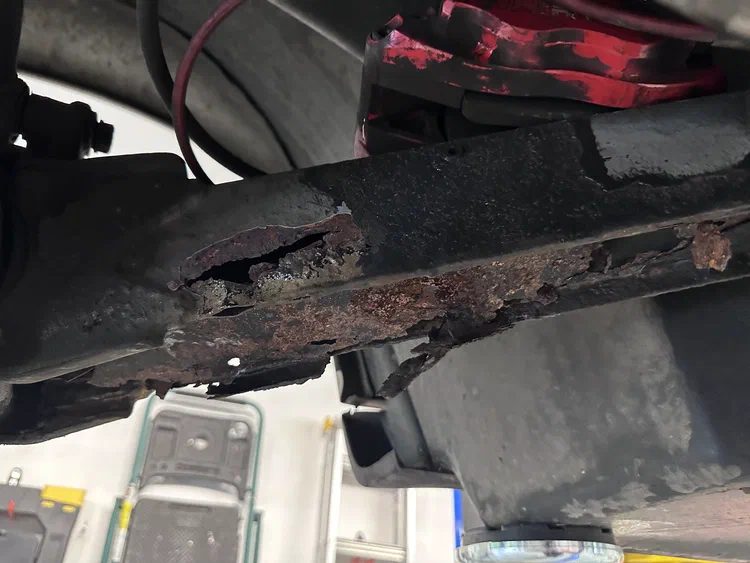
I went into this with the goal of replacing the rear shocks with the KW coil-overs, but soon discovered that one of my trailing arms was basically made of rust. This led to a stainless steel trailing arm upgrade.
January – August 2023
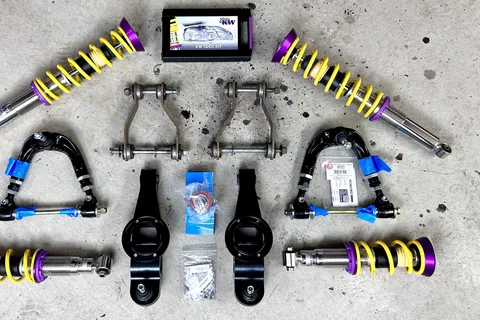
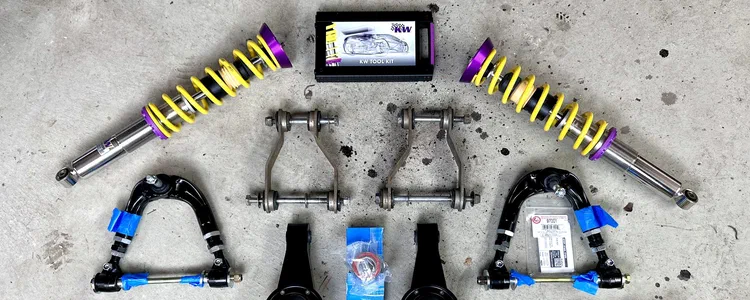
I had already refurbished the front suspension a couple years back, but I wanted to completely eliminate the vibrations I was seeing, so I went even further and replaced the entire thing with brand new, modern performance parts — billet aluminum LCAs, adjustable UCAs, KW shocks and resurfaced rotors.
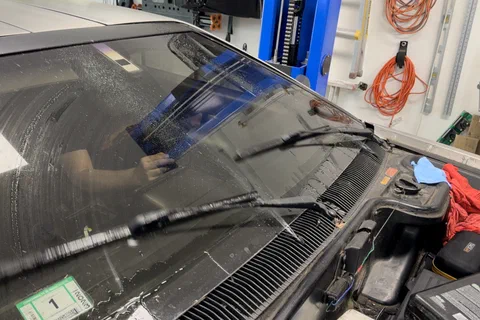
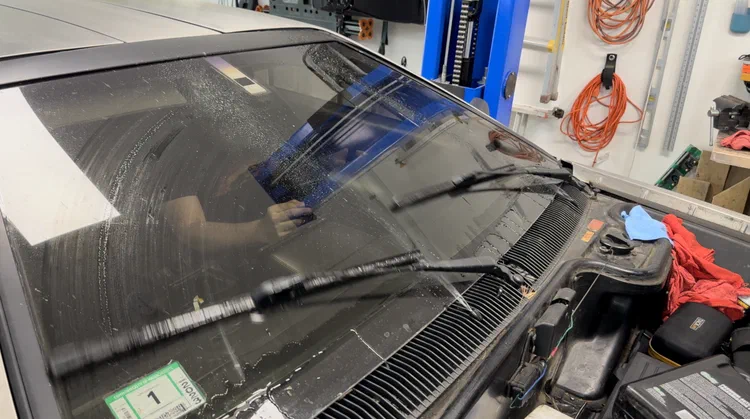
My windshield washers stopped working, which wound up being a bad pump, bad harness, leaking bottle, and plugged washer nozzle. I fixed all of that and upgraded to dual nozzles mounted in front of the windshield, replacing the one on the wiper arm.
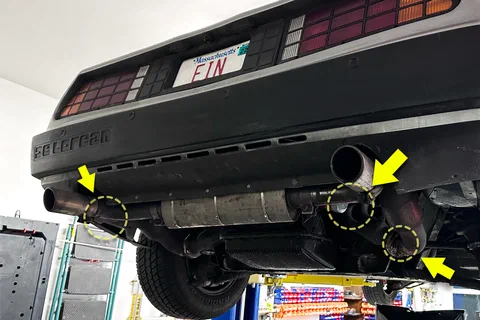
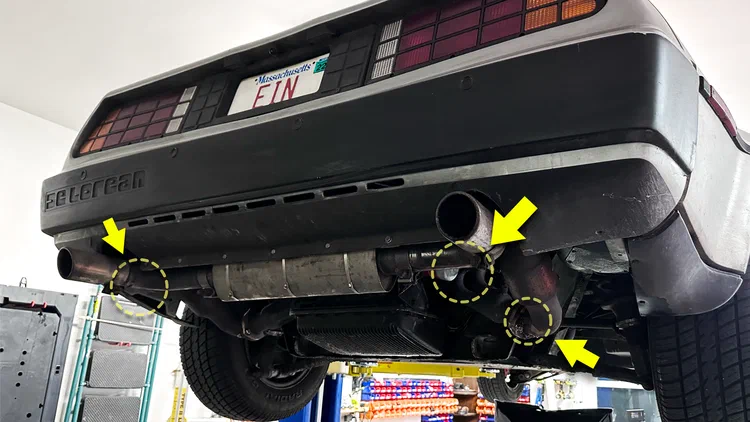
The DeLorean got louder than normal recently. This turned out to be a series of exhaust leaks involving broken welds, loose bolts, and worn flanges that all needed to be repaired or replaced.
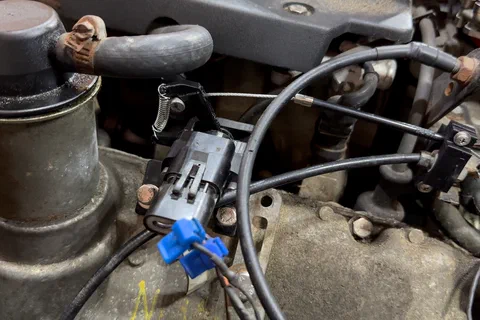
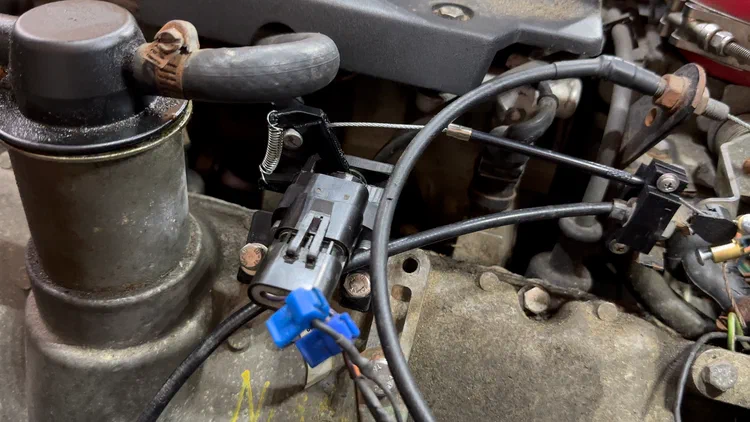
The throttle position sensor on my 3.0L engine never worked properly, so I decided to address it with a custom 3D-printed mount for the valve cover. I tried PLA, PETG, and ASA filaments to see which would work best.
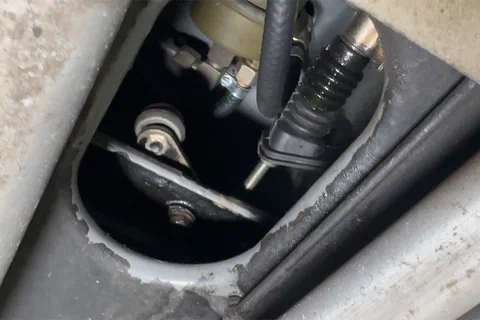
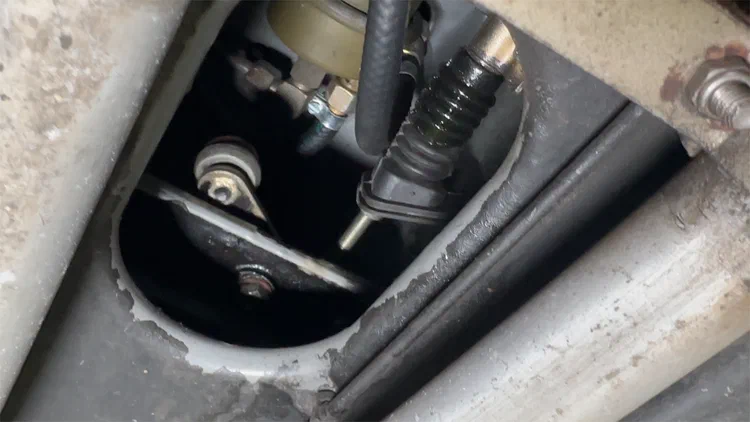
A new video, and a quick summary of the failures of the transmission linkage in my DeLorean.
2022
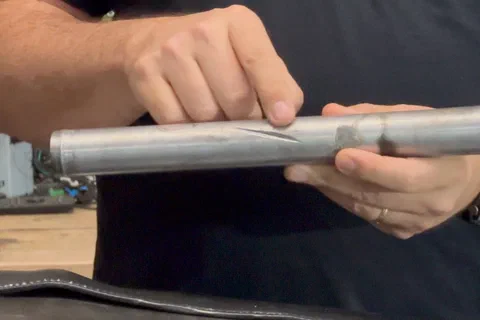
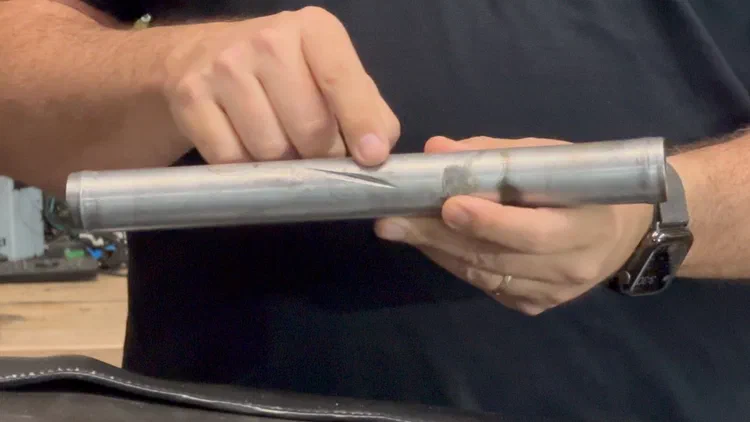
I started noticing a coolant leak under the driver’s side of my car, to the left of the engine bay. It turns out that I had let a pipe rest on the frame and worn a hole in it, which had to be replaced. Bad routing from a former project also compromised the water pump hose, so that had to go too.
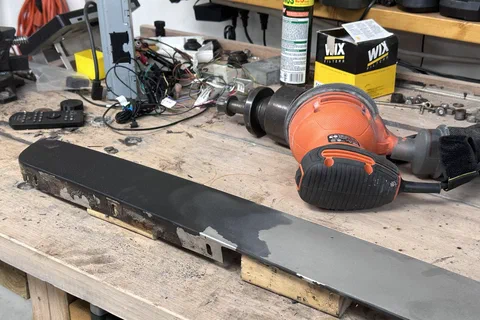
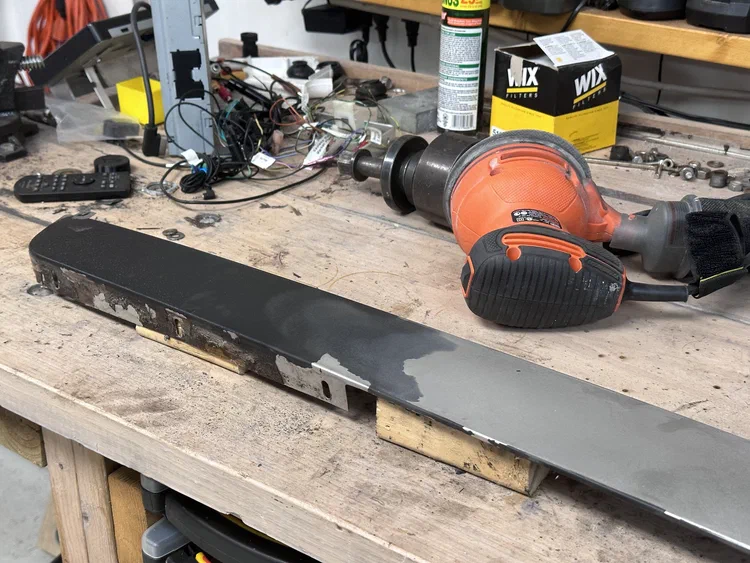
The paint on my windshield trim had chipped away over time, and it was finally time to take it off and repaint it.
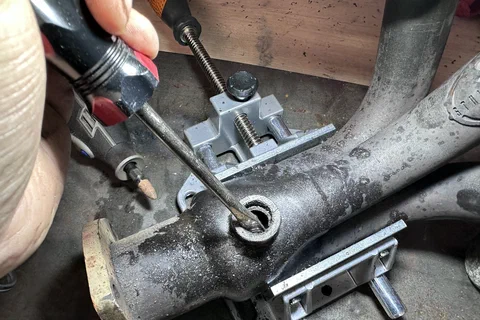
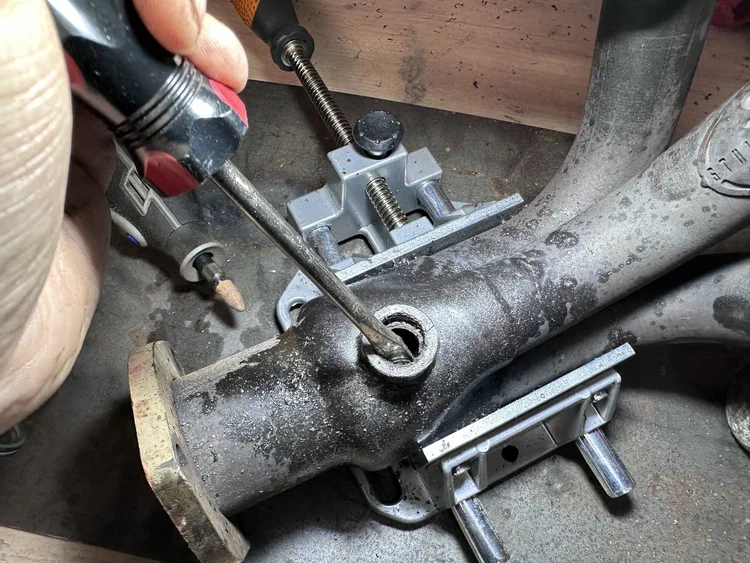
A quick swap of a bad O2 sensor wound up becoming a days-long process of waiting for tools, heating parts and finally removing the header and drilling out the bad unit. But it worked, and the new sensor is in reading good.
October 2021
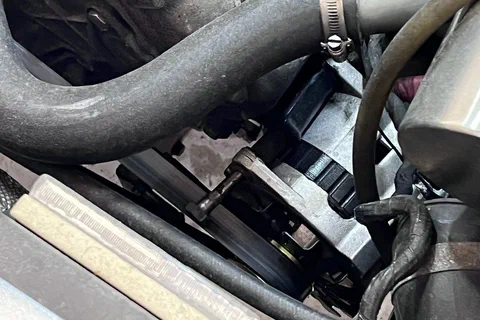
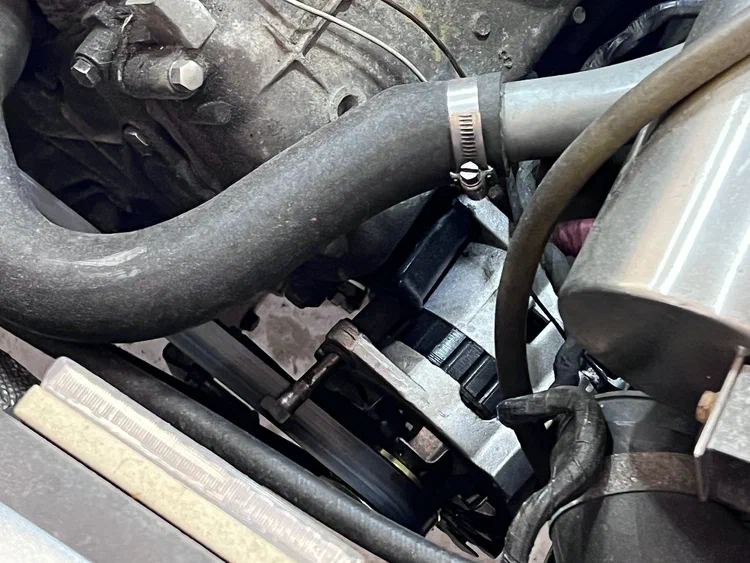
A squeaking alternator on the drive home led me to a broken bolt on the alternator mount. Not sure how that happened, but I replaced it with a new bolt and installed a spacer I’d mistakenly removed from the Camaro alternator, and now it’s good as new.
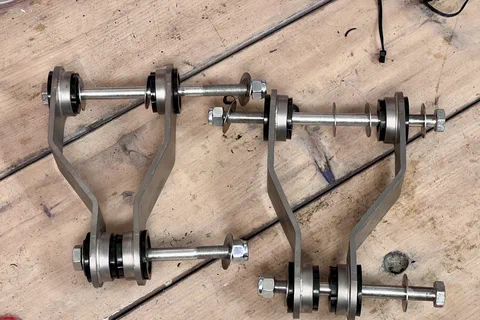
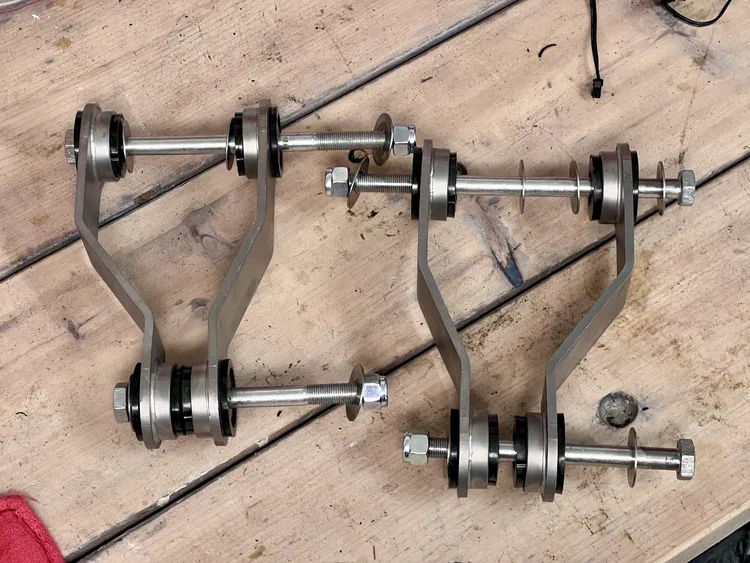
There was still a little vibration in my front suspension, so I decided to give one of the front lower arm support kits a try. I went with DeLorean Europe’s setup, which (possibly combined with some minor sway bar maintenance) seems to have almost completely eliminated my remaining vibration issues.
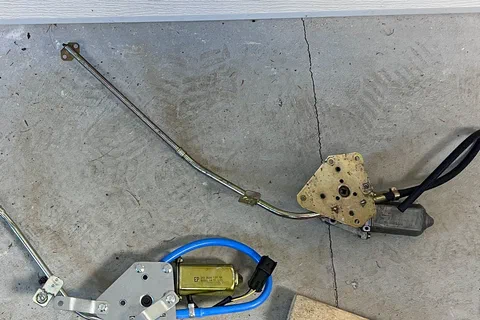
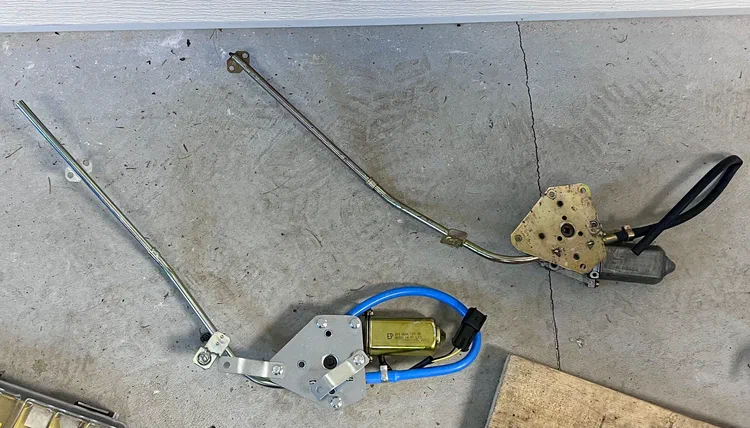
My driver’s side window regulator died. Replacing it requires taking apart a good chunk of the door, and replacing the regulator itself is a pain as well. But after some tinkering and dealing with a short, I have a working window motor again.
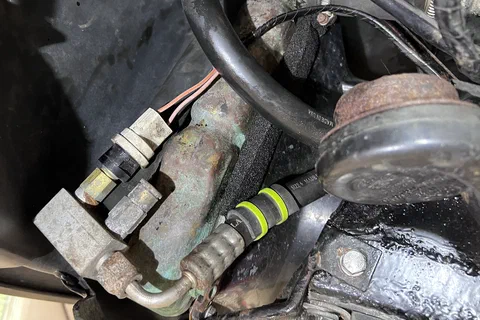
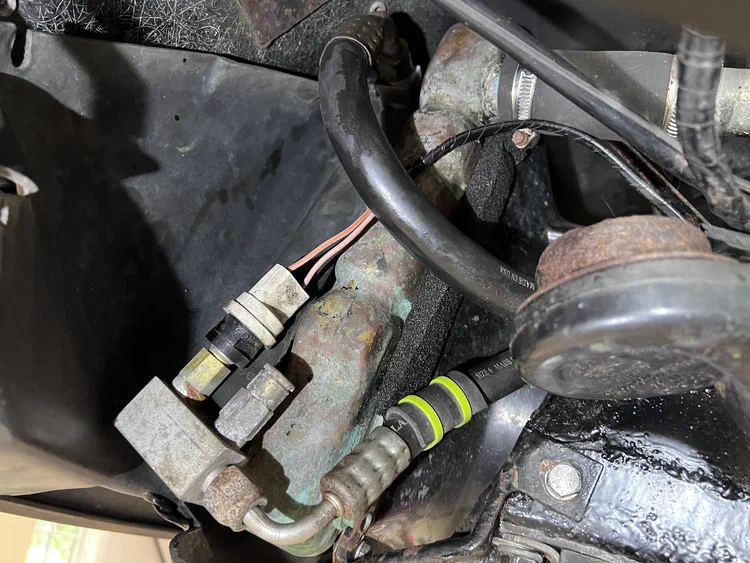
DeLoreans don’t have the best sealing between the radiator and the fans, and some common home window and door weather seal can significantly improve cooling by filling those gaps and making sure that the fans suck air through the radiator, not from around it.
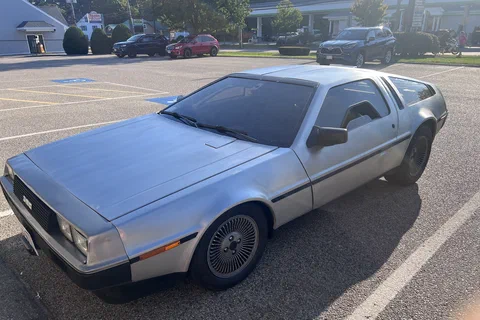
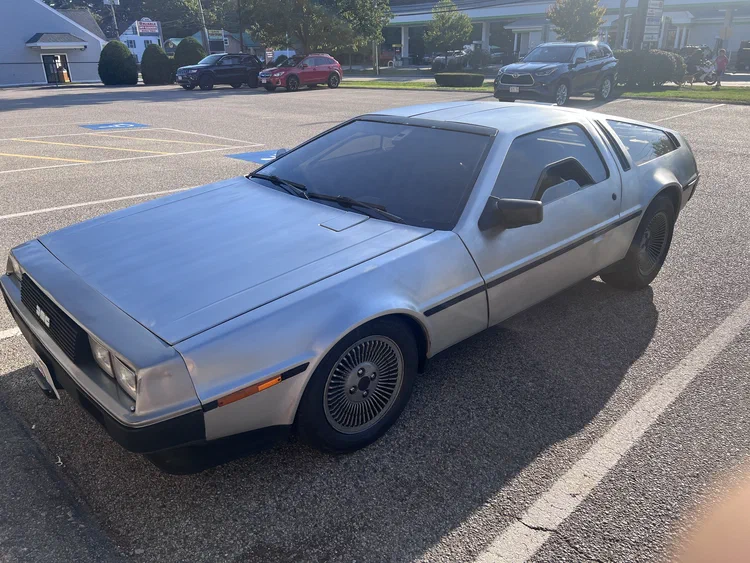
Modern cars have an IR barrier in their windows to help keep the heat out, but the DeLorean predates that. Tinting the windows can help keep your car cooler, so that’s what I did.
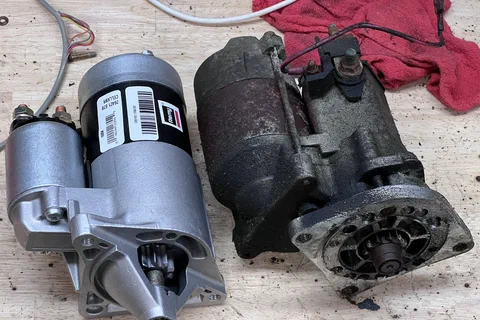
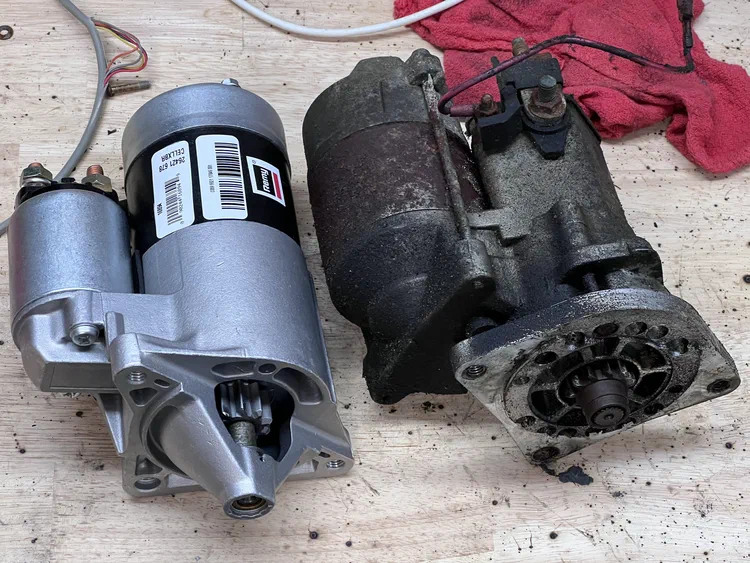
After almost getting stranded because my starter wouldn’t spin, I replaced it with a new Eagle Premier one. This was pretty straight forward, although I did have to remove my aftermarket header to get it out.
September 2021
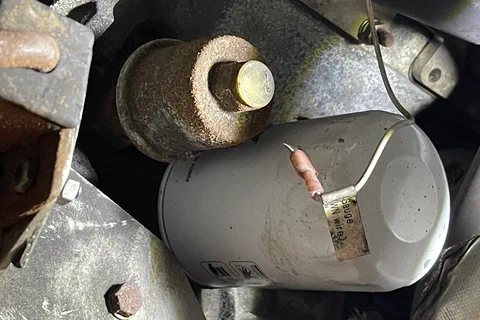
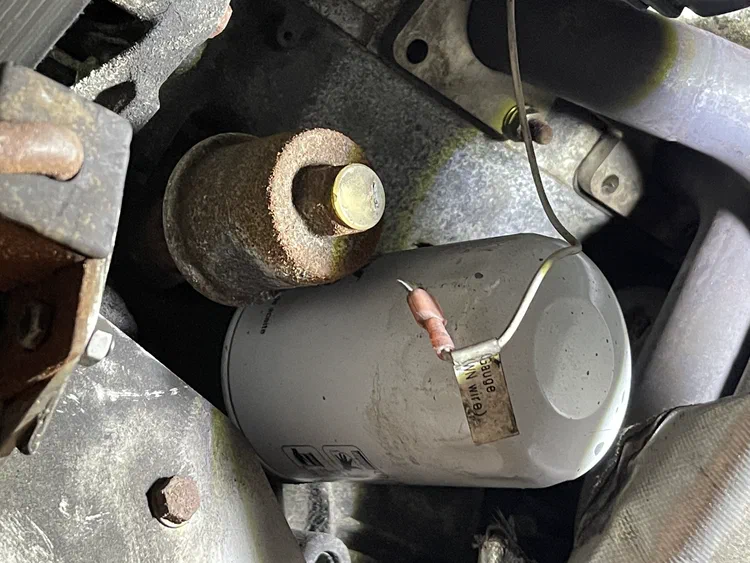
In between replacing the ball joints and bearings and the parts of the car that broke while driving it, I took care of a few other odds and ends that had been bugging me. Seat Belt Orientation My seatbelt had a twist in it. I’d tried to straighten it, but then the buckle was facing the wrong way and I’d have to twist it again.
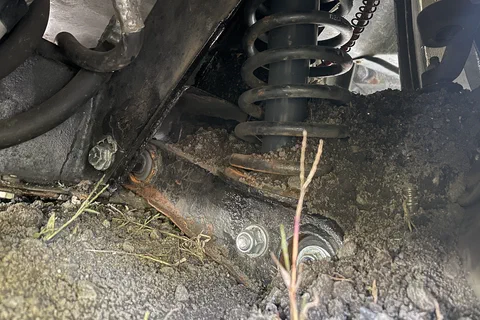
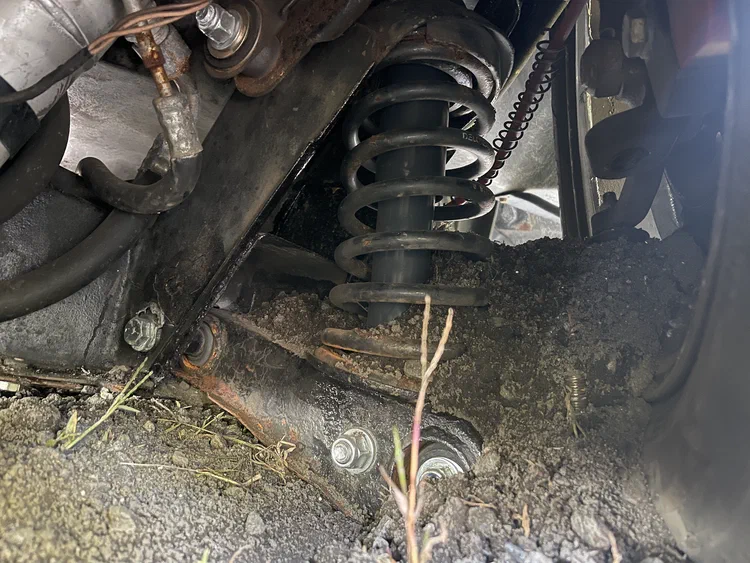
I had a best case scenario for a suspension failure: I got safely off the road and just needed a new ball joint. No major damage, no injuries. Just an inconvenience, and a lot of help from John Dowd.
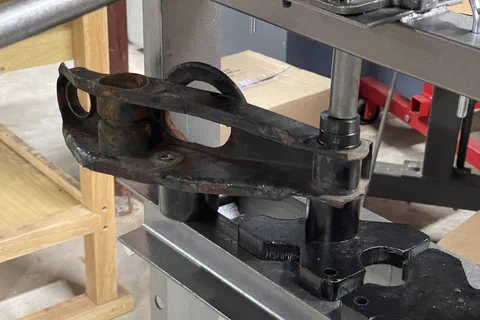
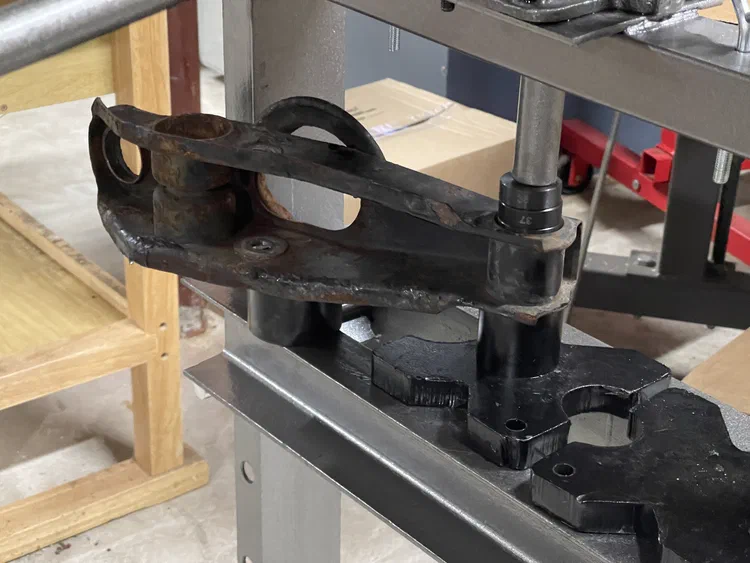
In a (fairly successful) attempt to fix some vibration coming from the front of my car, I decided to replace the front suspension bushings, ball joints and shocks. This involves a couple of presses, a bunch of replacement hardware, a spring compressor, and a fair bit of time, but I got it done.
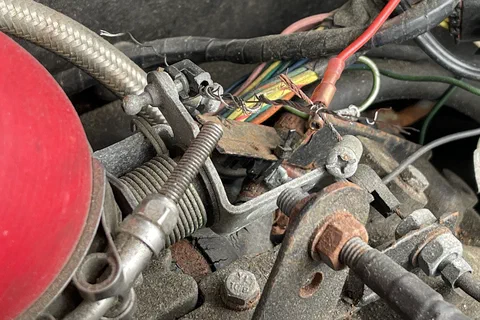
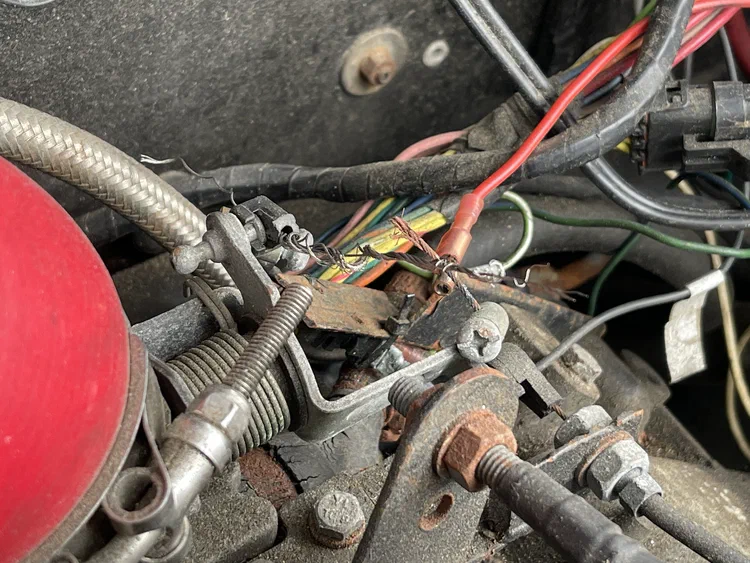
After replacing a grinding alternator, I went for a drive and broke my throttle cable on the highway. Luckily, I was able to use a tuning trick to get my EFI’ed car safely to a parking lot without being able to directly control the throttle. A quick trip to Home Depot got me a new cable and some clamps that I used to fix it in the parking lot.
August 2021
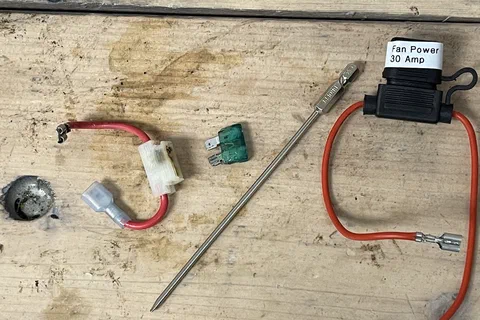
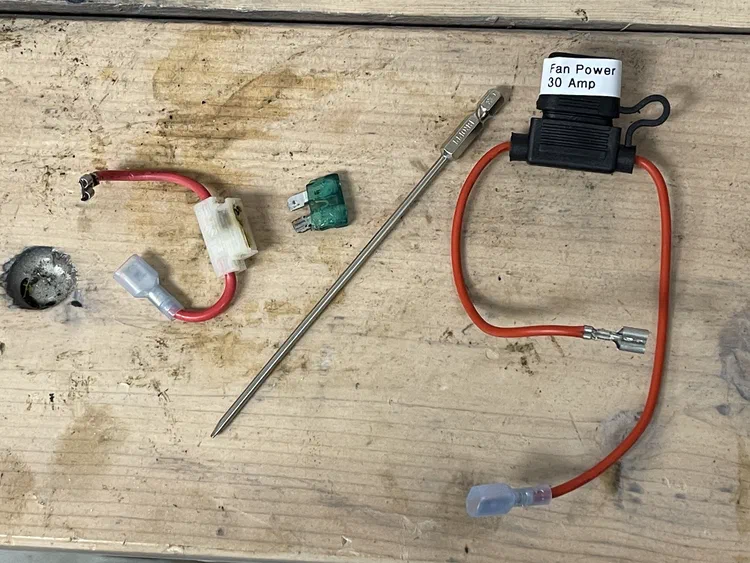
On a trip to a Back to the Future collection, my cooling fans failed. When I got home I found a melted and burned out fuse, and replaced it with two separate inline fuses to reduce the chances of this happening again.
July 2021
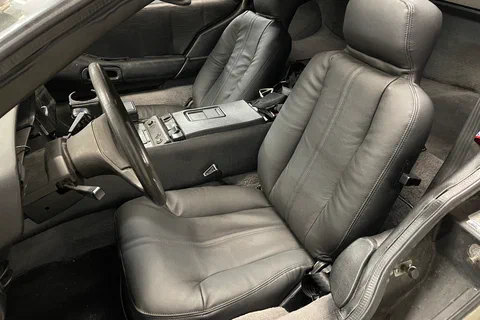
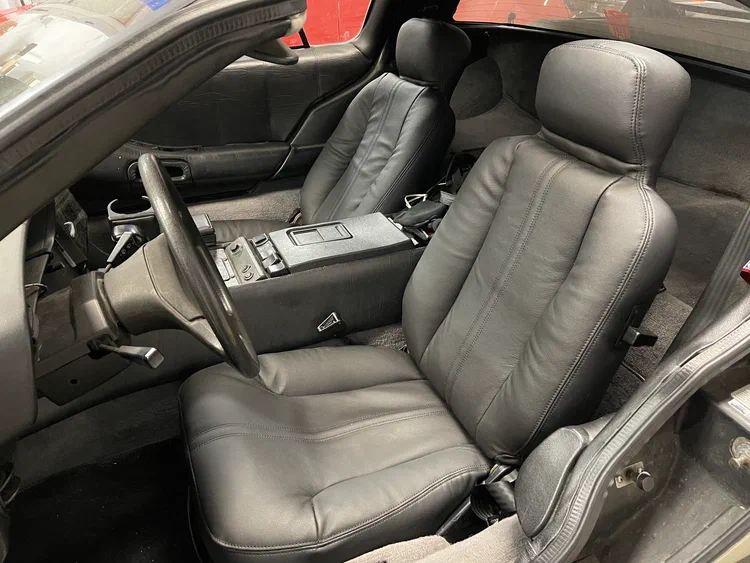
After 40 years, my seat covers were starting to look pretty bad. I replaced them with new ones from LSeat. They came out pretty good, given that this is my first time installing such a thing.
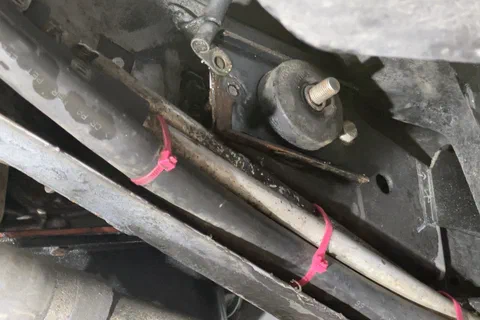
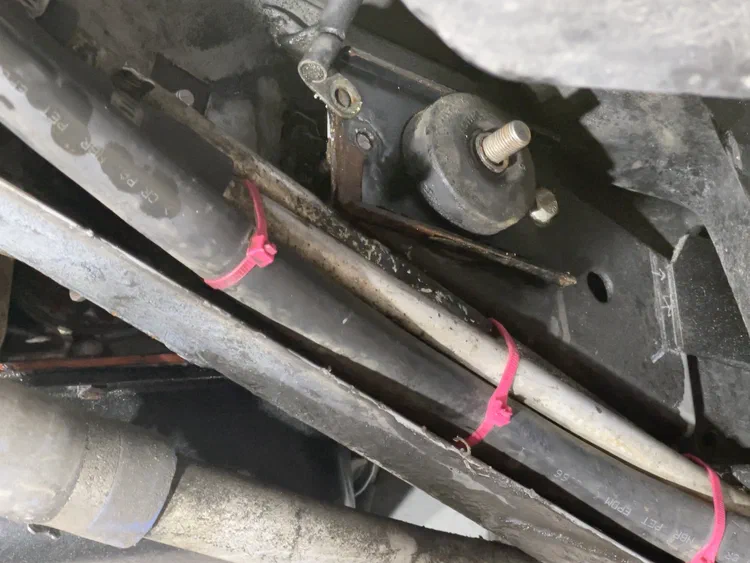
You know what’s fun? Spending two days removing a broken bolt because you didn’t notice a jam nut and sheared the head off, all because you were trying to track down an intermittent engine cut out that wound up being a loose connector on the opposite side of the car. <sigh>
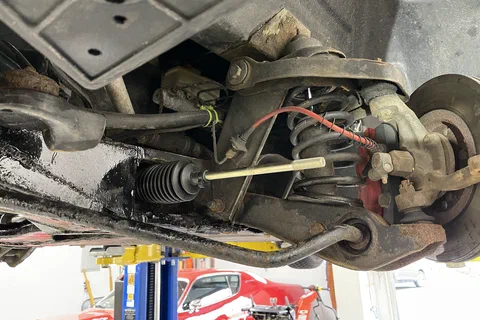
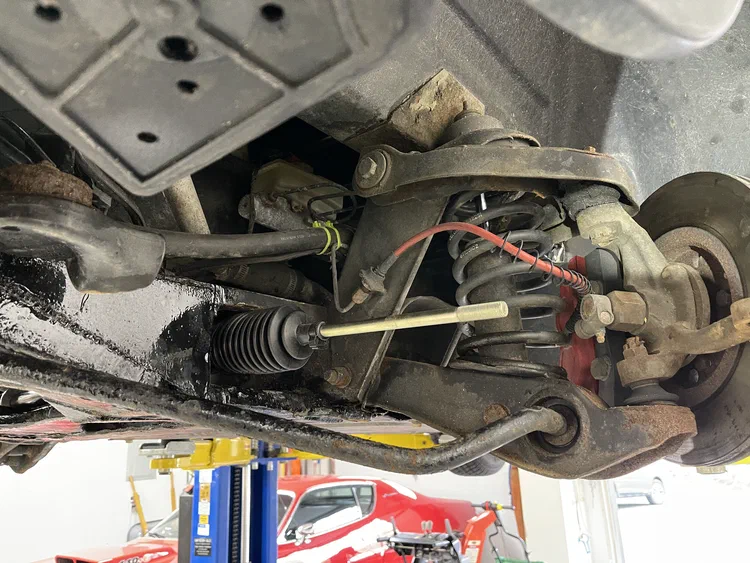
My steering column bushing was shot, the rack had a torn boot for some time that had partially ruined the mechanism, and I wanted to install a vibration-dampening U-joint and single piece column. Since all three are in the same place, I might as well do them all at once.
May – June 2021
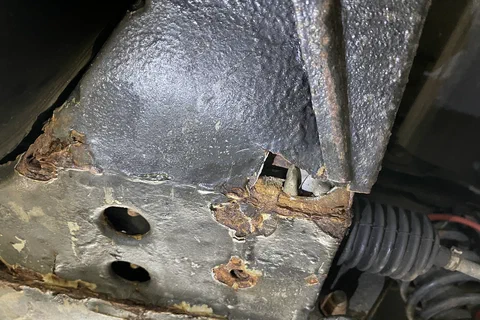
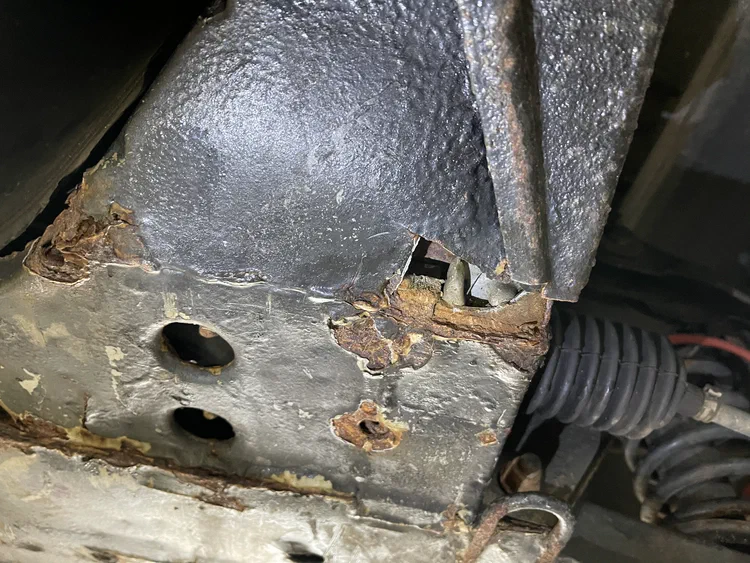
The driver’s side of the front frame extension had broken and needed to be welded up. There were a few other points that need some patches too. This was a good project for my new electric welder.
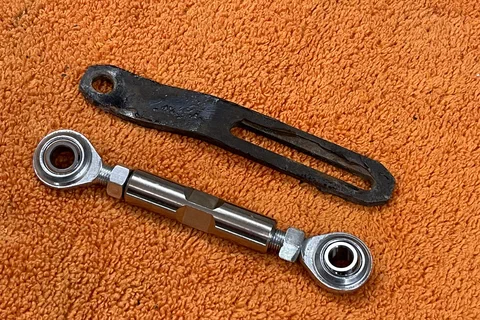
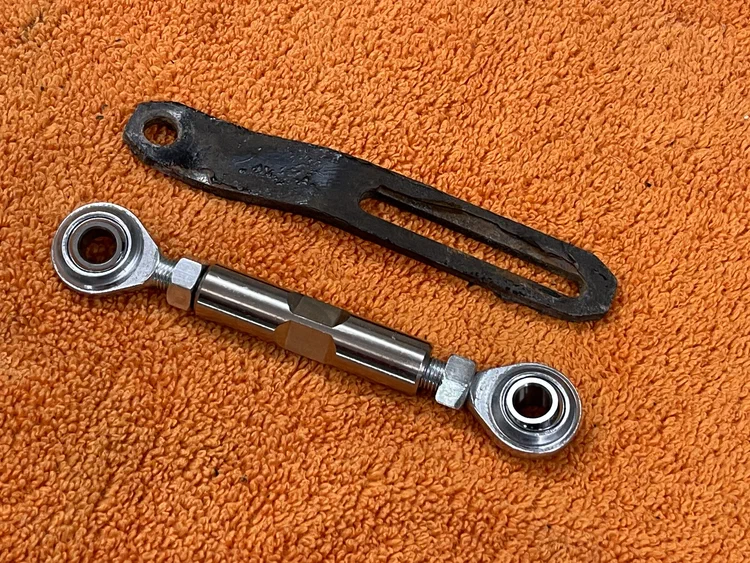
Tensioning the belt on the DeLorean sucks. Replacing the tensioning bracket with an adjustable tensioning rod makes it a lot easier.
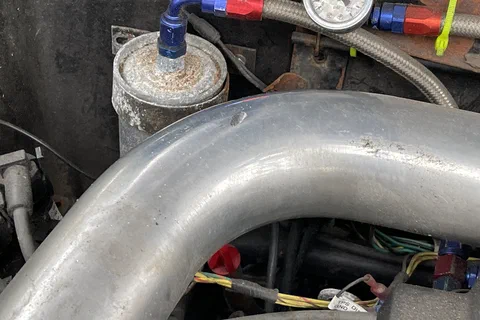
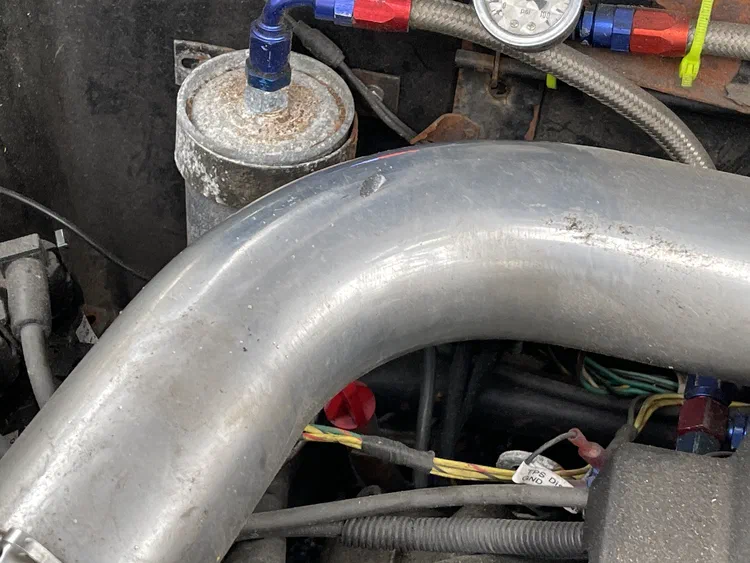
A series of loose, misaligned or broken parts made my car a lot louder than it needed to be.
March 2021
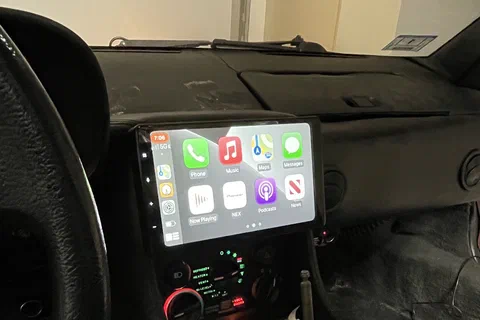
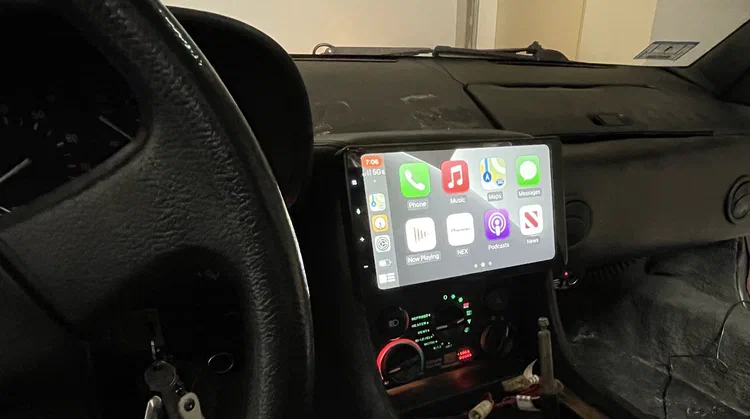
Two years ago I installed a double-DIN head unit, but my desire for wireless CarPlay and resolving an issue with my backup camera led me to setting up a newer, larger display, which posed some interesting mounting challenges.
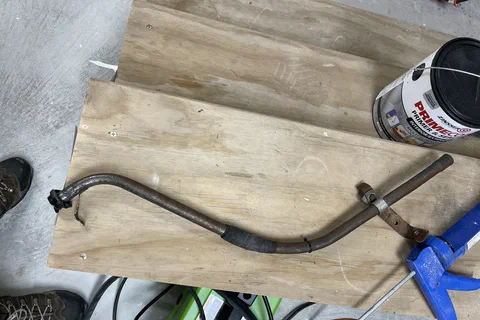
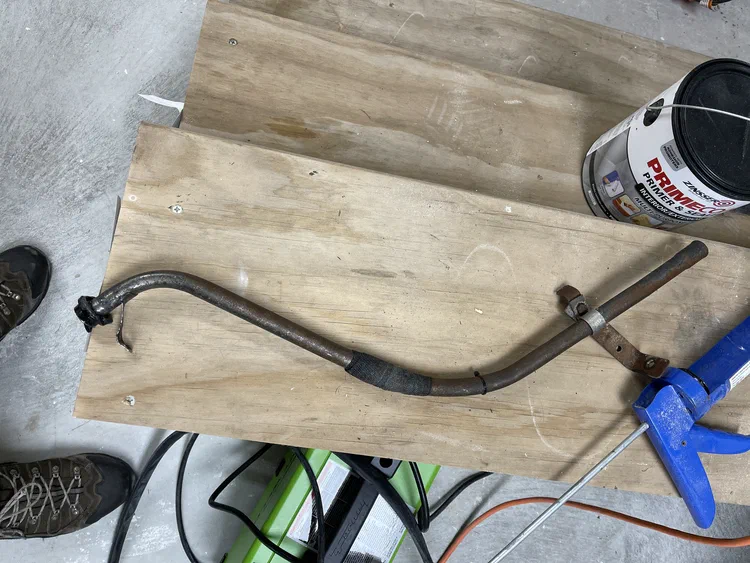
A quick fix to a worn dipstick tube led to a slightly more involved fix with the gasket at the bottom of the tube.
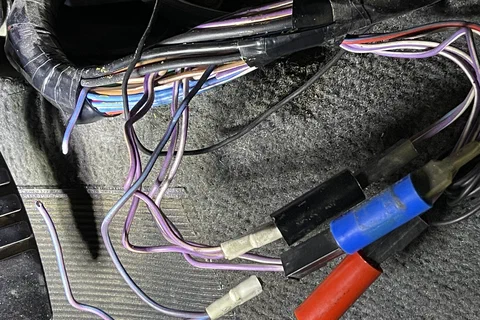
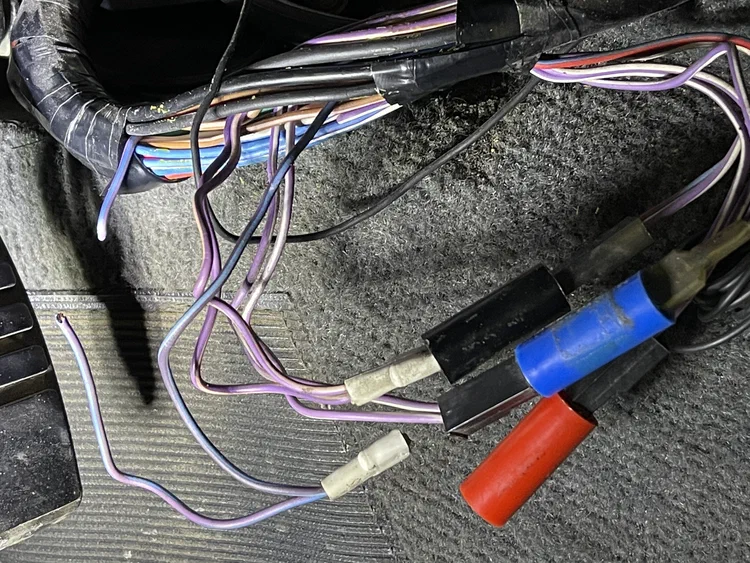
My driver’s door lights stopped working for some reason. After taking apart too much of the car, I found a broken wire near the diode bundle in the footwell. Took five minutes to fix, and a couple hours to track down.
January 2021
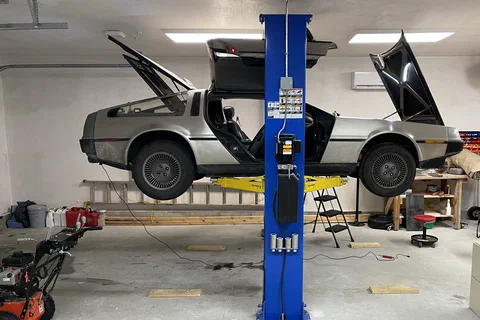
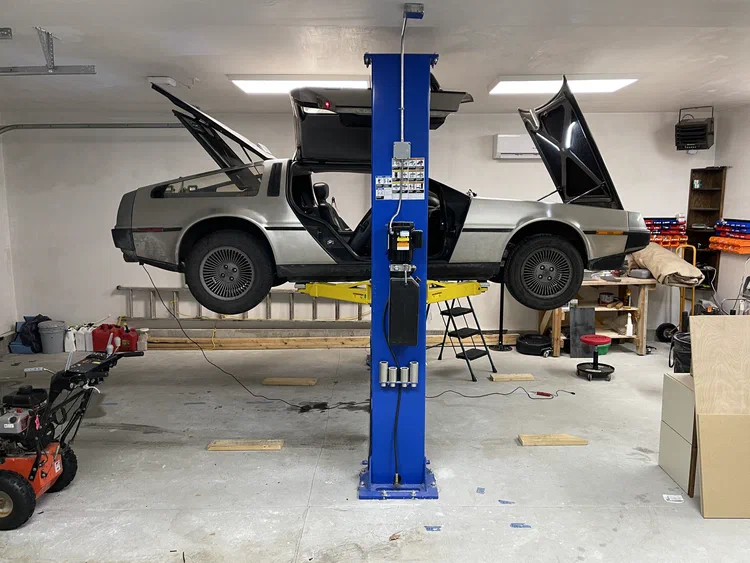
Now that my lift had power, I was able to do some overdue maintenance: change the oil, fix a leak at an oil sender, and upgrade my transmission linkage bracket.
February – November 2020
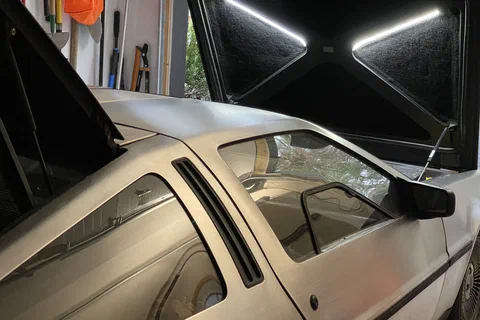
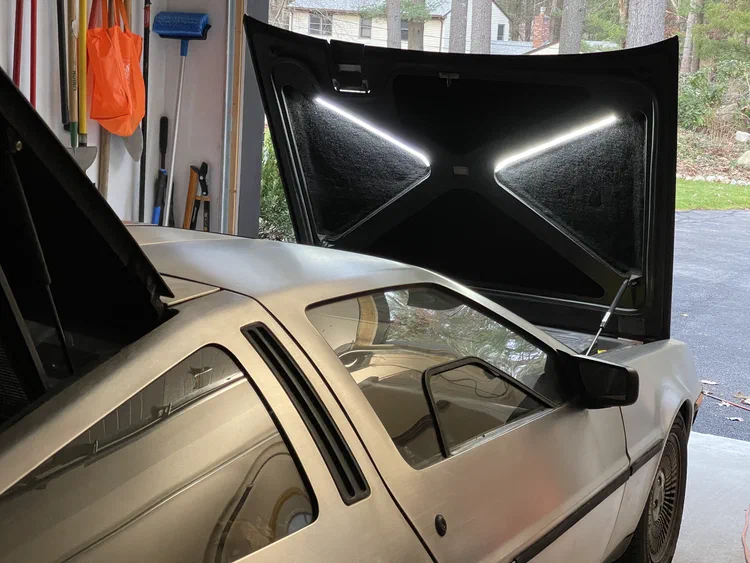
The luggage compartment light is rather weak, especially considering how much area it is expected to light. I upgraded it with a pair of LED strips. I also had to slightly refurbish the switch.
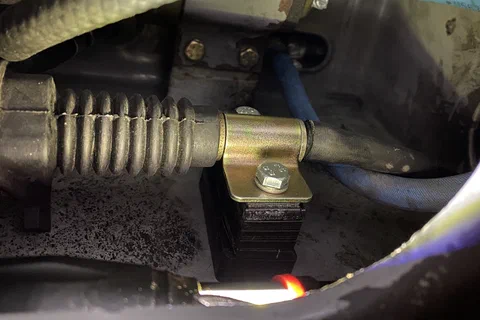
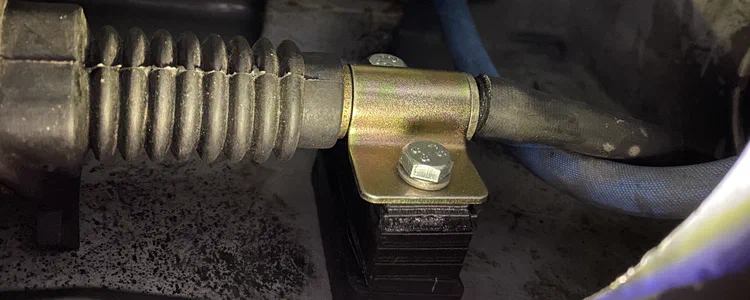
Just a few days after my MegaSquirt connector came loose and I had to get towed home, the transmission linkage came apart and I had to get towed home. After figuring out how to get the car back into the garage, I installed a new bracket with a 3D printed block nut holder, which has been working just fine since then.
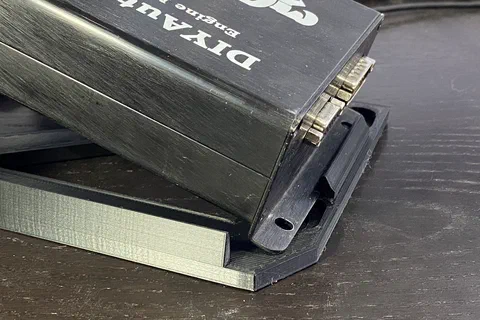
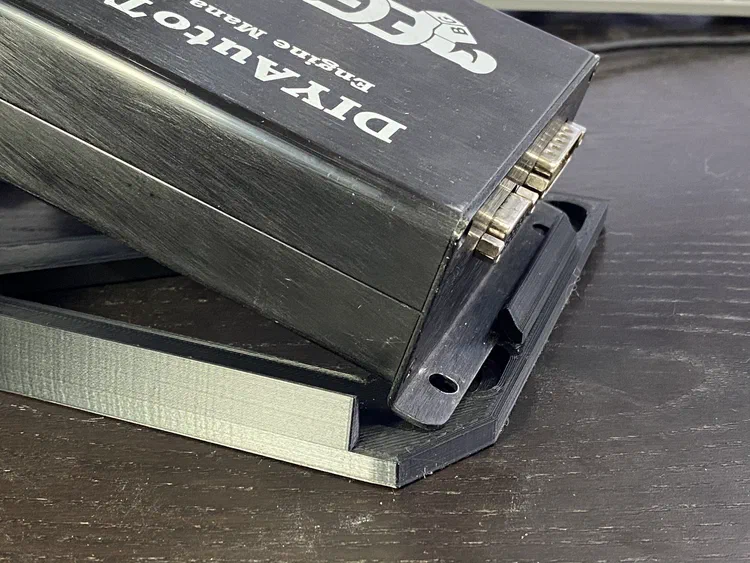
After getting towed home because I didn’t realize that the MegaSquirt DB37 had come loose (because I didn’t screw it back in), I built a mount to secure both MegaSquirt and the cable without screws.
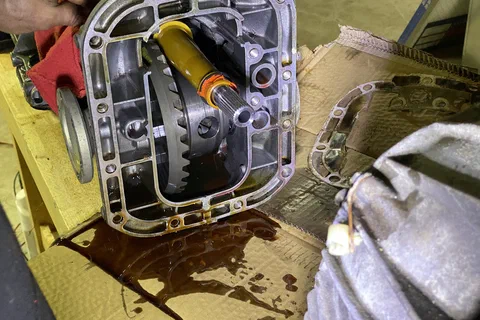
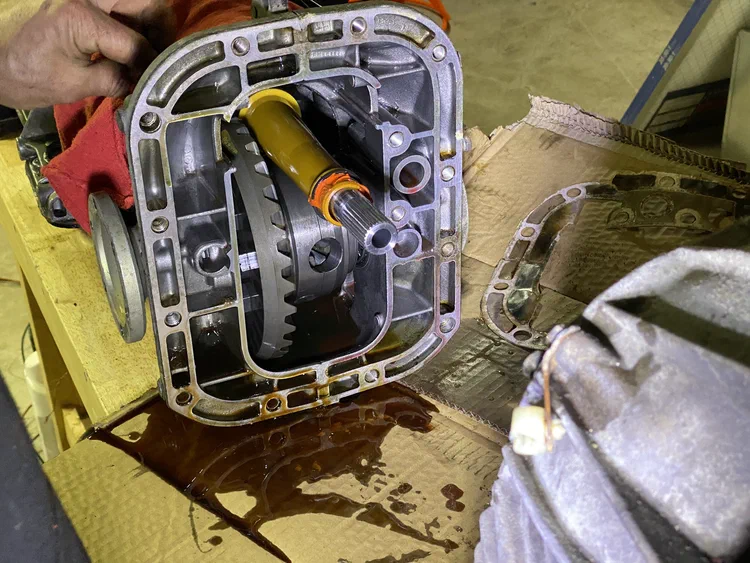
My automatic transmission has been leaking since I did my engine swap, and likely before then. To fix it, I’d have to remove the transmission and reseal it. It’s a big project, and while not trivial, it’s not too horribly difficult if you’re careful. It helped that I didn’t have to delve too far into the transmission, and was able to avoid anything that required special tools.
January 2020
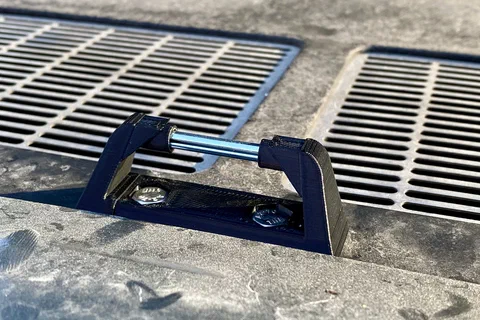
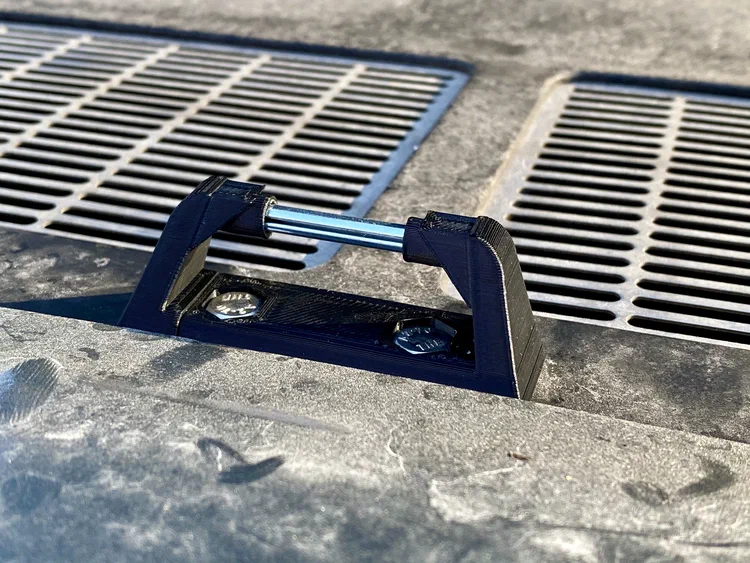
The old engine cover striker bar doesn’t fit the louver brace notch on my car for some reason, so I just printed a new one.
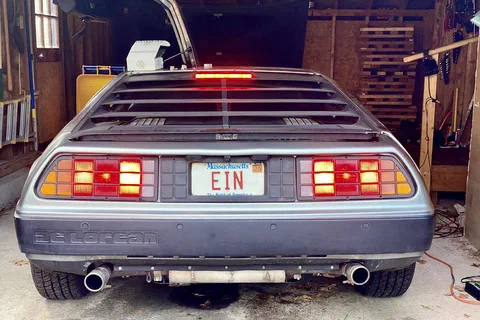
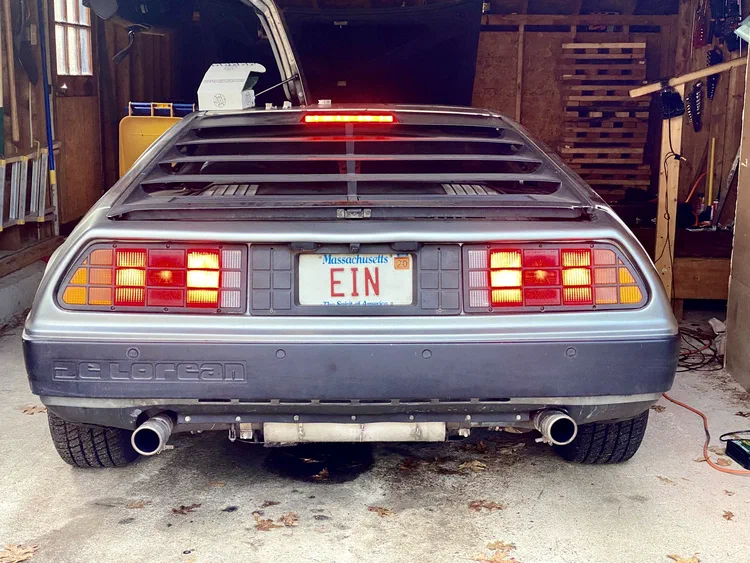
A common upgrade, I put LED tail lights in my car. The third brake light bulbs were a bit trickier to find, but I eventually got those too.
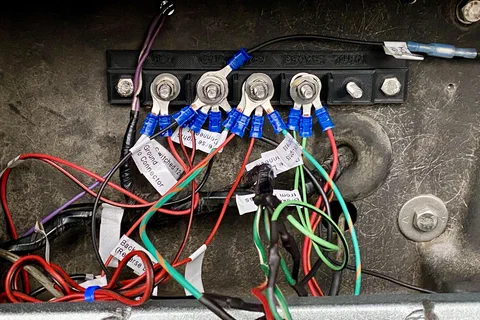
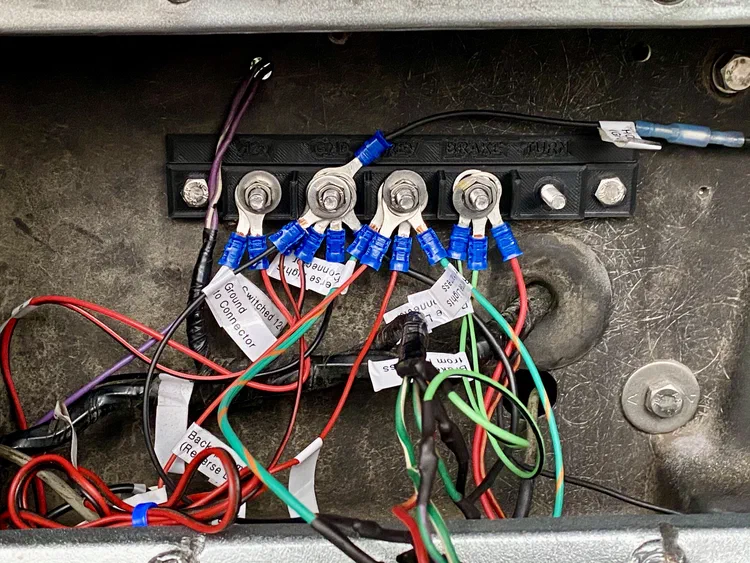
After years of adding a slew of accessories that tapped into the passenger tail light harness, I went about cleaning that up with a custom 3D printed terminal strip.
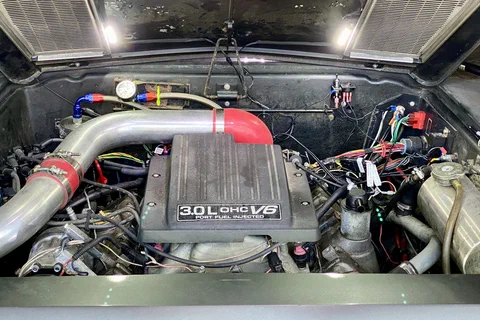
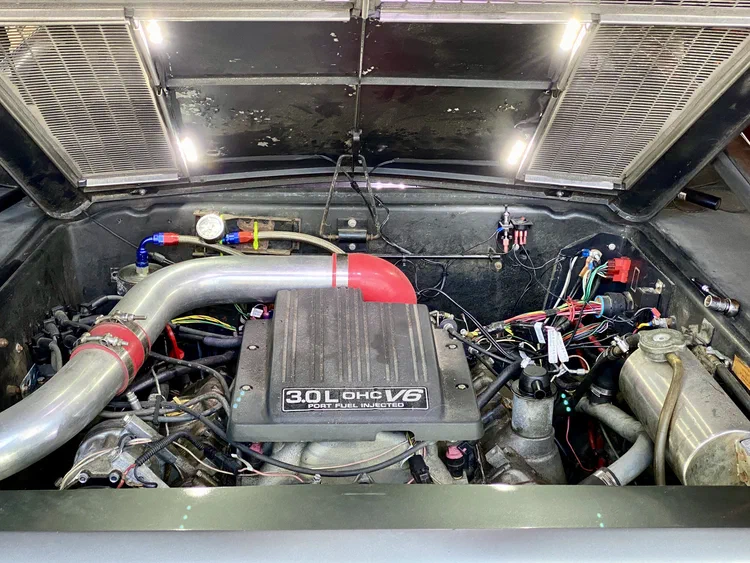
I’ve had to check the oil or do quick engine fixes at night with poor illumination, and holding my phone up as a flashlight wasn’t working very well as I juggled dipsticks and cleaning rags, so I installed a new set of lights in the engine bay.
September 2019
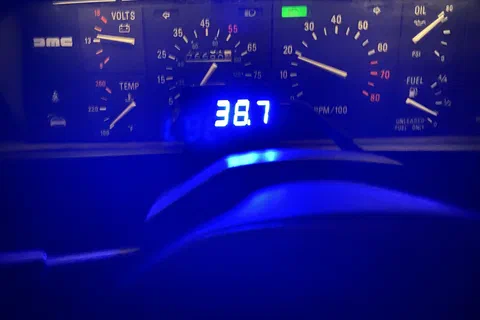
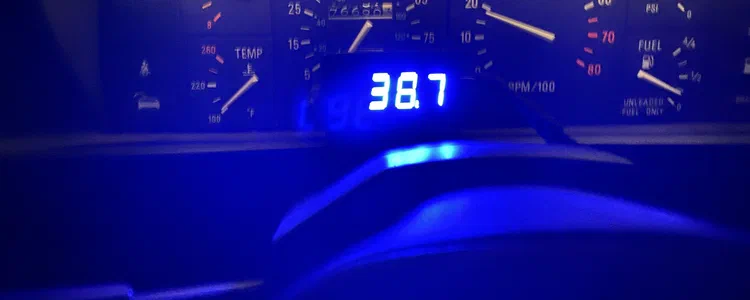
Angle drives break after five miles in my DeLorean, so I haven’t had a speedometer in years. Instead I built a clip-on digital one that picks up pulses from a Hall sensor passing by a VSS ring mounted on the rear axle, an Arduino, a 3D printed case and an Adafruit seven segment LED display backpack.
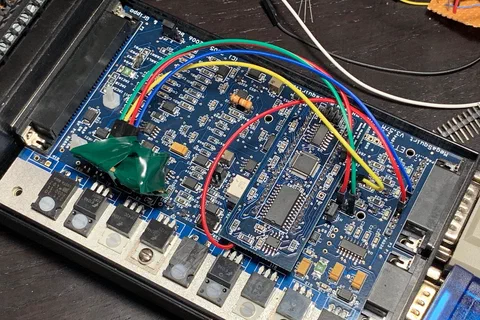
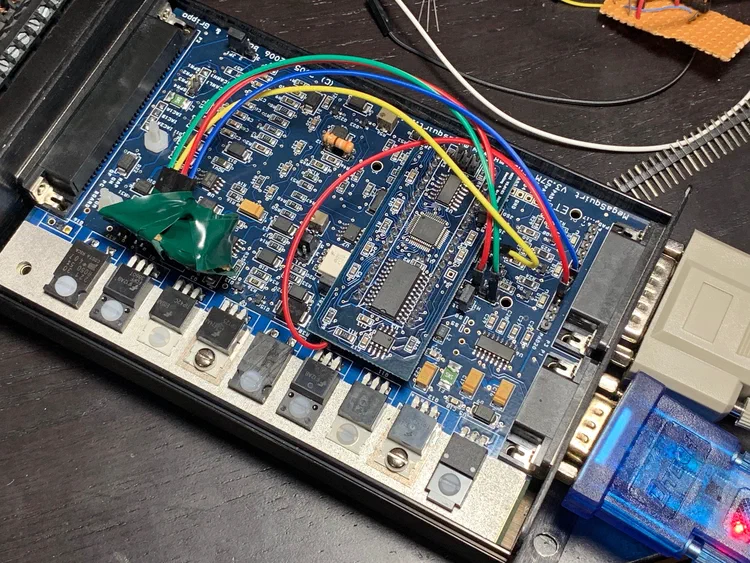
The A/C compressor can put a lot of load on the engine, which can be an issue when your car has idle stalling problems like mine does. I did a common MegaSquirt II modification to add A/C idle up support to my DeLorean.
August 2019
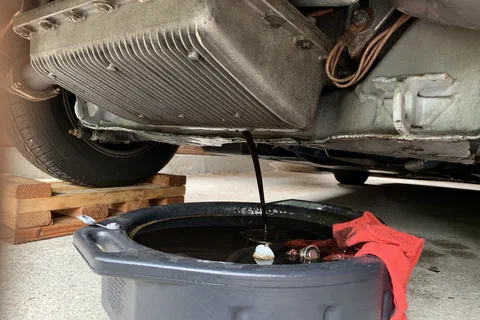
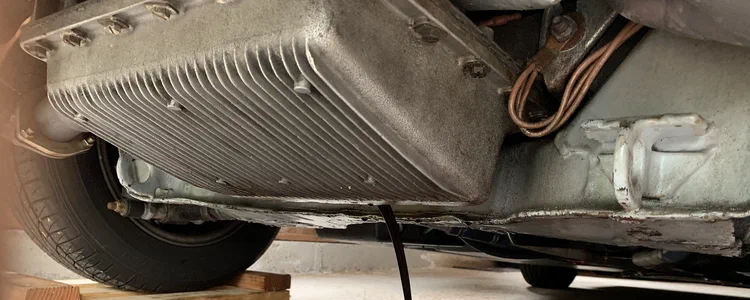
Adjusting my door striker pins so that the doors no longer rattled and latched properly was actually pretty easy. The oil change should have also been easy, but a bad oil filter and a lost oil vapor separator got in the way of that.
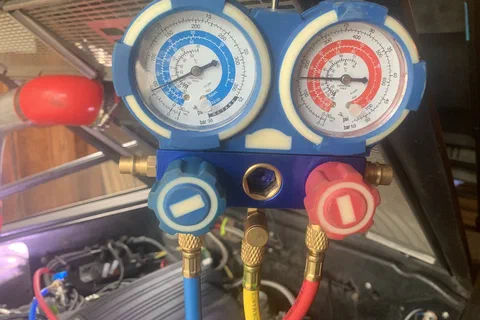
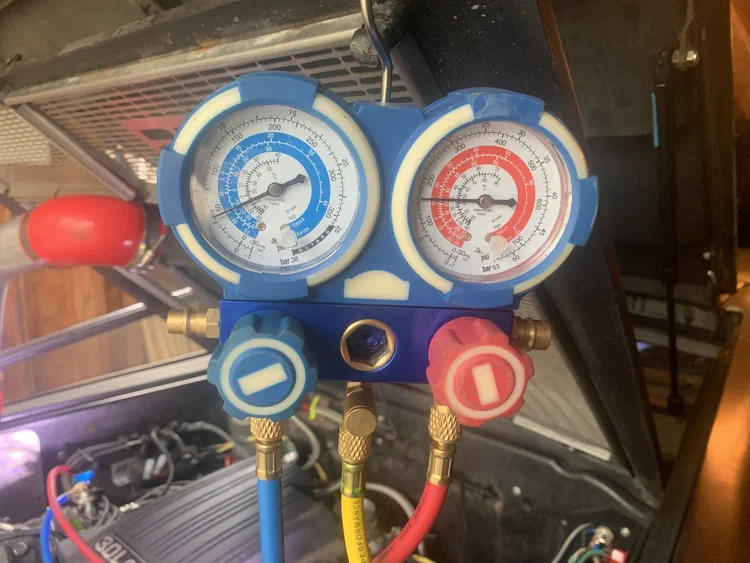
Putting in the new A/C system, fixing the problems with it, and filling it up. Finally I have cold A/C again.
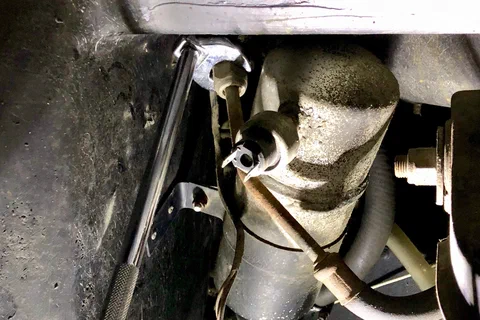
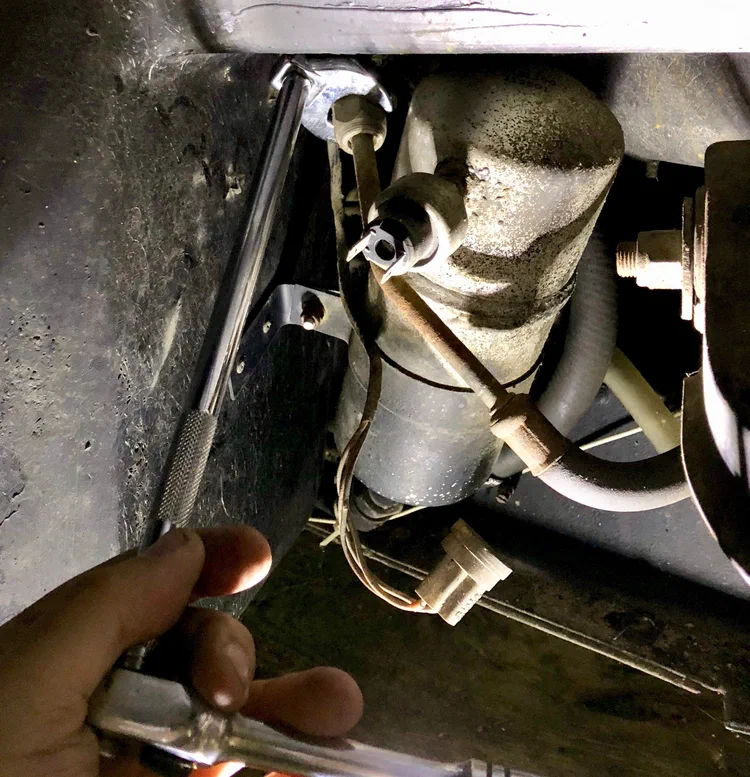
My old R12 system is very likely completely original, but after 35 years or so it developed an unknown leak, most likely at the evaporator. Since I had a new engine that required a new compressor, this seemed like a good time to replace the entire system and convert to R134a. Step one: getting the old system out.
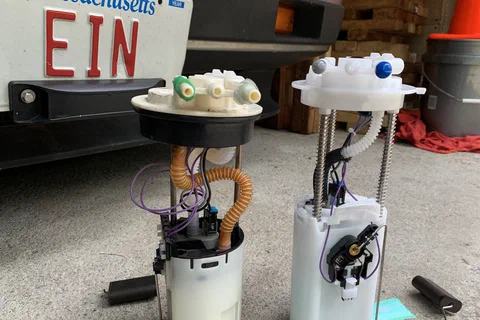
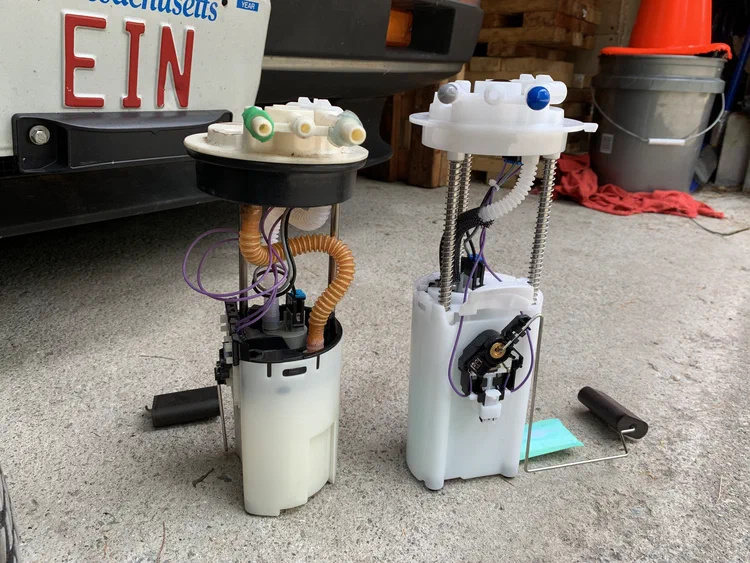
A bunch of parts all failed within about a week and a half, and all had to be fixed. I got most of them figured out, at least.
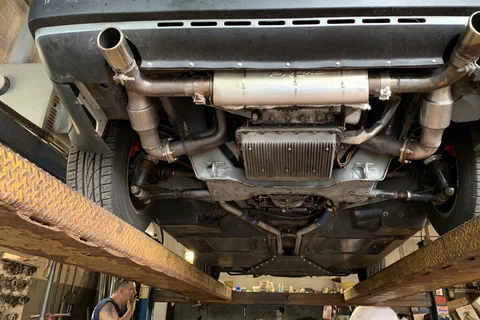
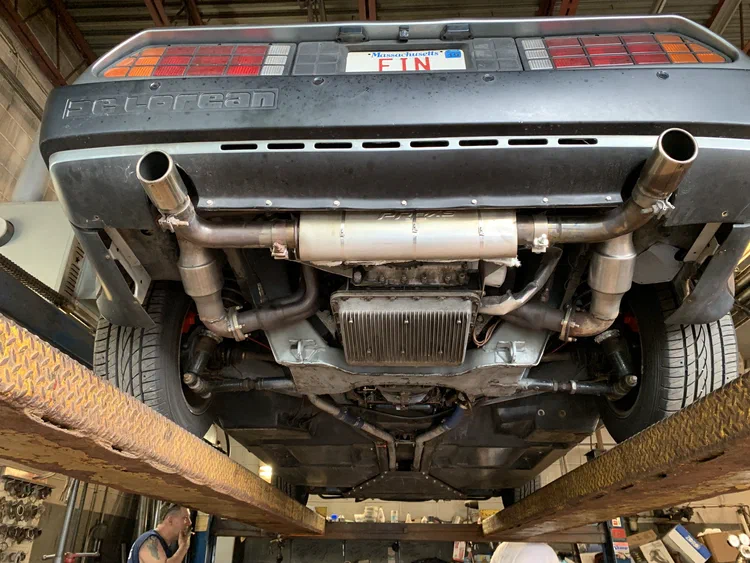
I did another once-over of the car and found a few more issues that needed to be addressed: a failed blower motor, a confused coolant temperature gauge, more exhaust noise, more tuning, and more transmission leaks.
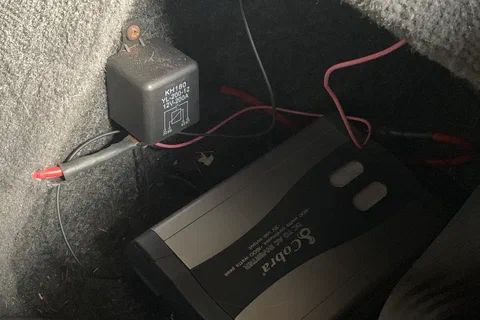
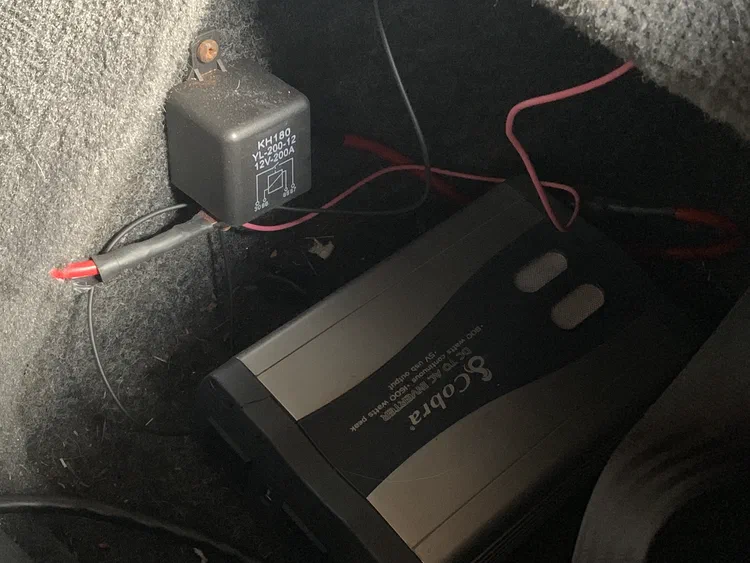
This time I had a few electrical issues to deal with, and some small updates to make.
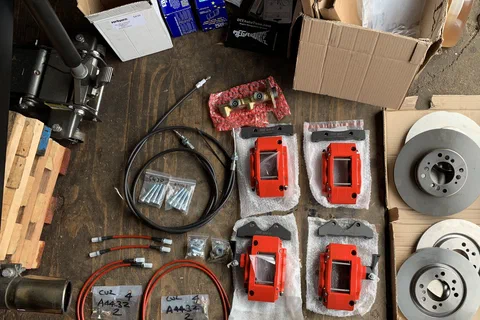
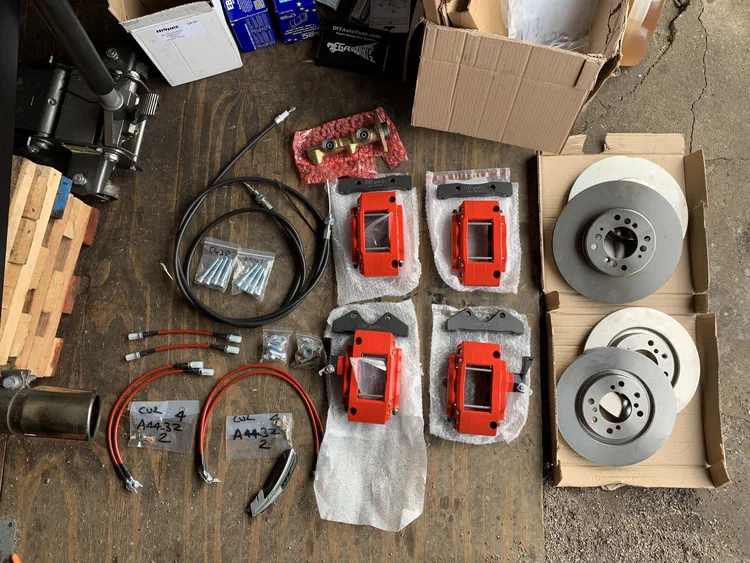
Upgrading from the stock brakes to DeLorean UK’s Big Brake System.
January – February 2019
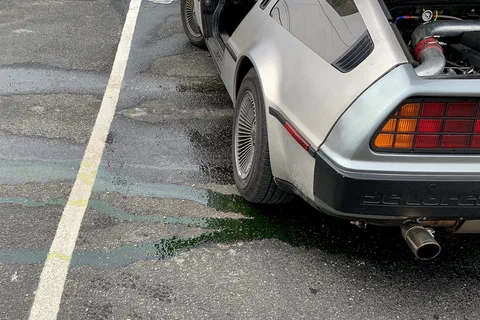
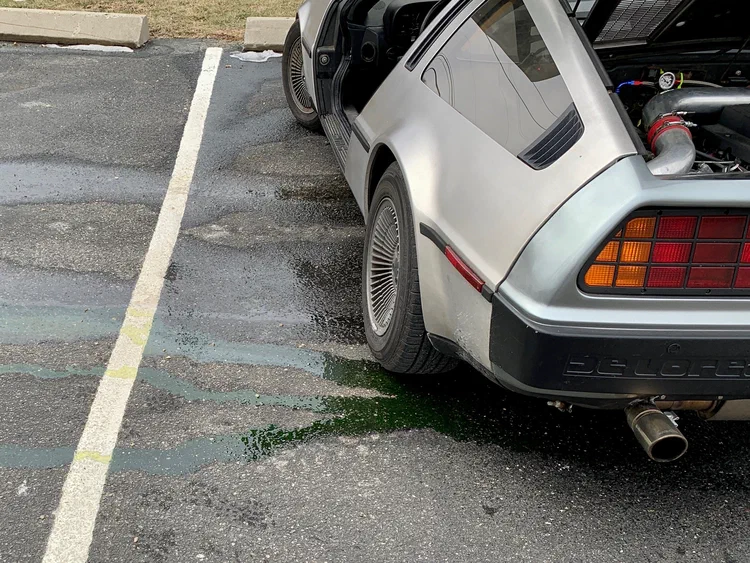
A few weeks of driving revealed a variety of small issues, and a massive coolant leak that required a tow to repair.
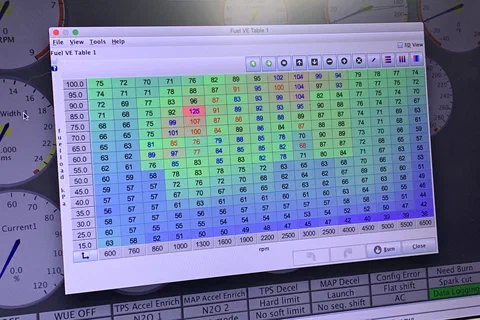
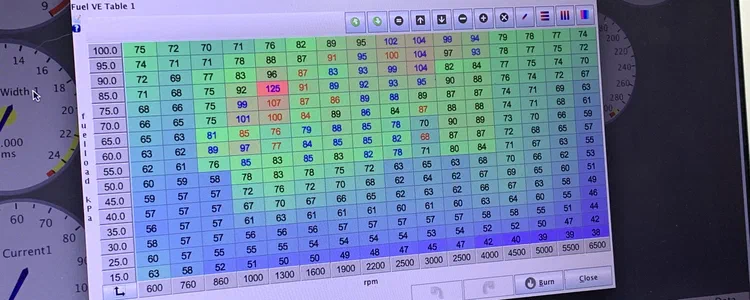
This post is the rough sequence that I used to get the car idling with TunerStudio, and then getting it driving. Something like this would have helped me a lot when I was trying to figure this out myself.
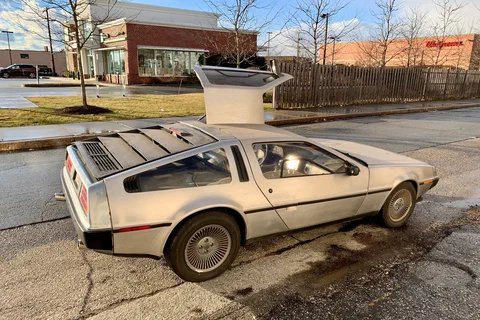
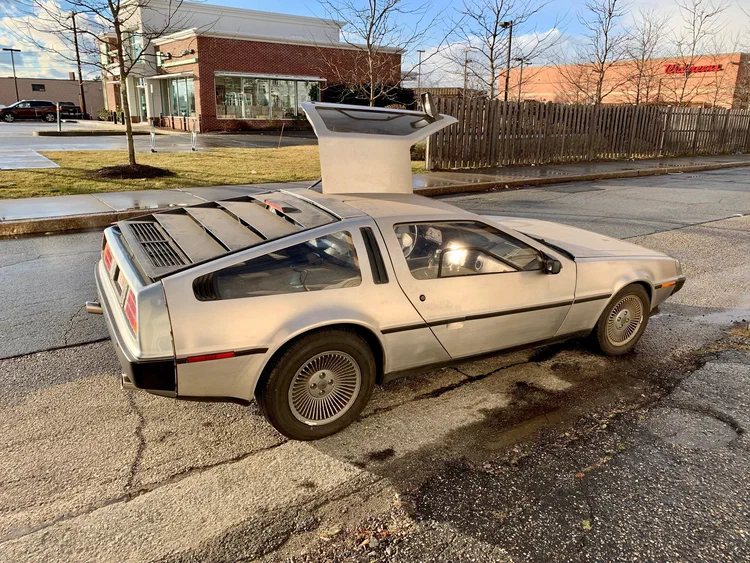
My first drive uncovered a few issues — stalling on acceleration and deceleration, excessive exhaust noise, bad brakes, TPS issues, a broken key, a squeaky belt, trouble starting in Park, a broken oil pressure gauge sender, fixing closed loop idle, replacing a leaking fuel line, fabricating a bracket for the oil dipstick tube, and running out of gas. Here I get all of those fixed, and finally bring the car home.
December 2018
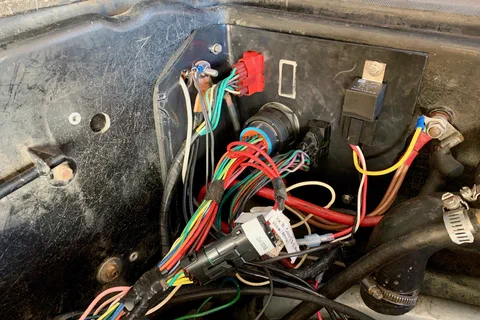
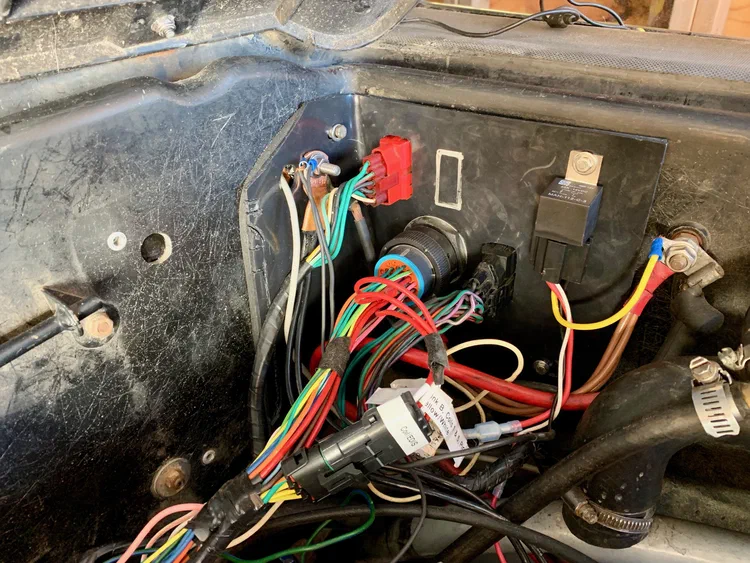
Diagnosing ignition issues led me to replacing the original bulkhead connectors used for the EFI wiring with a single, modern weatherproof one. This included building a new mounting plate with appropriately-sized holes for both the new connector and two of the original connectors.
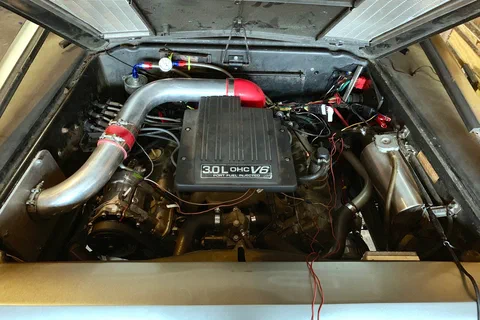
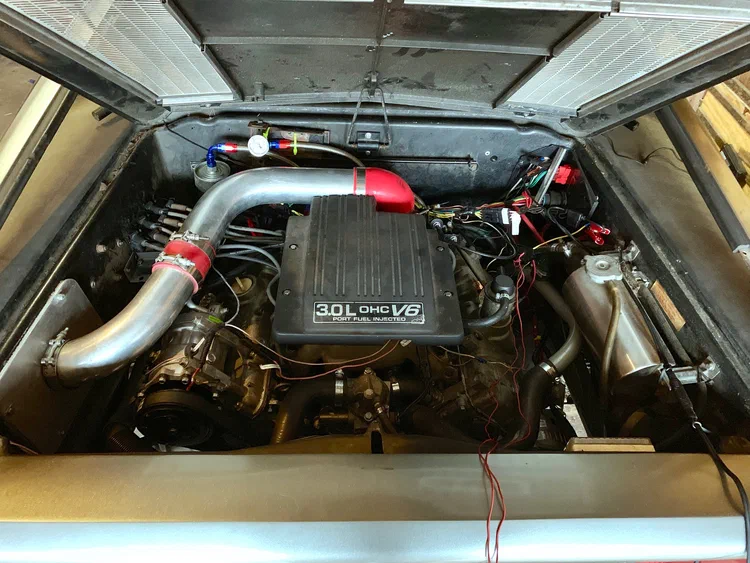
Finally, the DMC is back on the road, even if only for a short test drive around the block.
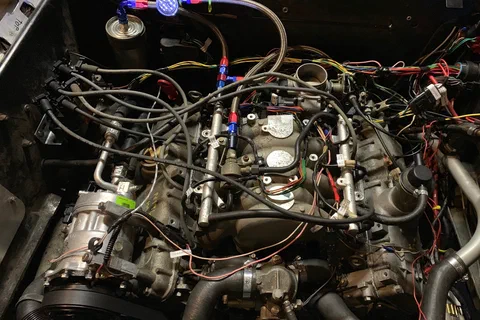
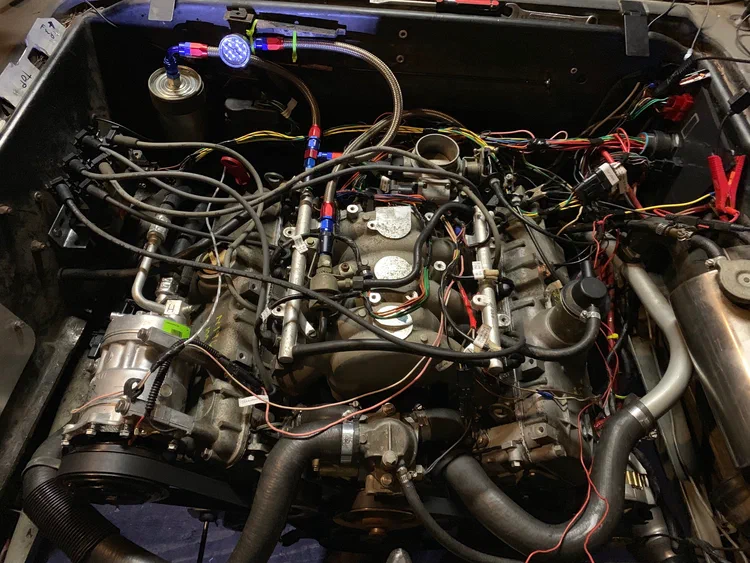
This post chronicles a series of issues and the subsequent debugging and diagnosing of ignition and tuning while getting the car to idle, but I finally got it going and ready for its first drive.
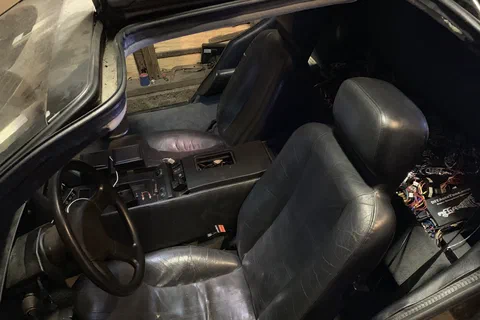
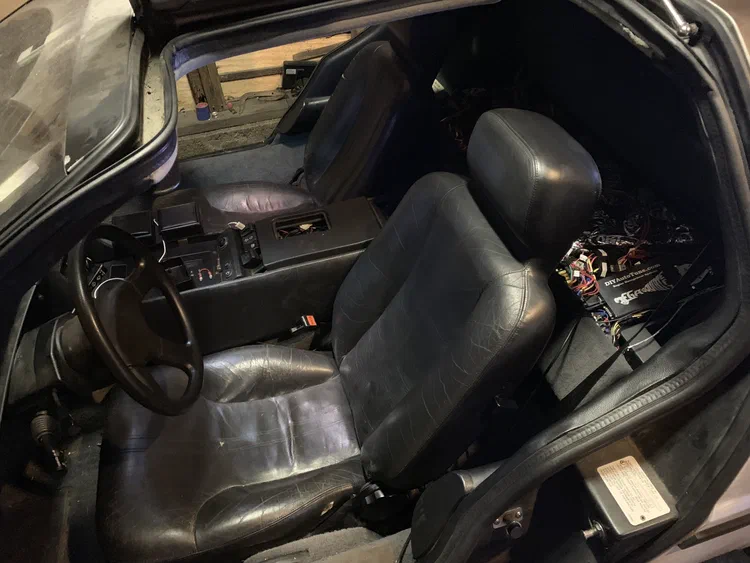
Putting back together the interior as I get ready for my first EFI test drive.
June – September 2018
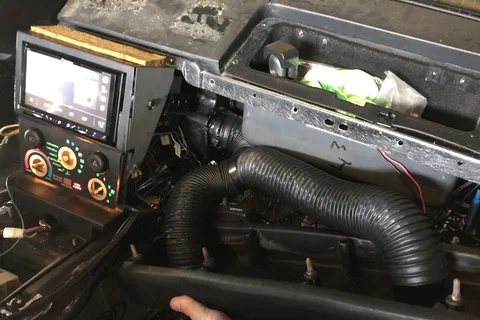
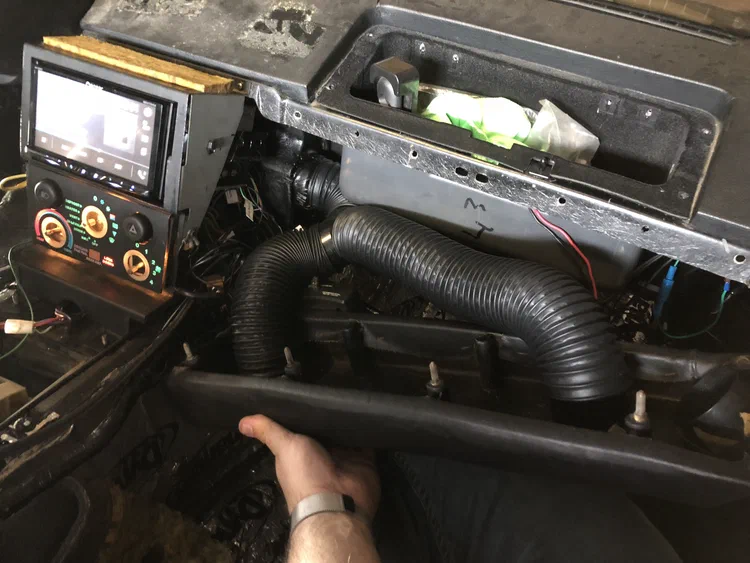
I swapped out the old radio with a new double-DIN unit with a touch screen and Apple CarPlay compatibility. This was a bit tricky, since the center air vents are where the radio needs to be. I relocated them to the knee pad and wound up needing to build a new air distributor to get the radio to fit.
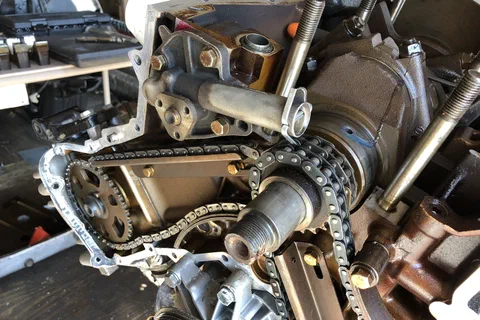
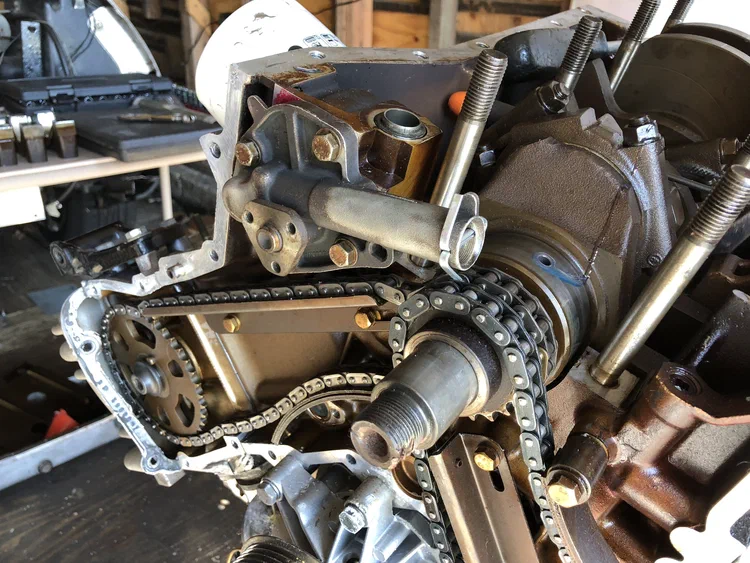
After letting the engine sit for a few days, I tried starting it and was greeted with a loud squeal and a slowly turning motor. The oil pump had failed, and the bearings needed to be replaced.
2017
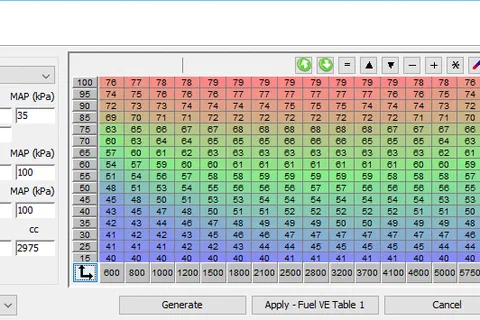
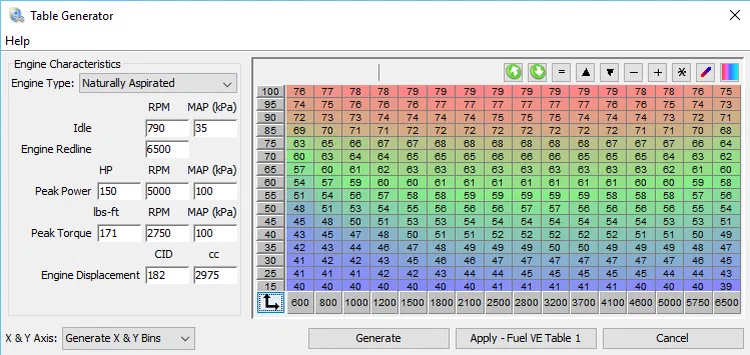
Everything is pretty much done, so it's time to set up the initial MegaSquirt tune with TunerStudio. I also had to hook up some remaining cables, add fluids, fix a coolant leak, drain some bad gas, build some brackets and do a few other bits before I could finally turn the key.
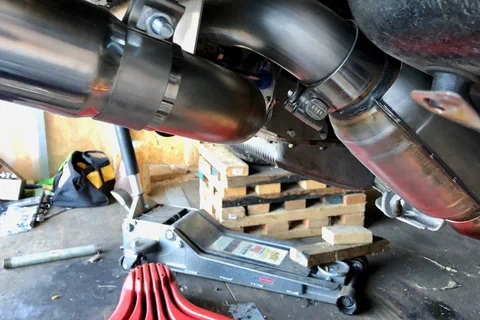
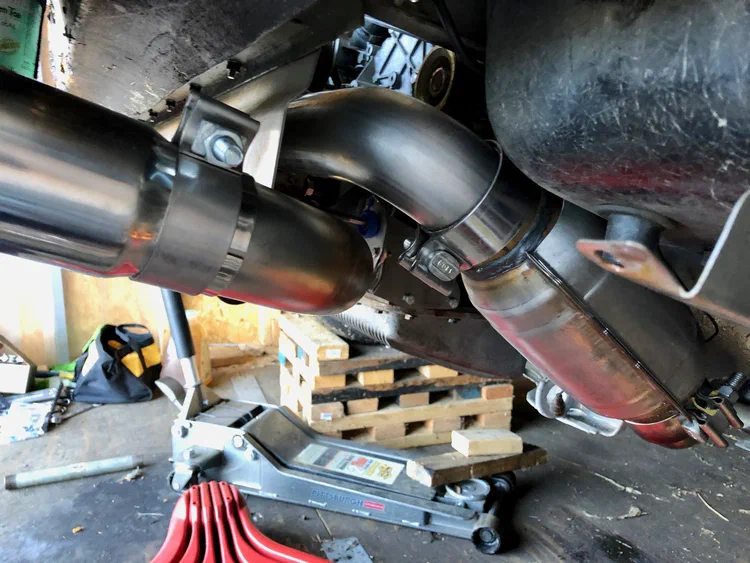
After waiting too long for a muffler, I decided to build my own using off-the-shelf parts, with minimal welding and no bending, with the end goal being to have as quiet of an exhaust as I could make... within the bounds of every aftermarket part being labeled "performance", that is. It came out pretty good, but I have yet to hear what it sounds like...
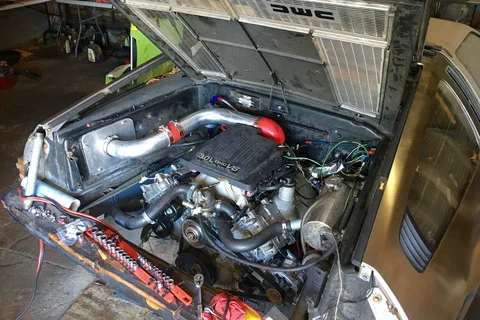
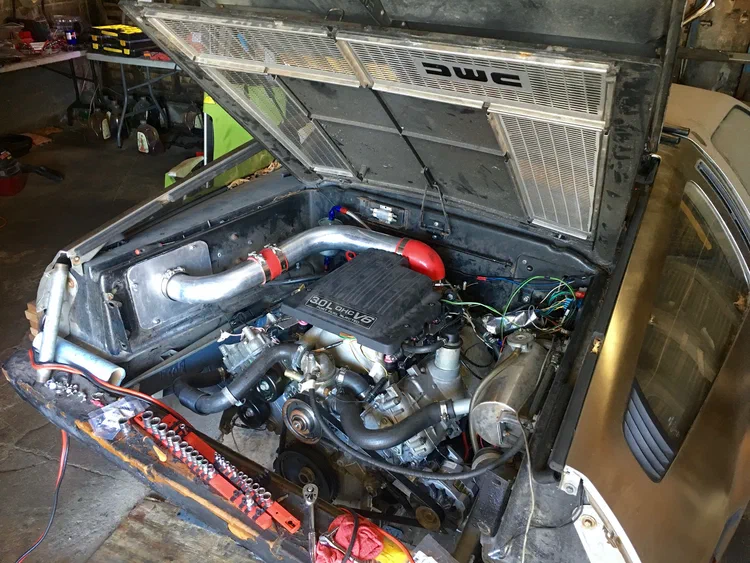
Re-installing the engine cover, louvers and rear fascia.
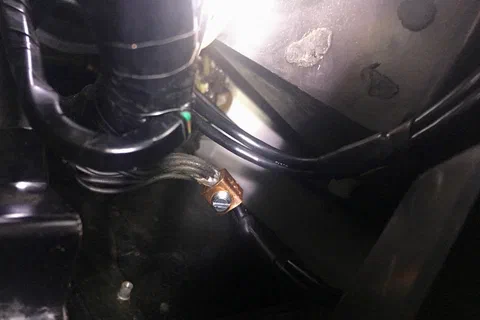
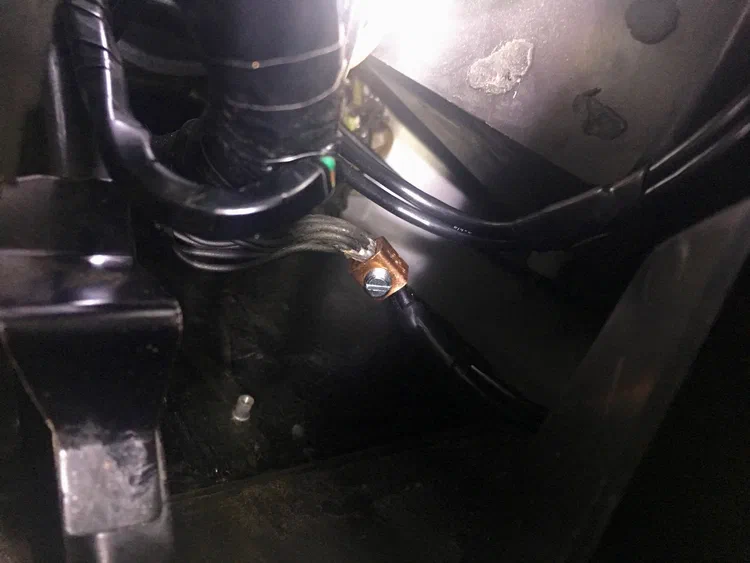
Adding a ground bus to the DeLorean's electrical system.
2016
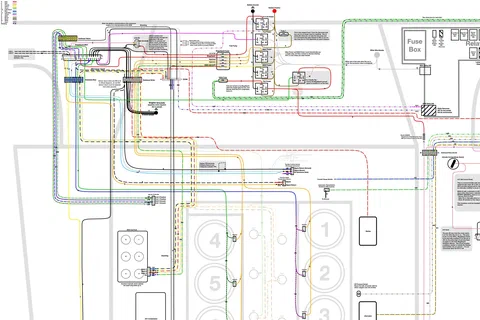
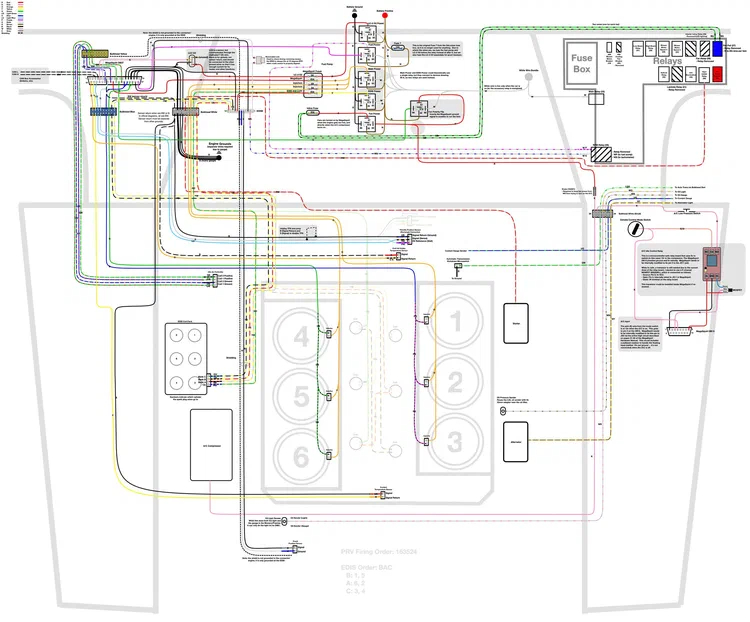
Before I could wire up Josh's harness into my car, I needed to understand it, as well as make a few modifications for the automatic transmission and my particular car's electronics. This meant creating a new wiring diagram, after which I could replace the old engine wiring with the new and move closer to getting it started.
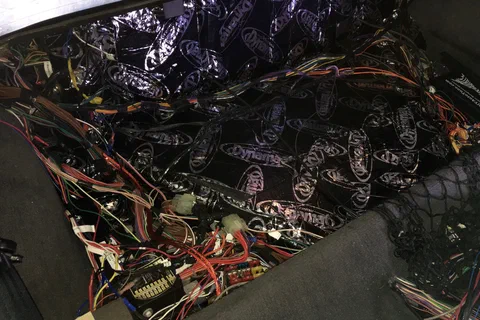
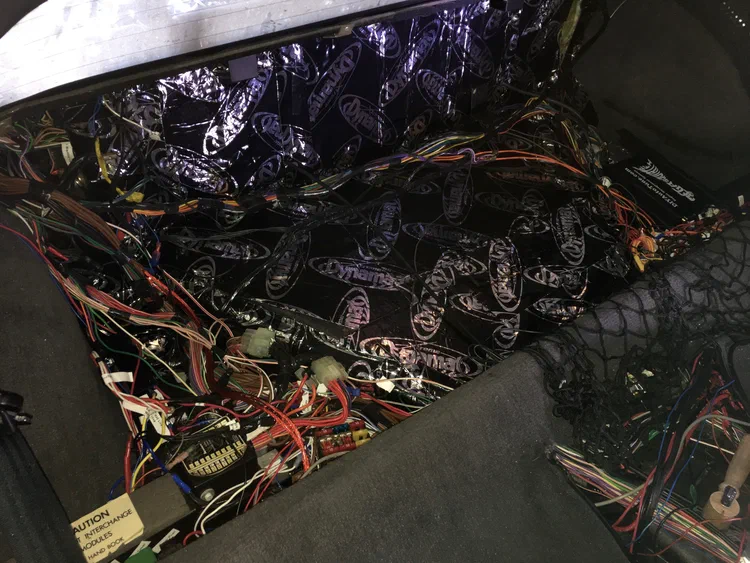
I'd installed some Dynamat before, but only in easily-accessible areas. With the electronics trays behind the seats removed for the EFI conversion, I had the opportunity to install Dynamat there as well.
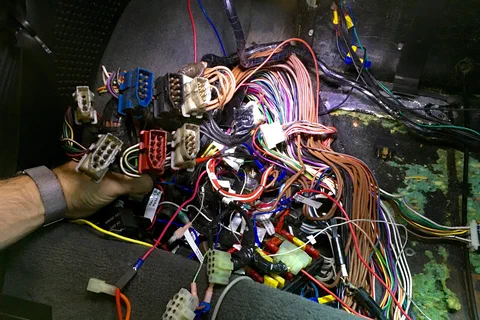
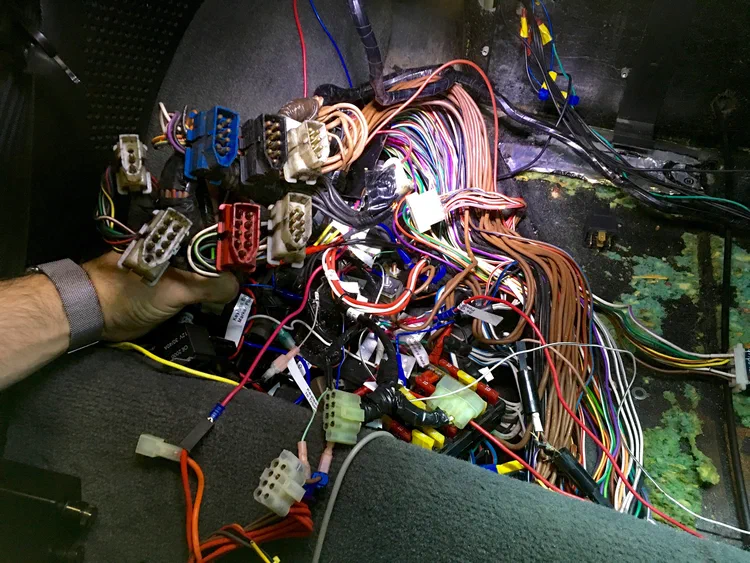
Now on to the electrical modifications. The spark plugs go in pretty easy, and the coil-on-plug system fits just like the spark plug boots normally would. Before I could go any further than that, I would have to remove the old engine ECUs and related wiring to get ready for the MegaSquirt installation.
September – November 2015
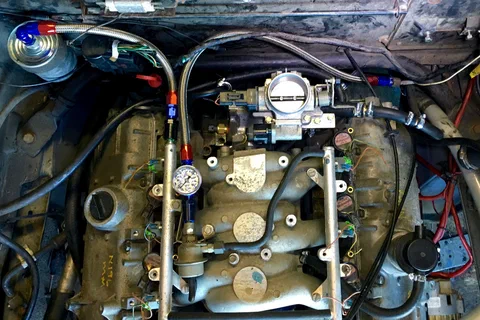
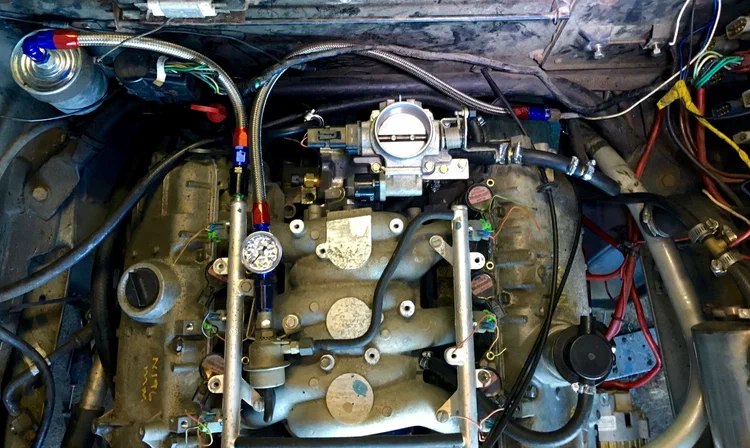
Vacuum routing on the 3.0L engine is simpler than on the 2.8L engine. In part this is because I removed the charcoal canister, so I no longer have a vapor recovery system (although I may add one later). I needed to hook up four things: the climate control vacuum reservoir, the automatic transmission vacuum modulator, the brake booster, and the MegaSquirt MAP sensor.
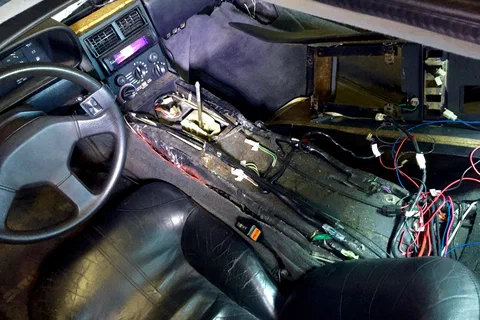
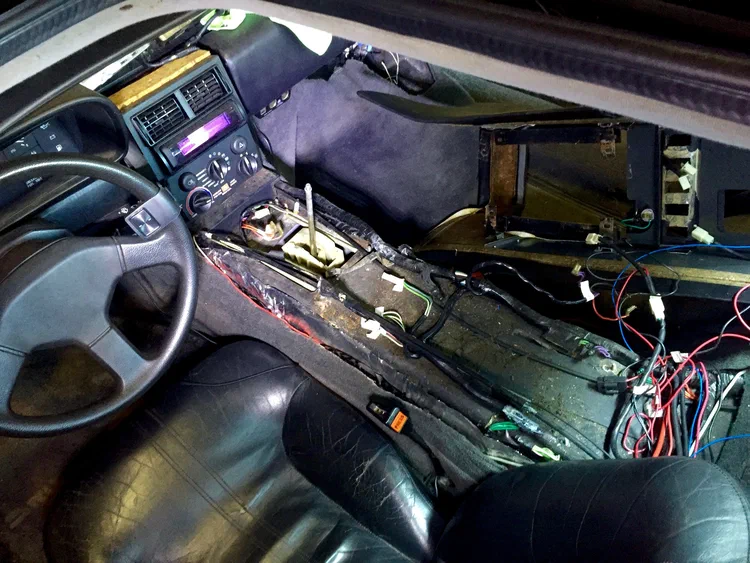
In order to pull the old ECU wiring, I needed to get under the center armrest. This isn't particularly hard; it's mostly an issue of finding all the bolts, disconnecting all the wires, and making sure to move the harnesses away from the sides of the armrest before lifting it out.
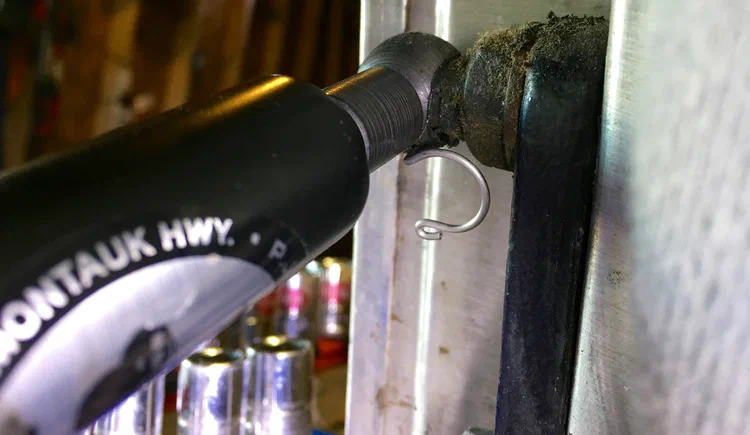
The door struts are really easy to replace, but I spent a surprising amount of time trying to get the clip into the bottom of the strut until I finally rotated it to point away from the car. After that the top end went on pretty easy. If not for that bit of trouble, this would have taken just a few minutes.
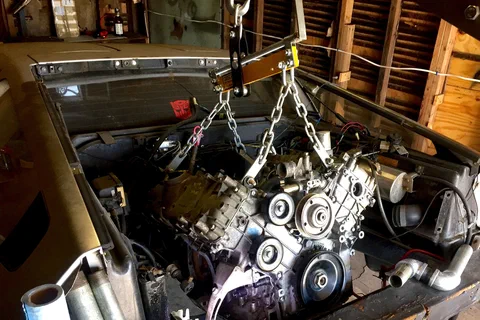
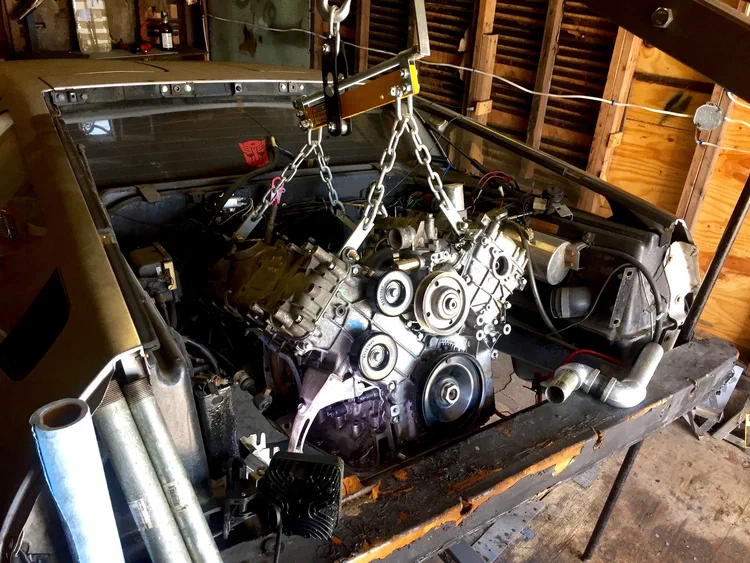
With the bottom of the engine swapped out and the top of the engine cleaned up, it now had to go into the car. Overall this wasn't too complex, beyond the trick of getting the transmission aligned with its mounts. It went pretty smoothly all told.
July 2015
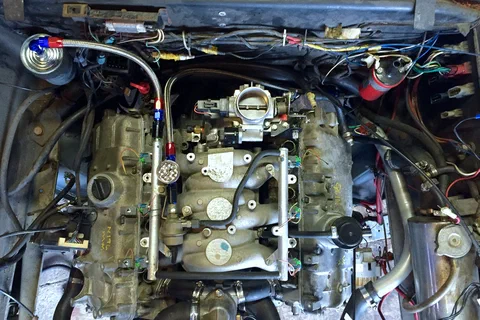
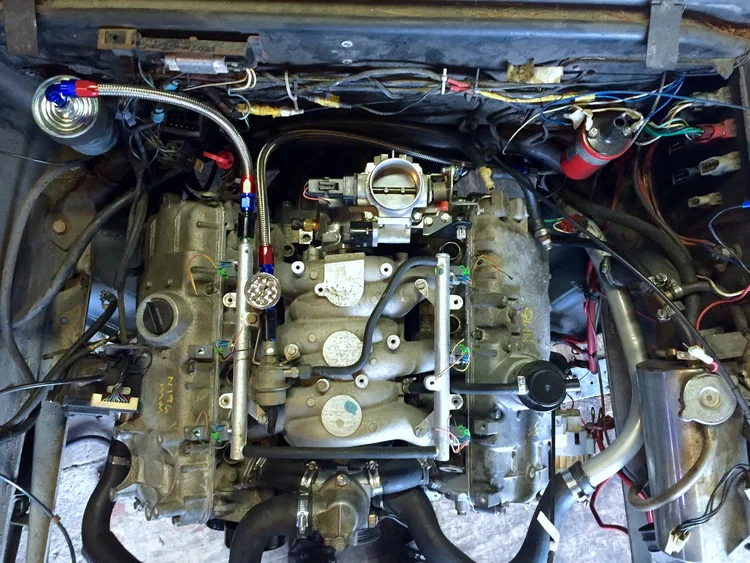
The fuel system was fairly easy to install. After relocating the fuel filter to the engine bay, I put the new fuel injectors into the fuel rails and mounted them back on the intake manifold, and installed that back on the engine. I built two new stainless fuel lines with AN-6 connectors to run from the rails to the existing hardlines in the car.
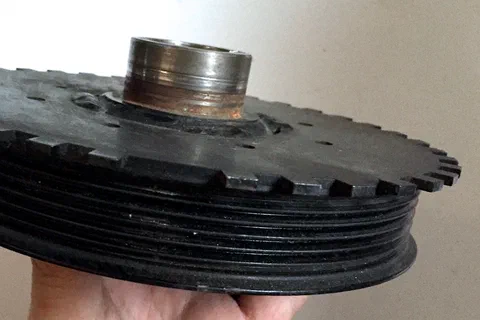
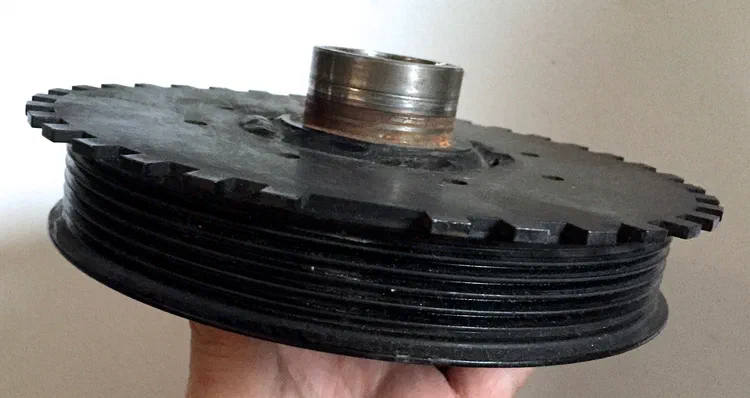
Right about the time I needed to figure out all the EFI hardware, Josh on DMCTalk.org just happened to be upgrading his 3.0L engine to an even larger one, and put all of his 3.0L conversion hardware up for sale. I bought everything that would aid in getting my 3.0L engine up and running.
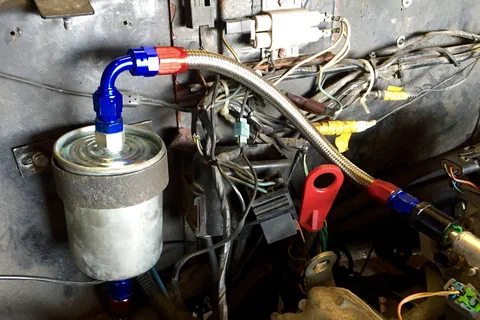
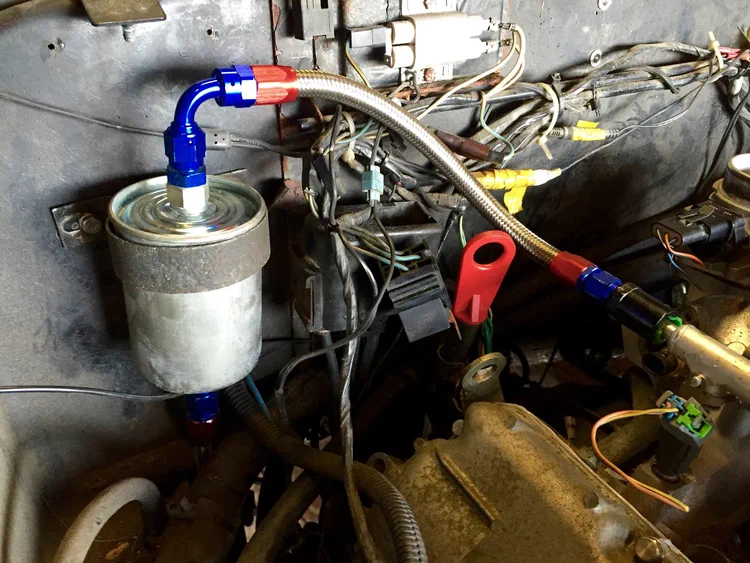
In its stock location, the DeLorean's fuel filter is not the easiest thing to get to, especially when rusted hardware is involved. I decided to relocate mine to the engine bay to make it easier to access, building new AN-style fuel hoses that would easily interface with my in-progress 3.0L EFI system. This also introduced me to rivnuts, a tool that makes it easy to add blind bolt holes.
May – June 2015
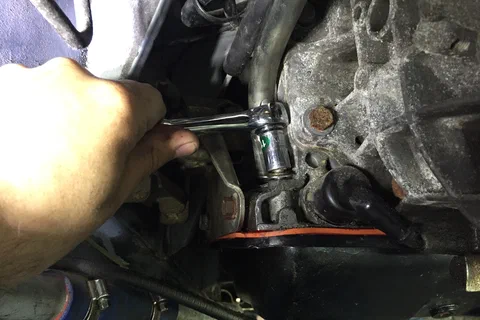
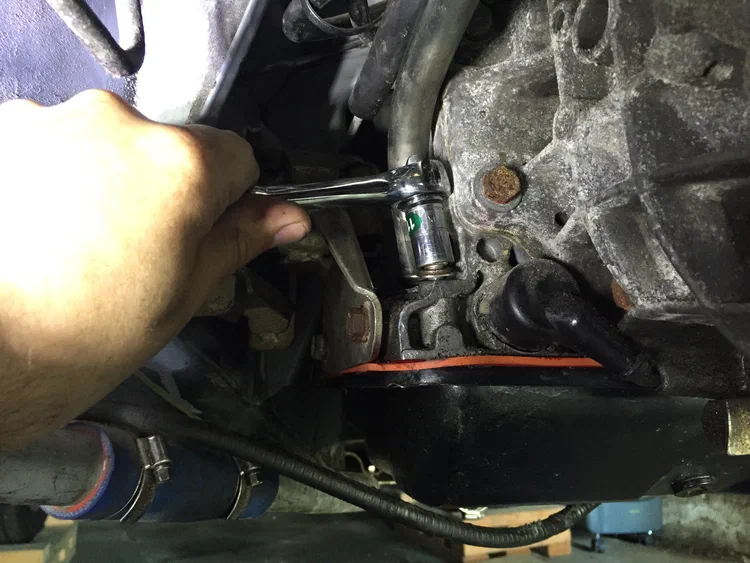
I snapped off my automatic transmission's dipstick tube when reinstalling the engine and transmission into the car. Replacing it isn't too bad, and only requires a couple of bolts once you've raised the car and drained the transmission. Well, except for the fact that I stripped the bolt hole that holds the tube to the transmission thus requiring that I repair it first.
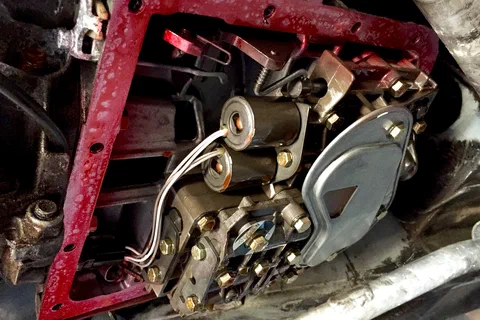
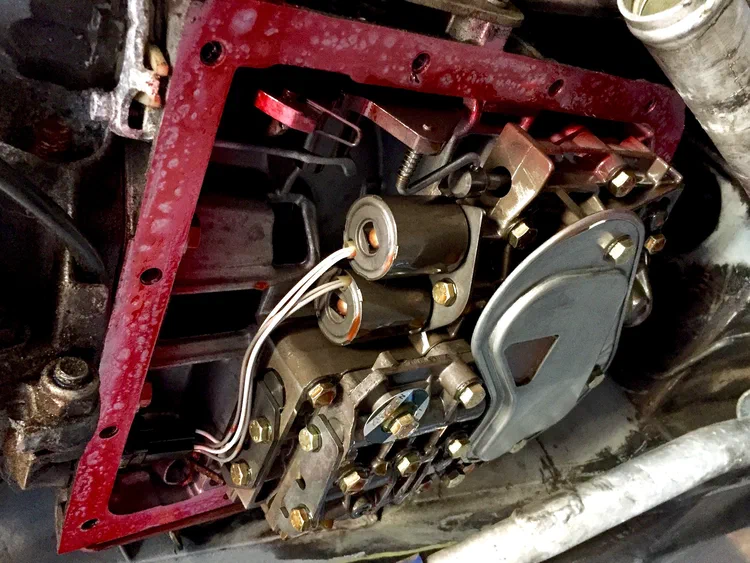
My automatic transmission always seems to leak, so I decided that while I was reinstalling the engine and transmission in the car that it would be a good time to replace the old-style cork gasket with a new silicone one from DeLorean Performance Industries.
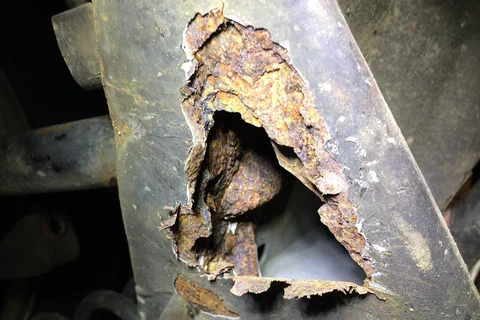
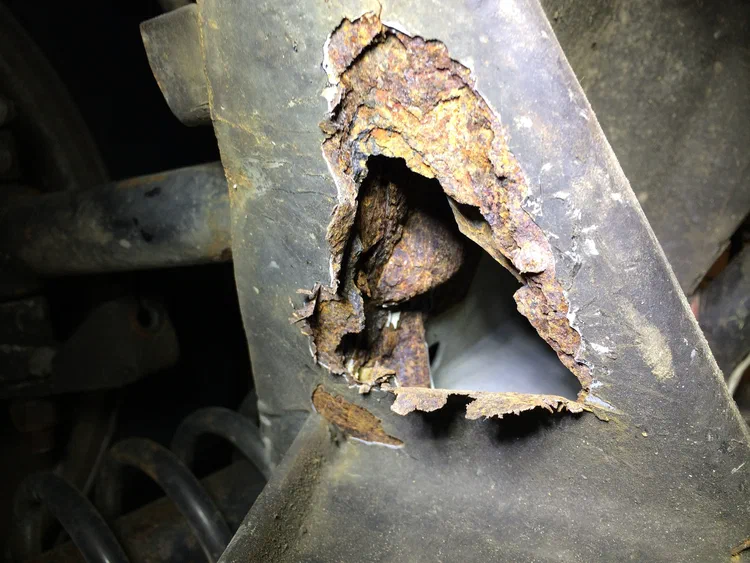
While removing my engine, I noticed some surface rust. I soon found that a few points weren't just surface rust -- chipping away revealed a large hole on each side of the frame under the lower link arms. There was also rust inside some of the frame members, but the holes were what really concerned me. That meant welding clean metal over them, treating the metal, painting with POR-15, priming, and finally painting with a final coat of grey.
November 2014
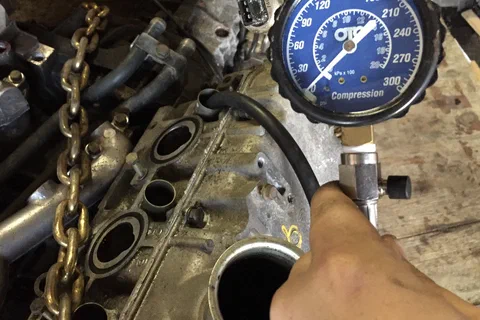
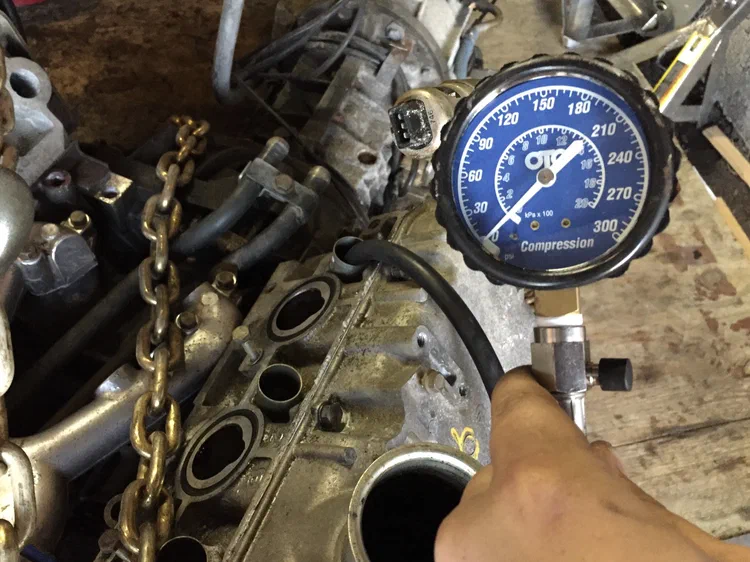
I didn't want to take the engine back out of the car once I got it in there, so before I went any further I decided to make sure the engine compression was good. This meant mating the engine and transmission so that I could use the starter to turn the engine, and learning how to use my previously-purchased but never before needed compression test kit.
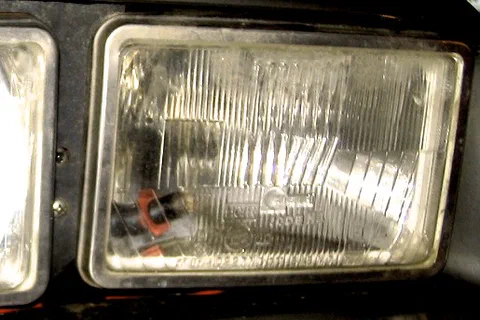
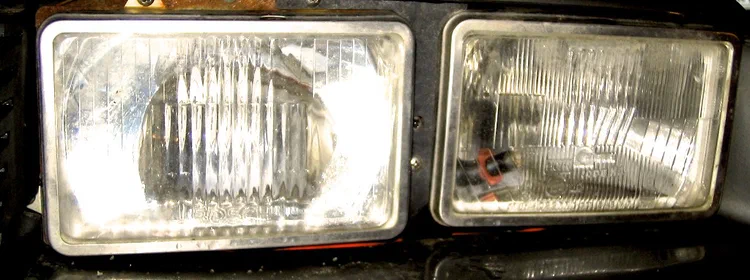
I kept forgetting to turn off my headlights when I left the DeLorean. While there is a factory buzzer to let you know this (and that your seatbelt isn't on), it's so annoying that most owners disconnect it as my car's previous owner had -- I've never even heard it myself. I decided that a better solution was to modify the headlight switch wiring to work more like many modern cars, and have them switch with the ignition. This mod is rather simple, requiring only that you add a new relay to the center console.
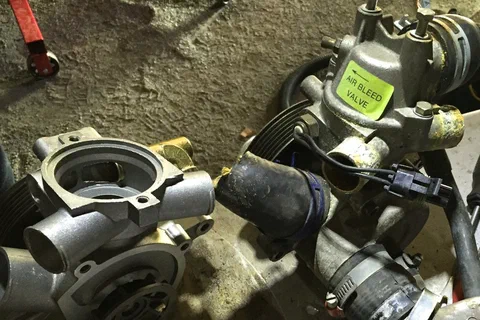
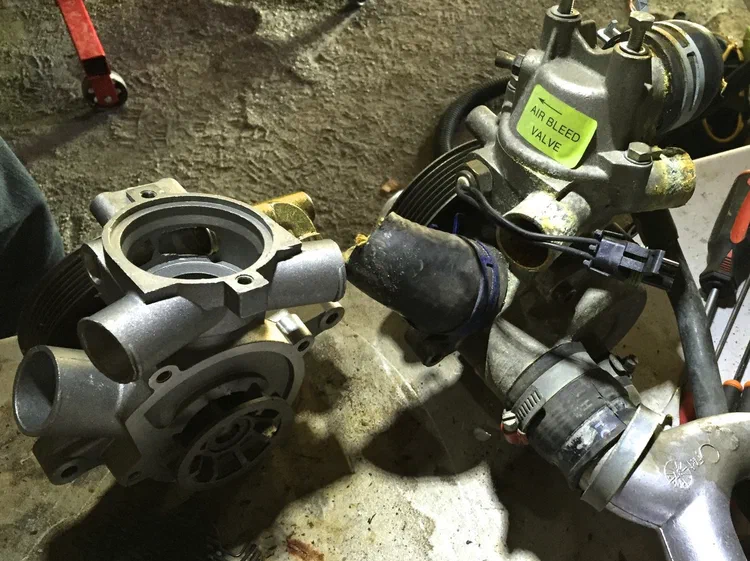
Given the oil/coolant mix I was dealing with earlier, plus the age of the engine in general, I decided to swap out the water pump. I didn't realize just how little of the water pump is the pump itself -- the thermostat housing and back of pump need to be swapped with those from the 3.0L. Of course I stripped some of the bolts trying to remove the old hardware, but I eventually got everything assembled onto the new pump.
October 2014
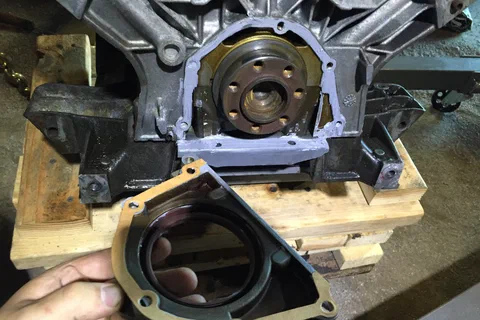
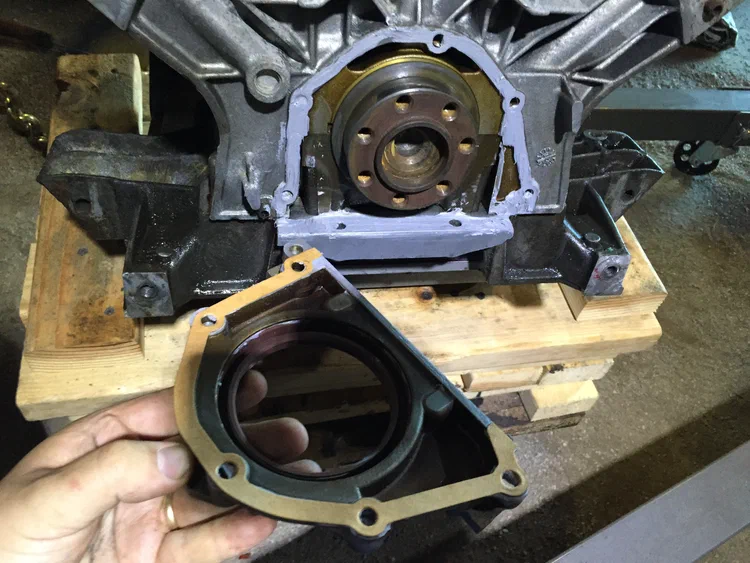
The rear main seal keeps all the oil from leaking out the back of the engine around the crankshaft. It's very hard to get to unless you already have the engine out of the car, and even then an engine stand can be in the way. Overall, I found the process easier than I had feared, with the most trouble being taking the engine off the stand so I could get access to it.
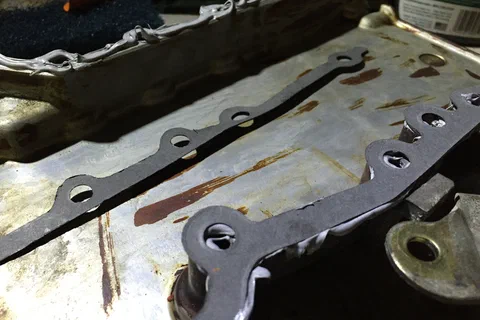
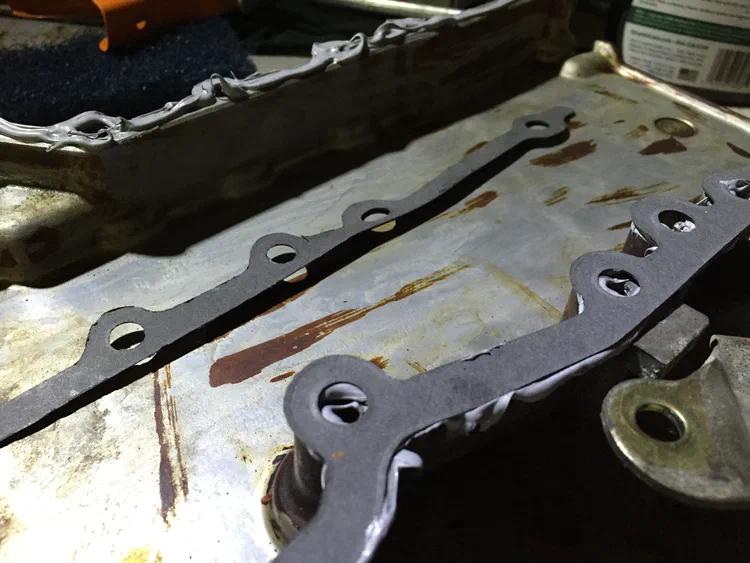
Installing the timing and valve covers is fairly straightforward. I wound up ruining my front main seal while trying to tap it in just a bit further, and had to replace it as well. The gaskets went on without much trouble with some Right Stuff, and I was able to reuse a lot of my stainless steel hardware from the 2.8L engine on the 3.0L covers. I also replaced the oil filter cap, but I still need to find an oil vapor separator to replace the one I broke when transporting the engine.
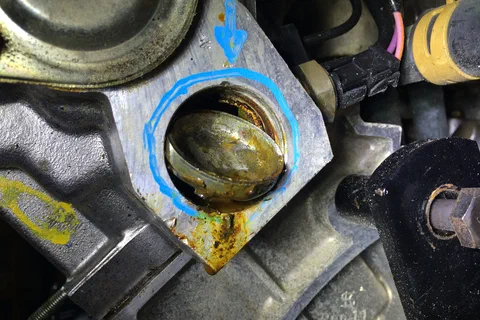
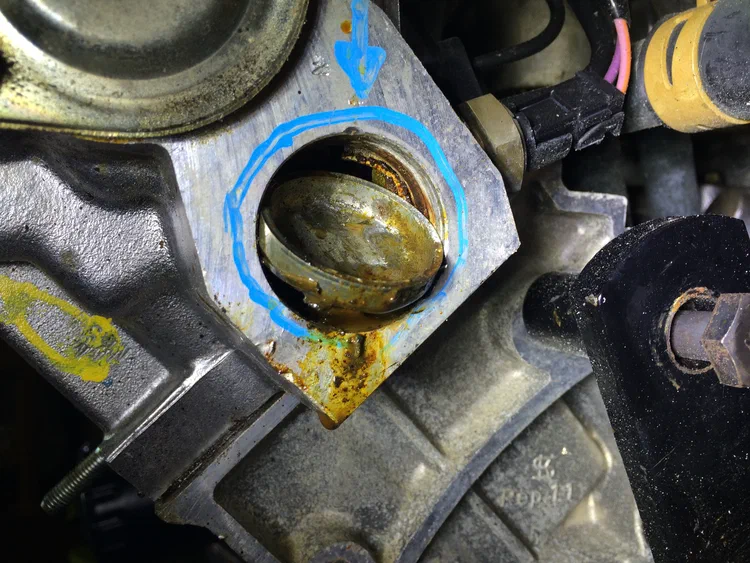
My 3.0L engine had a bad core plug on the back of the right hand head that needed to be replaced. They forgot to mention this when they sold it to me, but they were good enough to mark it on the tag and circle the bad plug itself in blue marker. I wound up having to tilt the plug out by hitting it with a punch and a four pound hammer to get enough force. Finding a new plug wound up being the tricky bit.
September 2014
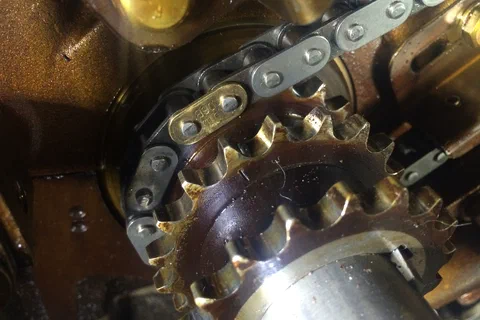
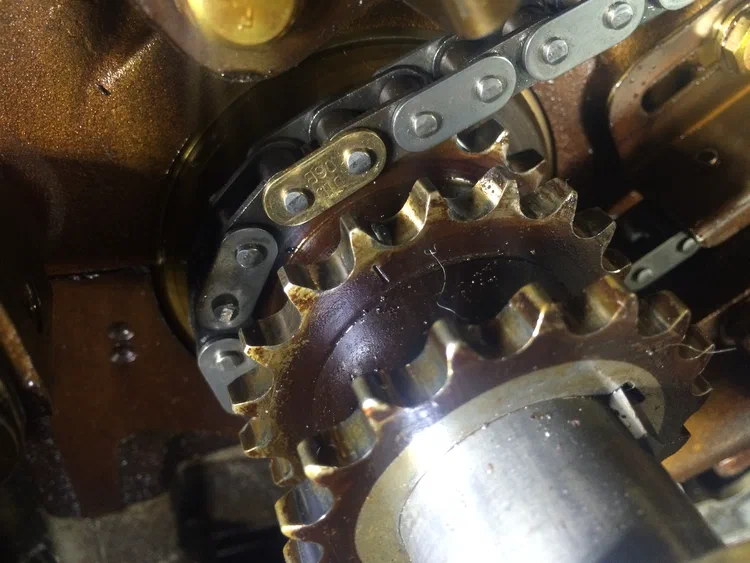
Flipping the engine over repeatedly caused the timing chains to slip off of the crank, so I finally had to bite the bullet and retime the engine. This was actually pretty simple, and I replaced the chains and tensioners while I was at it, although I also wound up replacing the oil pump in the process when I broke a bolt over-tightening its sprocket.
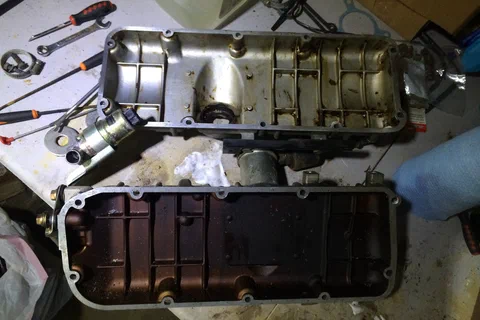
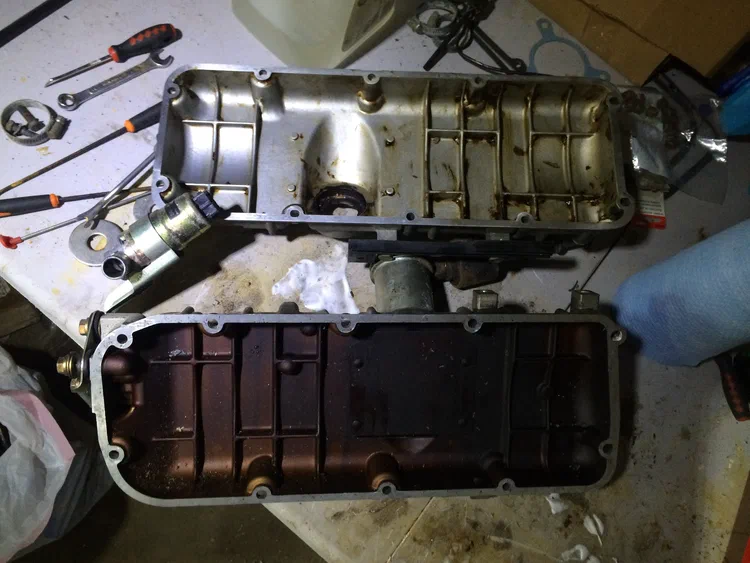
The gaskets on the valve covers need to be cleaned off before they can be reinstalled. One of them came off easily, but the other broke apart and needed to be tediously removed. This time I tried Permatex Gasket Remover on the remnants, which worked much better than I'd expected. It was also able to clean the blackened inside of the valve covers back to their original aluminum surfaces.
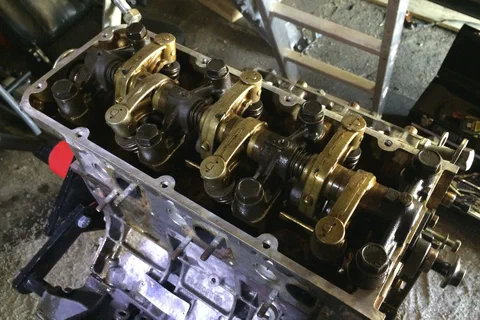
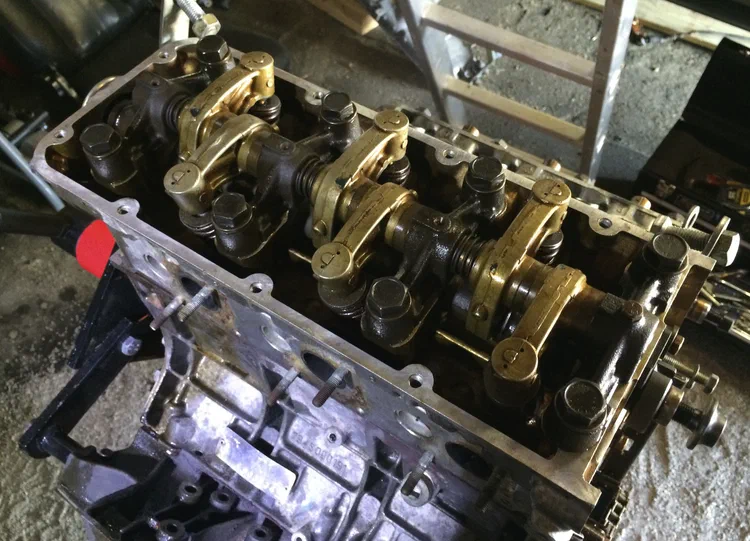
Mounting the cylinder heads requires that they first be clean and straight. A tap is used to re-cut and clean the threads for the head bolts before the gasket is placed and the heads and rocker arms are applied. With the 3.0L engine, you also have to be careful not to lose any of the tappets in the end of the rocker arm fingers. Then you just need to torque down the bolts, and you're all set.
August 2014
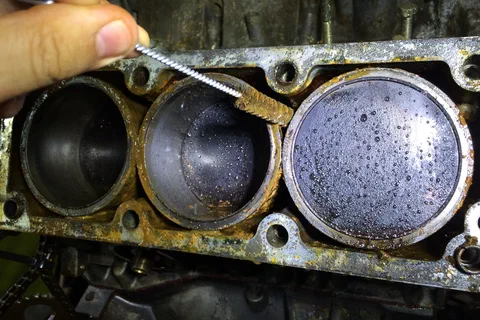
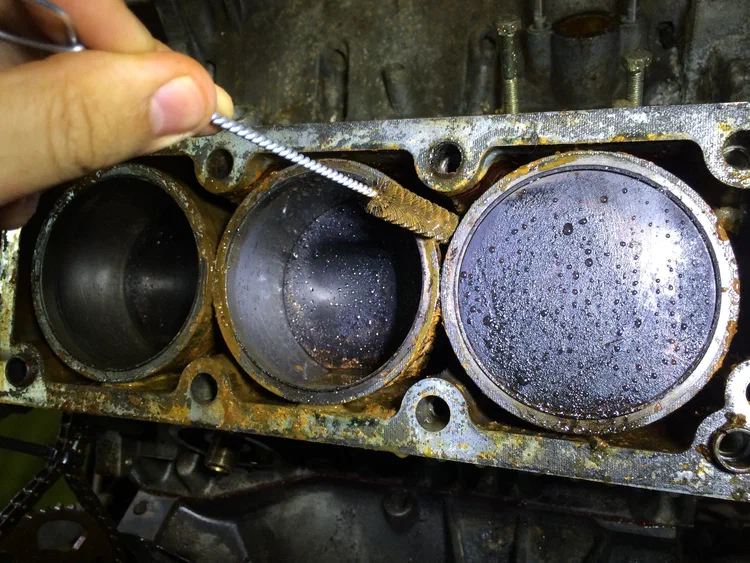
With the lower crankcase re-assembled, I flipped the engine over and removed the intake manifold to find oil in the coolant passages. I had assumed the engine had been drained before it was shipped to me, but it seems this was not the case -- flipping the engine had caused the oil and coolant to mix into a gunk that filled the coolant jacket. I had to remove the heads and thoroughly clean them before I could move forward with putting the engine back in the car.
July 2014
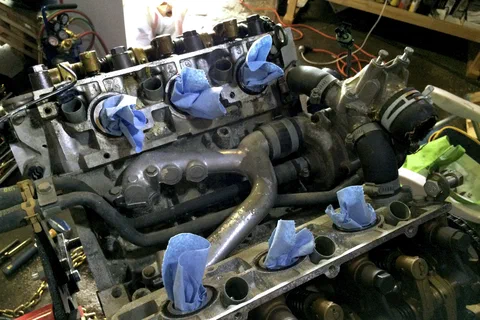
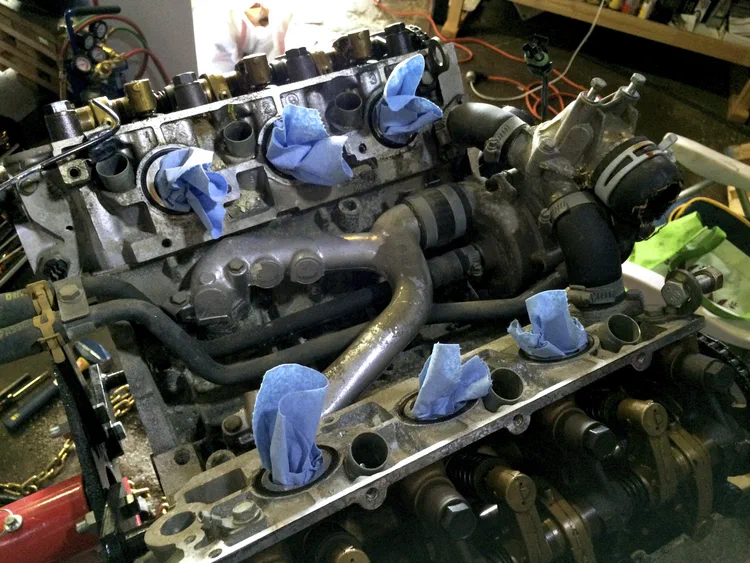
Now that my 3.0L engine was right side up again, I thought this was a good time to take apart the top and see what was under there. I removed the fuel rails and harness, intake manifold, water pump and "Y" pipe to expose the valley.
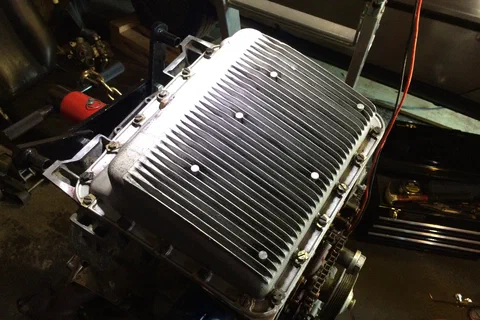
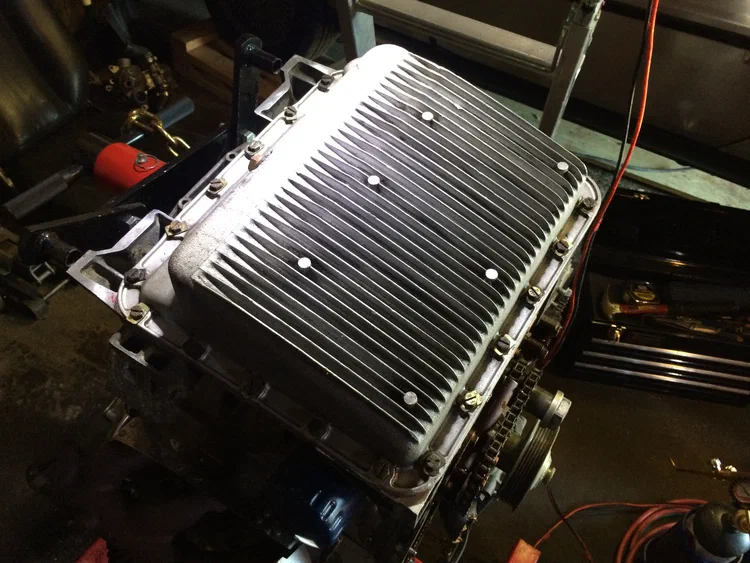
With my newly-arrived gasket kit, I was ready to install the 2.8L lower crankcase onto the 3.0L engine, followed by the oil baffle, oil inlet assembly and oil pan. Besides some trouble flipping over the engine and forgetting to install the baffle and inlet before putting on the pan, this went off without a hitch.
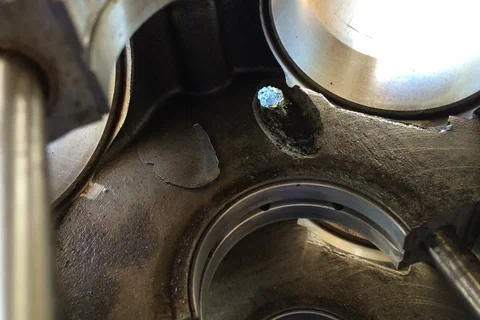
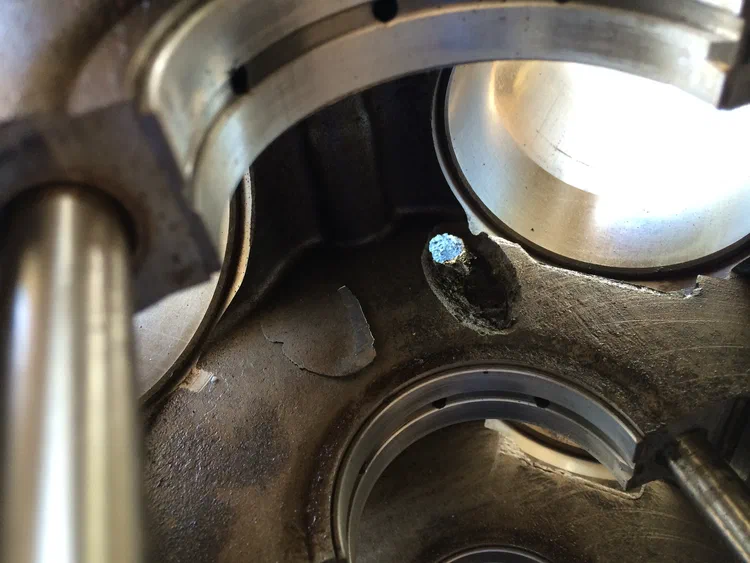
Now that I'm well on the way to replacing the 2.8L engine with a 3.0L engine and have stripped the old block to sell any usable parts on eBay, I decided to take a look at the hole that started this whole process. It was pretty easy to see with the pistons out of the way, and the adjacent wall was clearly beginning to fail as well.
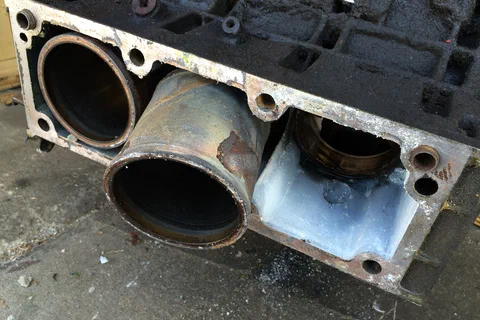
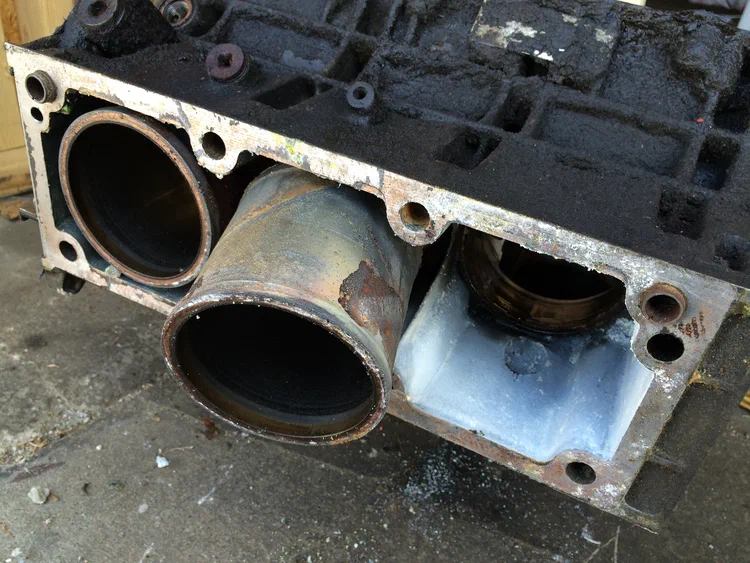
I pulled the crank, pistons and liners from the old 2.8L engine to sell on eBay. I also did this wrong -- you're supposed to remove the pistons and liners as a single unit. I removed the pistons first, and later removed the liners. This would have been alright if I'd actually labeled which liners go with which pistons, but I didn't. I also had a bit of trouble getting the main pulley nut off the crank once it was no longer in the block.
March – June 2014
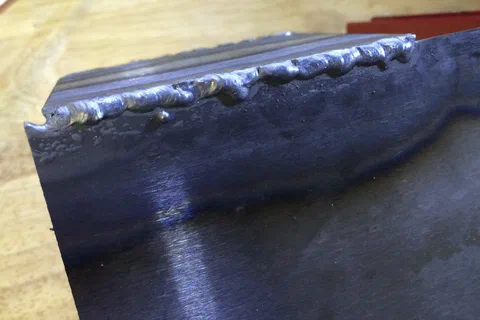
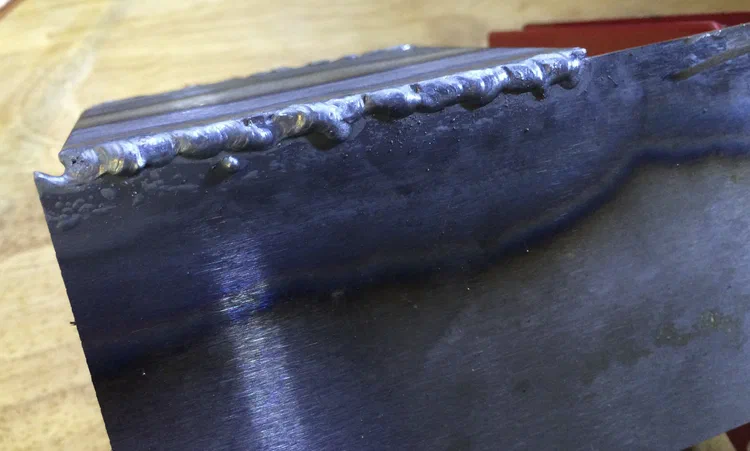
After discovering two holes in my frame and the difficulty in finding anyone to weld it, I decided to learn oxyacetylene welding myself. I did the research, bought as much safety gear as I could, found an oxyacetylene kit and a gas supplier and went to work. My welds are pretty poor so far, but I'll keep practicing until I'm confident that I won't ruin my frame by patching it.
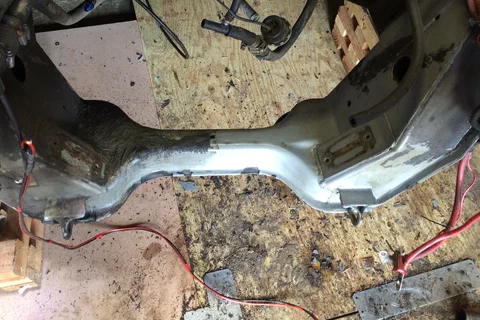
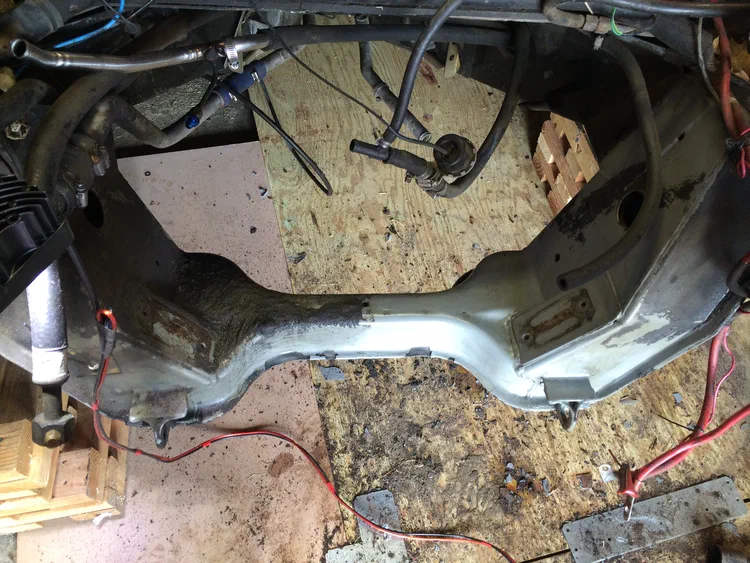
An oil leak led to my frame being very, very dirty, with a thick coat of oil covering most of the surfaces. It wasn't too hard to clean off; just some plastic scrapers and household cleaner got it back to looking new -- or at least not like the mess it was before.
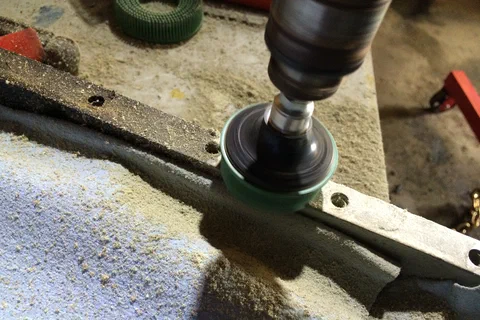
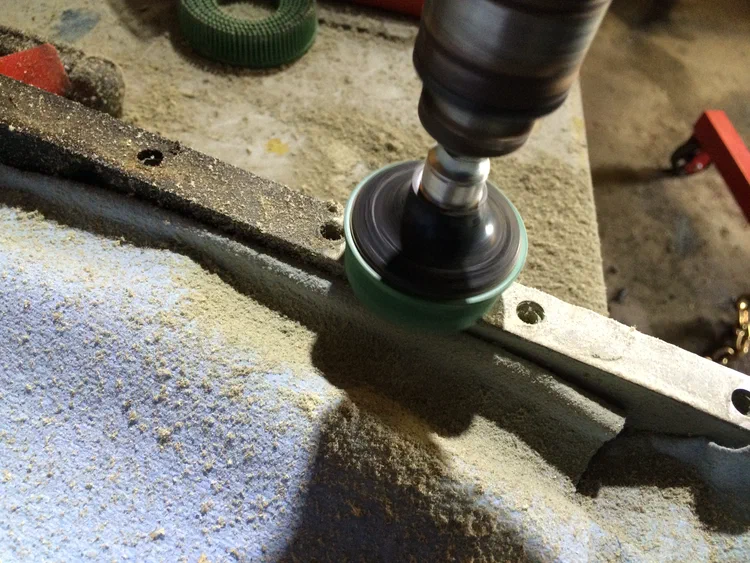
Before I could install the 2.8L lower crankcase on the 3.0L engine block, I needed to clean up the mating surfaces. The oil pan gasket was my main concern -- it was firmly bonded to the lower crankcase, and trying to scrape it off with a composite scraper was very slow going. I switched over to bristle discs, which quickly removed the gasket material and left me with clean, slightly grained aluminum -- and a lot of gasket dust.
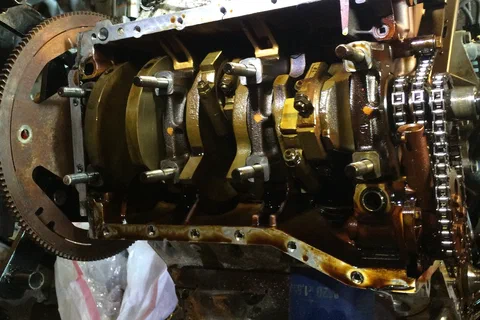
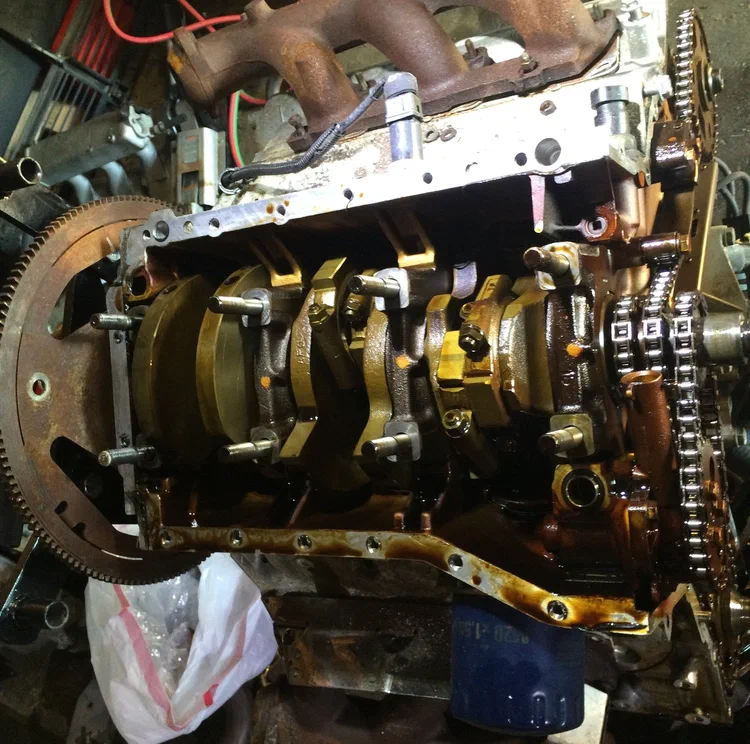
Removing the lower crankcase from the 3.0L is pretty much identical to that of the 2.8L engine. I still managed to spill a lot of oil, but didn't have any real problems otherwise.
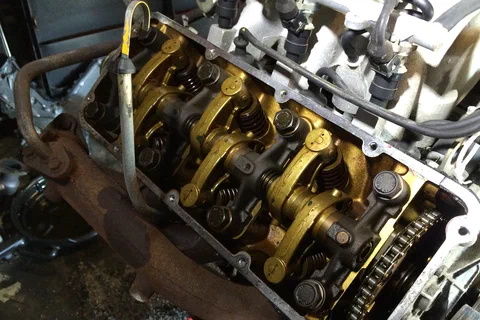
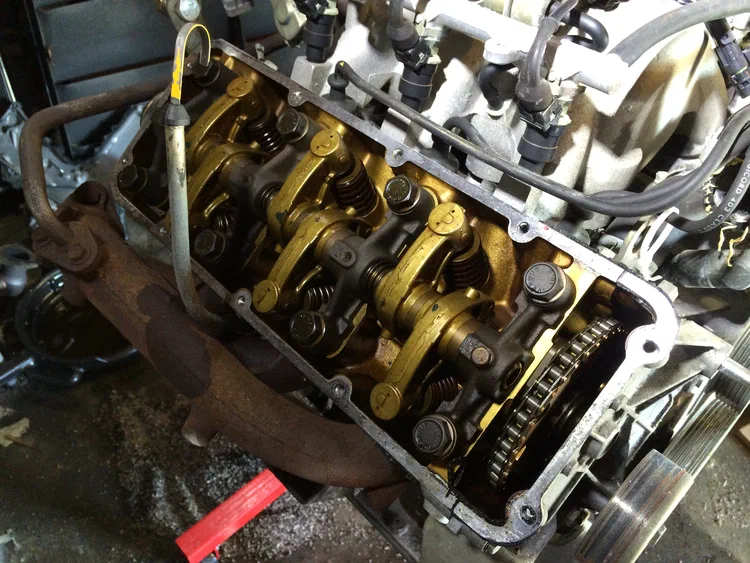
The 3.0L engine's valve and timing covers come apart much the same as those of the 2.8L engine. There are a few differences, like the distributor and a mount for an electrical harness. I had a more significant problem, though: getting the main pulley nut off, which proved to be quite challenging.
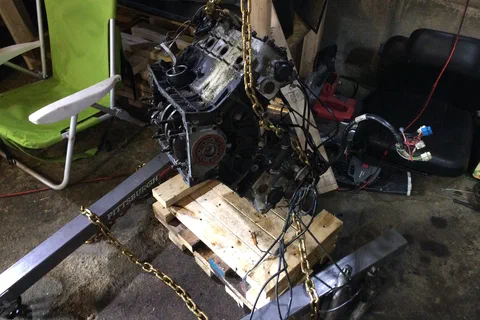
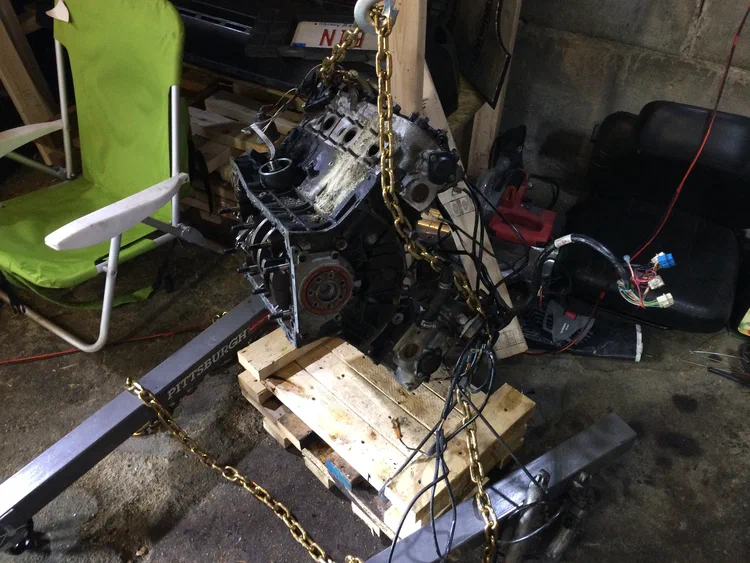
My old odd-fire 2.8L engine had recently refurbished cylinder heads and performance cams, neither of which are useful in the even-fire 3.0L engine. Since the engine block itself has a hole in it, I decided to part out the engine. I don't know if the pistons or rods or anything else in there is worth anything, but the performance cams were $600, and refurbished heads are $1500 each. Mine are so low mileage after refurbishing that I'm hoping I can get a reasonable amount of money for them.
February 2014
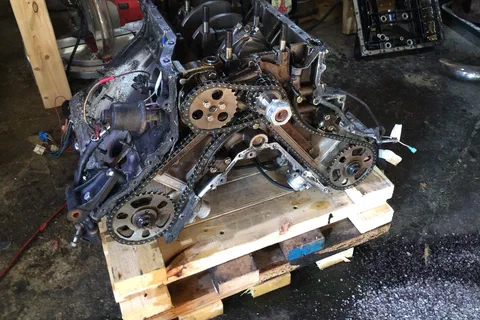
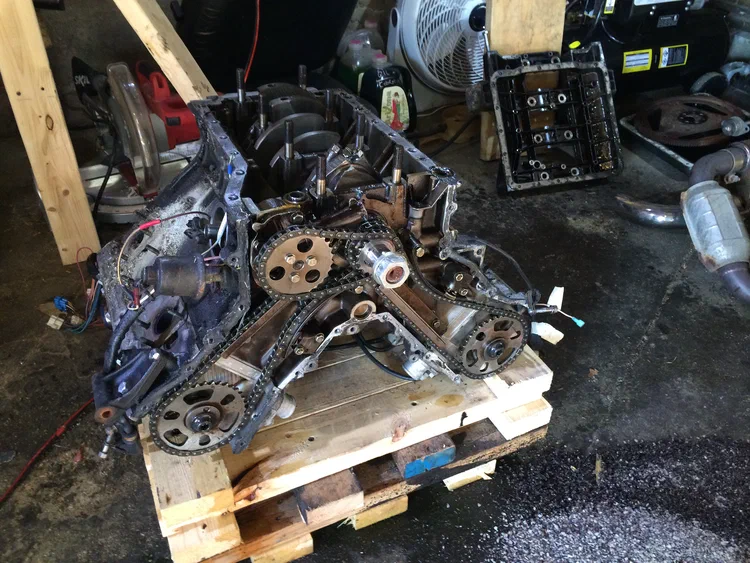
While the new 3.0L engine is the closest thing to a drop-in replacement for the 2.8L that exists, it's not trivial. One of the issues is that the 3.0L won't fit on the stock engine mounts. Since both engines are PRVs, the solution is to swap the lower crankcase (and thus the engine mounts) between the two engines. I already had the engine on a stand, so I had to flip it over, remove the oil pan, oil pump inlet tube, oil baffle and finally the lower crankcase. Everything went smoothly, although the chunk of metal and loose nut sitting at the bottom of the engine were quite odd finds.
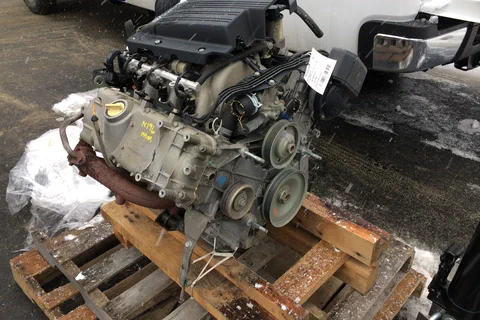
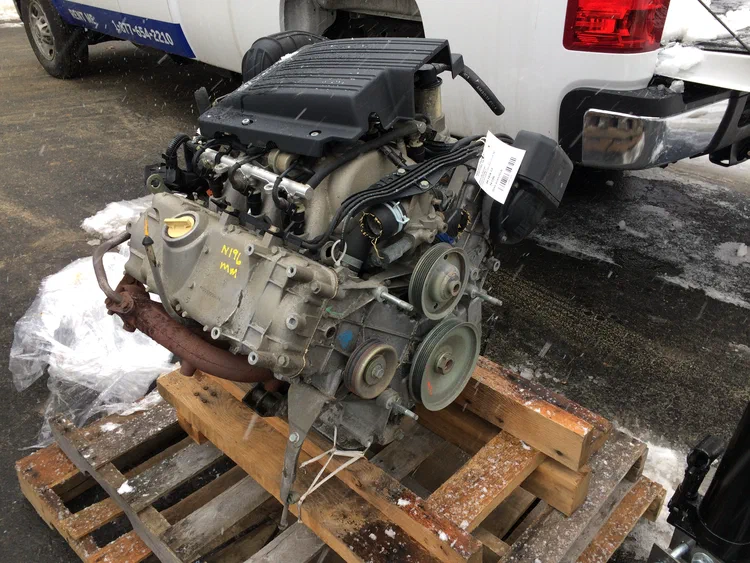
With the damaged 2.8L engine removed from the DeLorean, it was time to get a 3.0L to swap in. After failing to find one locally, I bought one on eBay and had it shipped to my house. From there I loaded it onto a rented pickup and brought it to my garage, using my engine hoist to load and unload it. In a snowstorm.
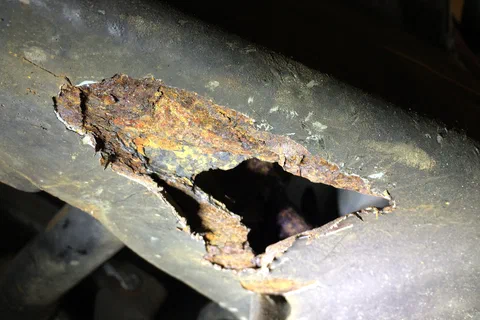
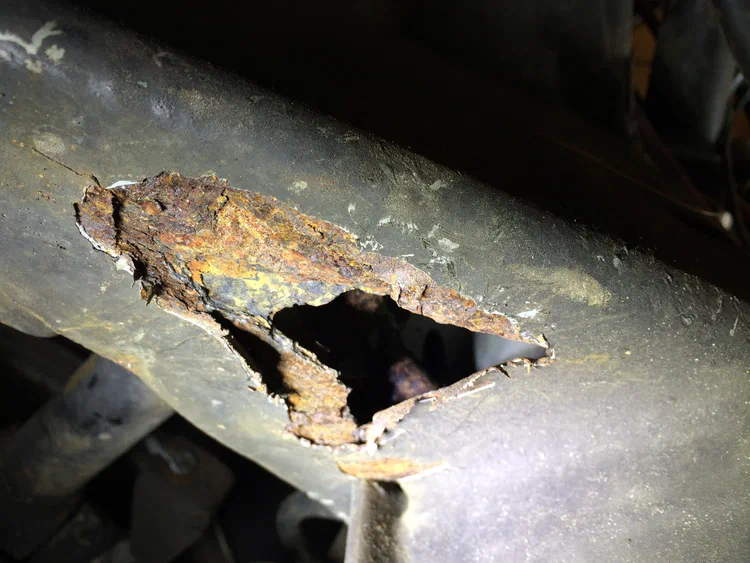
While I was disconnecting the engine and transmission to pull them from the car, I noticed a small bulge through the epoxy under where the passenger side upper link arm bolts to the frame. It was pretty small, but as I poked at it with my finger, more and more epoxy and then rusted metal flaked off. Finally I had a hole over an inch in diameter. I soon found a similar but smaller hole in the same place on the driver's side.
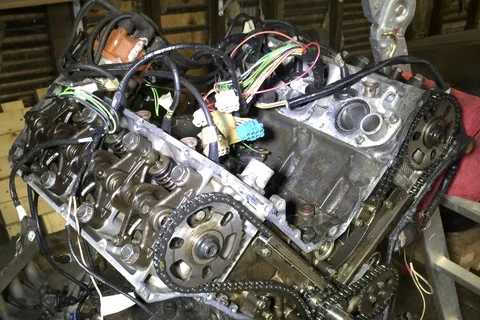
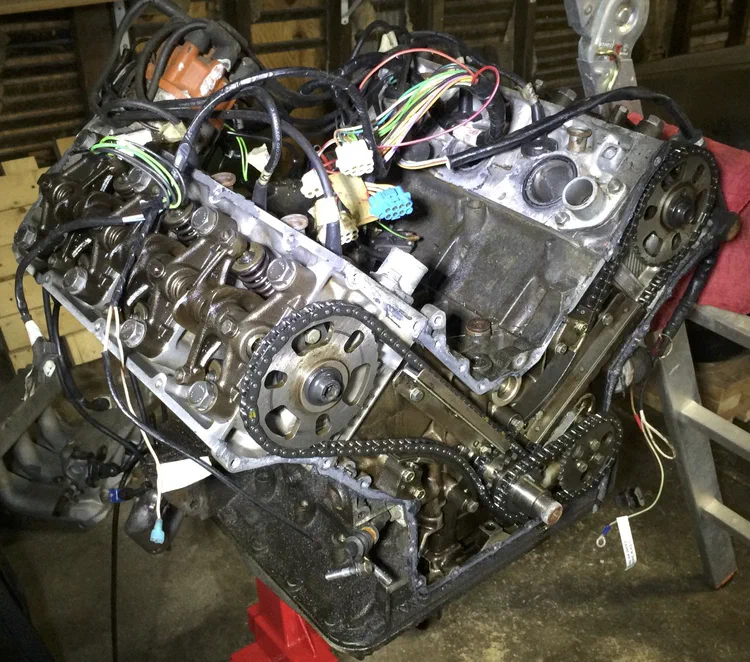
With the damage to my block, I had to decide if I was going to repair it or swap to a 3.0L engine. Either way, I was going to have to take apart the old 2.8L. The first steps are to remove the valve covers, main pulley, timing cover and optionally the water pump.
January 2014
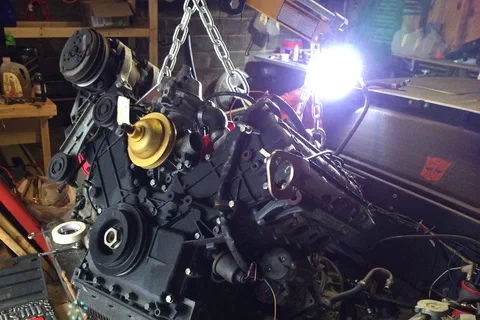
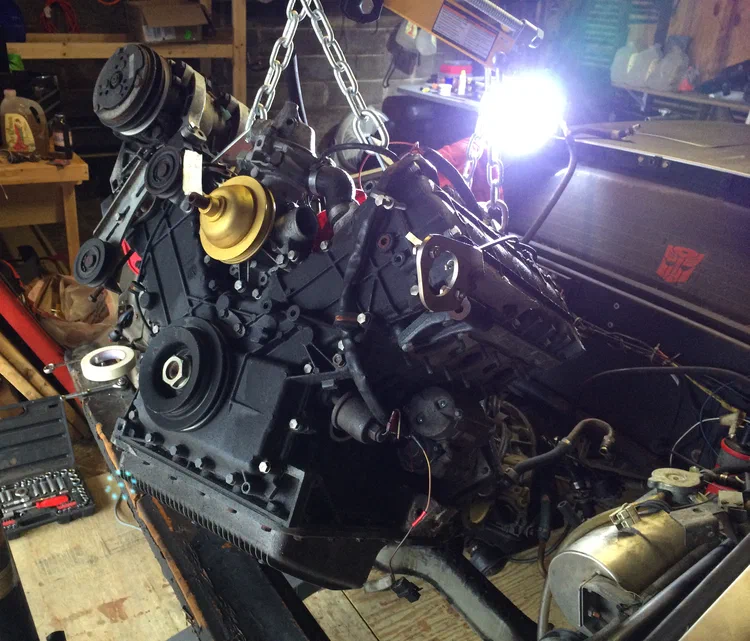
After discovering a hole in the valley on the top of the engine block, I decided I needed to pull the engine. While the basic process is outlined in the Workshop Manual, there are a number of things they just assume you know (since the manual was targeted at mechanics), so it could be a bit unclear what to do at times. Some Google searches found a few engine removals, but no step-by-step instructions. It took me a couple of months of working for a few hours for one day each week or two to remove the engine and transmission, including various questions to the DMCTalk forums, setting up the tools I'd need, and doing research. In the end I took out the engine and the automatic transmission as a single unit. I've attempted to catalogue my experience as best I could in the hope that it will help others who need to remove theirs. The question now is what I'm going to do about the engine now that I have it out.
September 2013
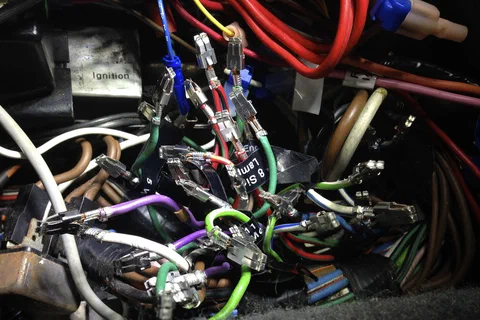
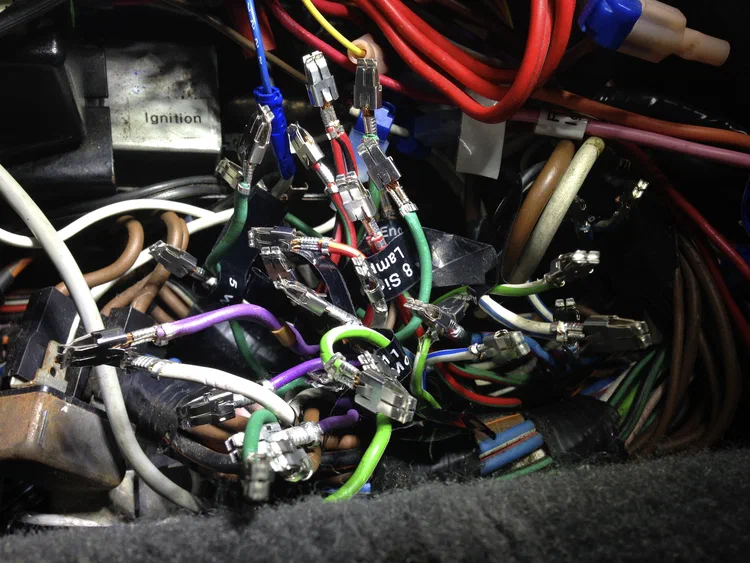
My fuse box has seen better days. Three of the fuses had melted so badly that I had to replace the sockets with inline fuse holders. While waiting to get some money together for the EFI conversion, I finally took the time to replace my fuse box with a new one from Houston that I'd gotten a few months ago. I actually wound up buying two of them -- my dog decided the first one would make a good chew toy. At least this gave me extra terminals for the inevitable mistakes I would make.
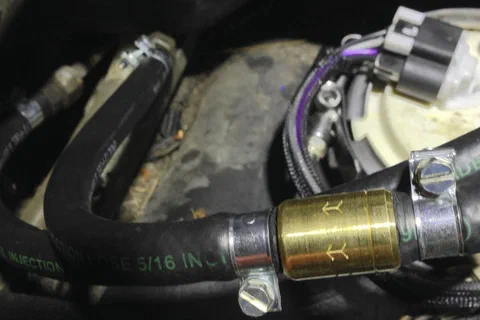
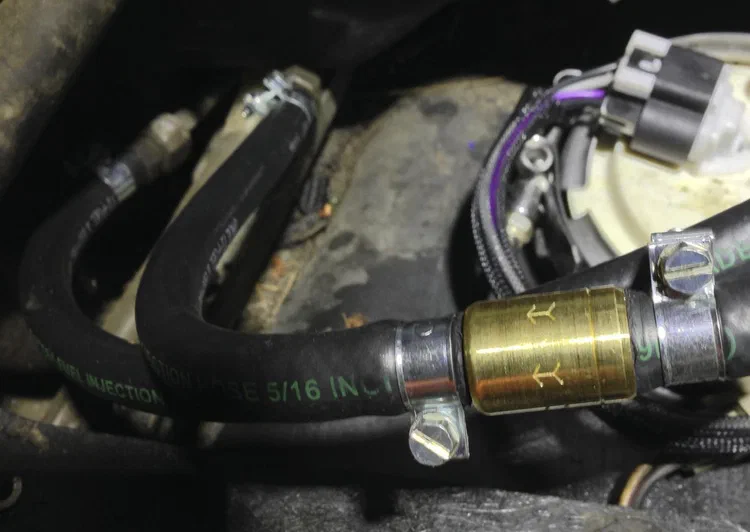
Some DeLorean owners have reported that the check valve has failed in Houston's fuel pump/sender combo. This can cause starting problems due to loss of fuel pressure. This in turn led to a discussion on DMCTalk about adding an inline check valve. Although I haven't actually started up my car since I installed the new fuel pump, I thought it wouldn't be a bad idea to install a check valve just to be sure.
August 2013
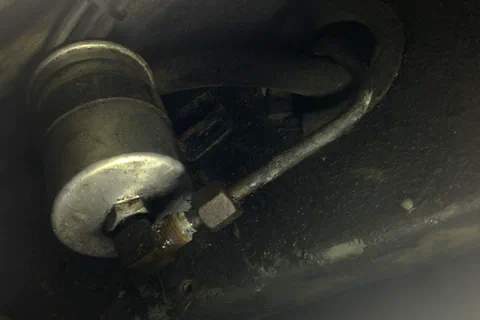
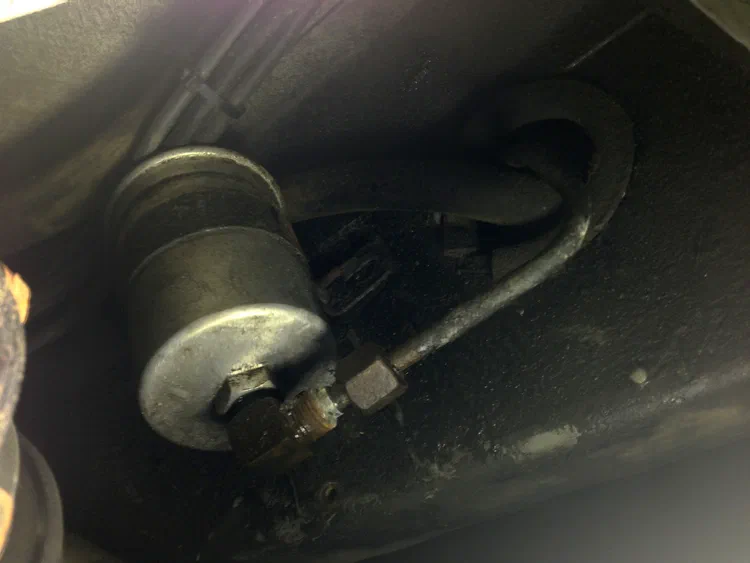
After replacing the fuel pump and cleaning the tank, I needed to replace the fuel filter. In principle, this is simple -- disconnect the hard line, remove the bracket, and take off the banjo bolt. In practice, I had rusted lines that required quite a lot of fiddling to break free.
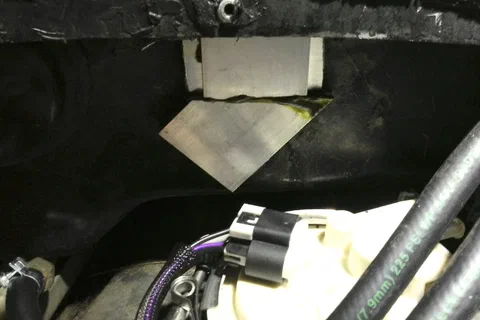
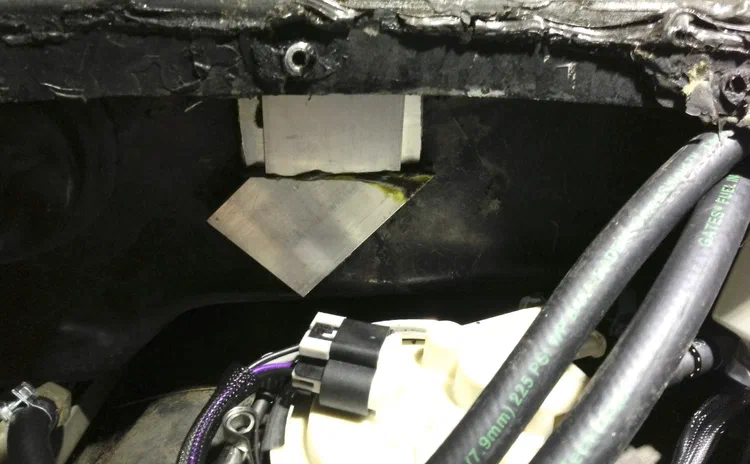
A rather odd design decision on the DeLorean is how it deals with removing water that runs off the windshield. The water rolls down the glass, is funneled towards the center of the window, and drains down a hole and right on top of the fuel pump. This likely contributed significantly to all the water that had collected at the top of my pump. Using some aluminum stock and weather stripping adhesive, I built a simple deflector based on some discussion on DMCTalk to help redirect the water away from the fuel pump to reduce the chances of such a failure happening again.
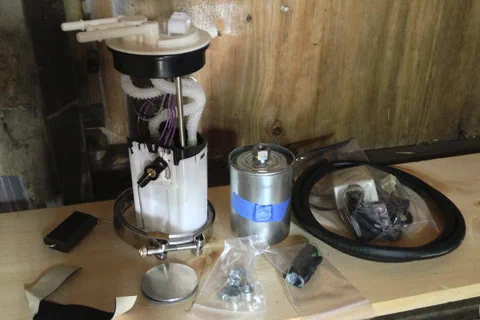
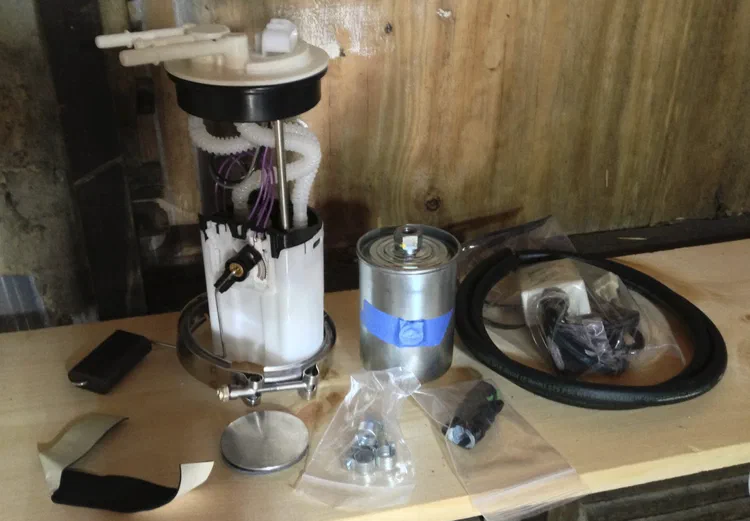
After a hole in the cap covering the fuel pump filled the top of it with water and rusted everything within, I decided this would be a good time to upgrade to Houston's fuel pump/sender combo. The replacement isn't very difficult in principle, but I ran into a couple of issues along the way.
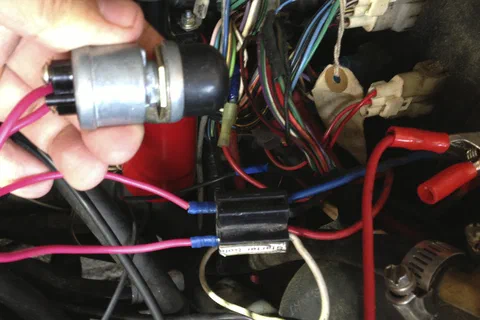
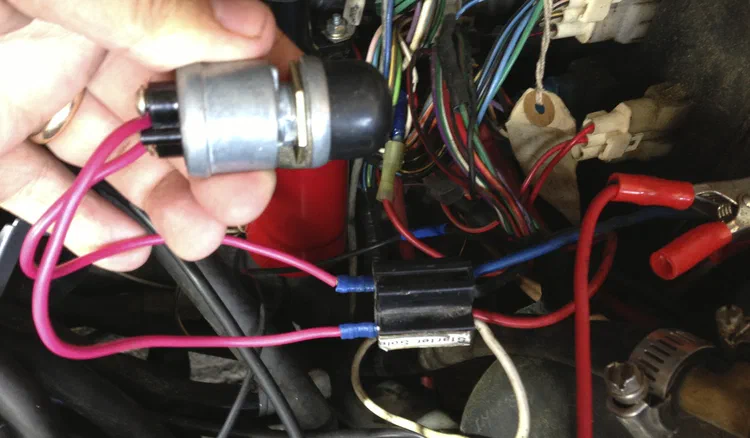
I took Dave Swingle's advice and tried starting the car by pushing down slightly on the deflector plate while cranking the engine. Since I didn't have an assistant to crank it for me, I picked up a momentary pushbutton and hooked it up to starter relay socket I'd installed some time ago. This let me start the car and test the mechanical advance, which appeared to be working just fine.
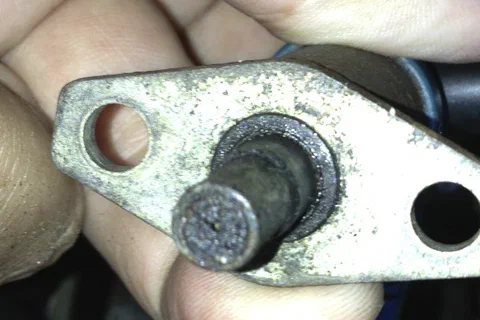
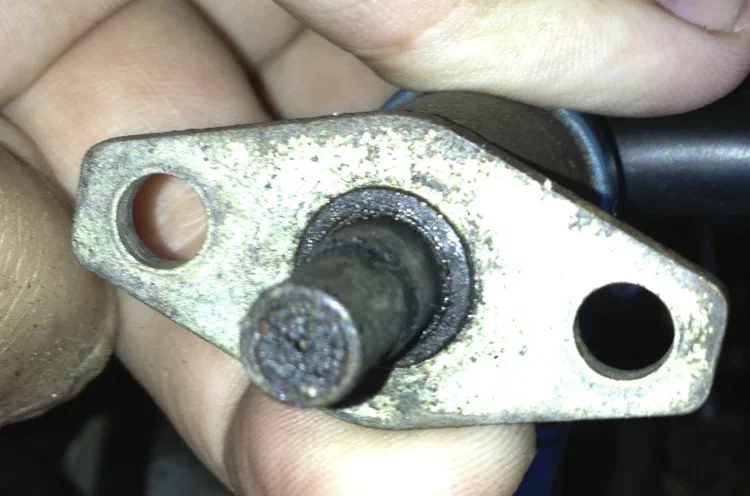
While attempting to start the car to test the mechanical advance on the distributor (and failing to even get the car started), I discovered that the cold start valve had become clogged. Dave Swingle provided some good diagnostics that helped me make sure that this was true, as this part rarely fails. I've included Dave's tests in this post.
July 2013
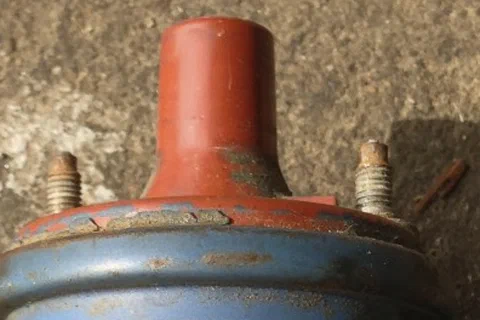
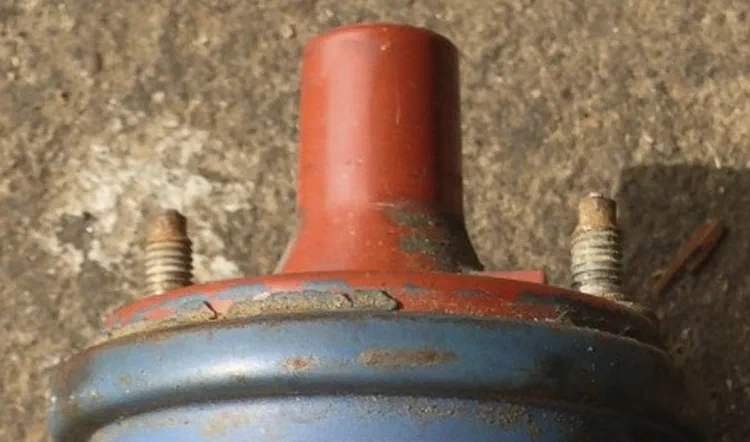
After limping the DeLorean to the garage, I attempted to diagnose my misfiring issue and replaced the spark plugs and coil -- alas, to no avail.
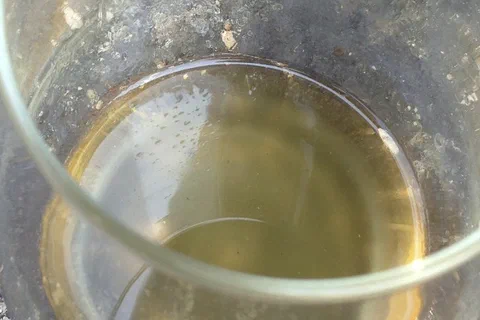
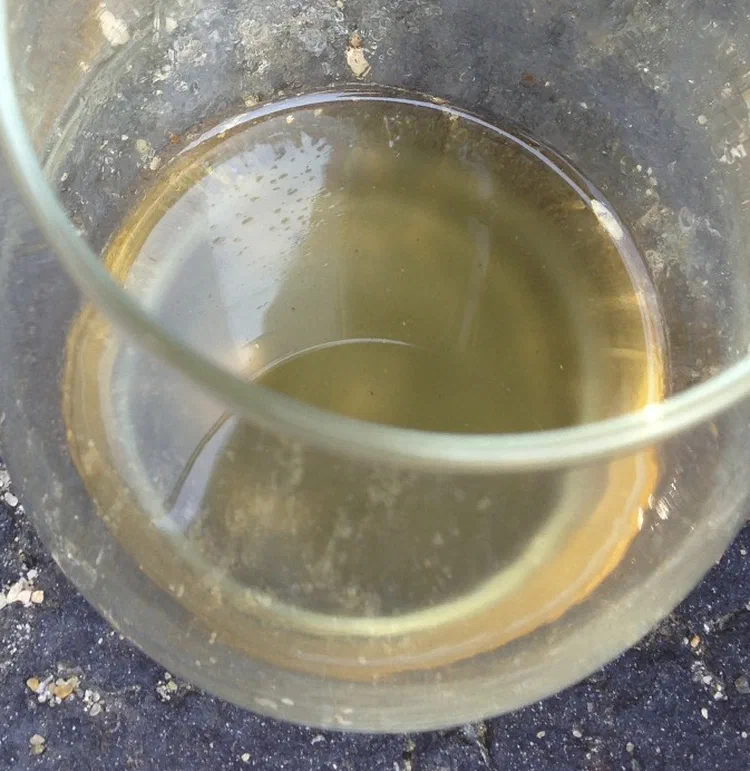
A failing seal from the fuel pump cap and boot is likely what led to water getting into my gas tank. This resulted in extremely poor performance, first limiting me to 3000 RPMs, and soon after to only 1500 RPMs. Repairs included cleaning the injectors, replacing one that was completely dead, testing spark (just to be sure), testing fuel pressures and cleaning the fuel tank and replacing the fuel filter. While clearly there was something wrong with the fuel system, it did not fix my misfiring problems.
This blog is to chronicle general repairs and maintenance to my DeLorean. This will include diagnosis of problems, performing the repairs, and the parts and tools needed to get it done, with as many links to other resources as I can find.