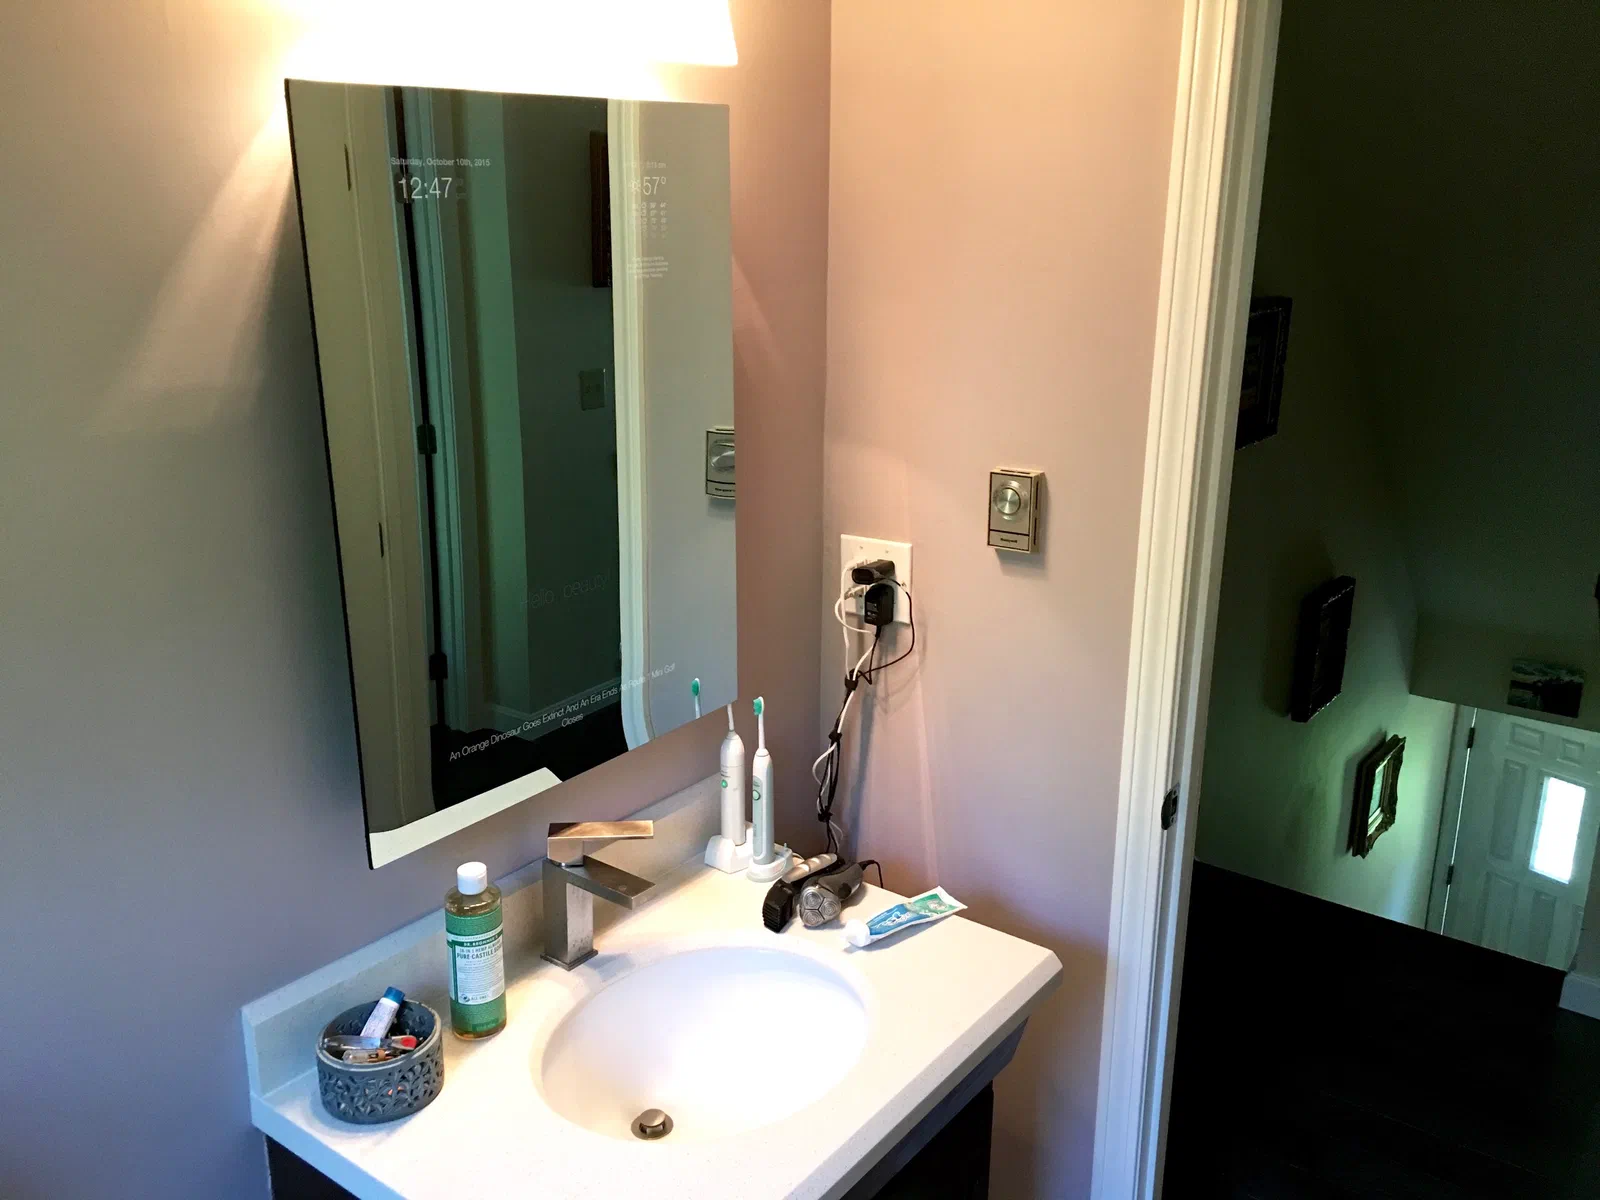
Magic Mirror
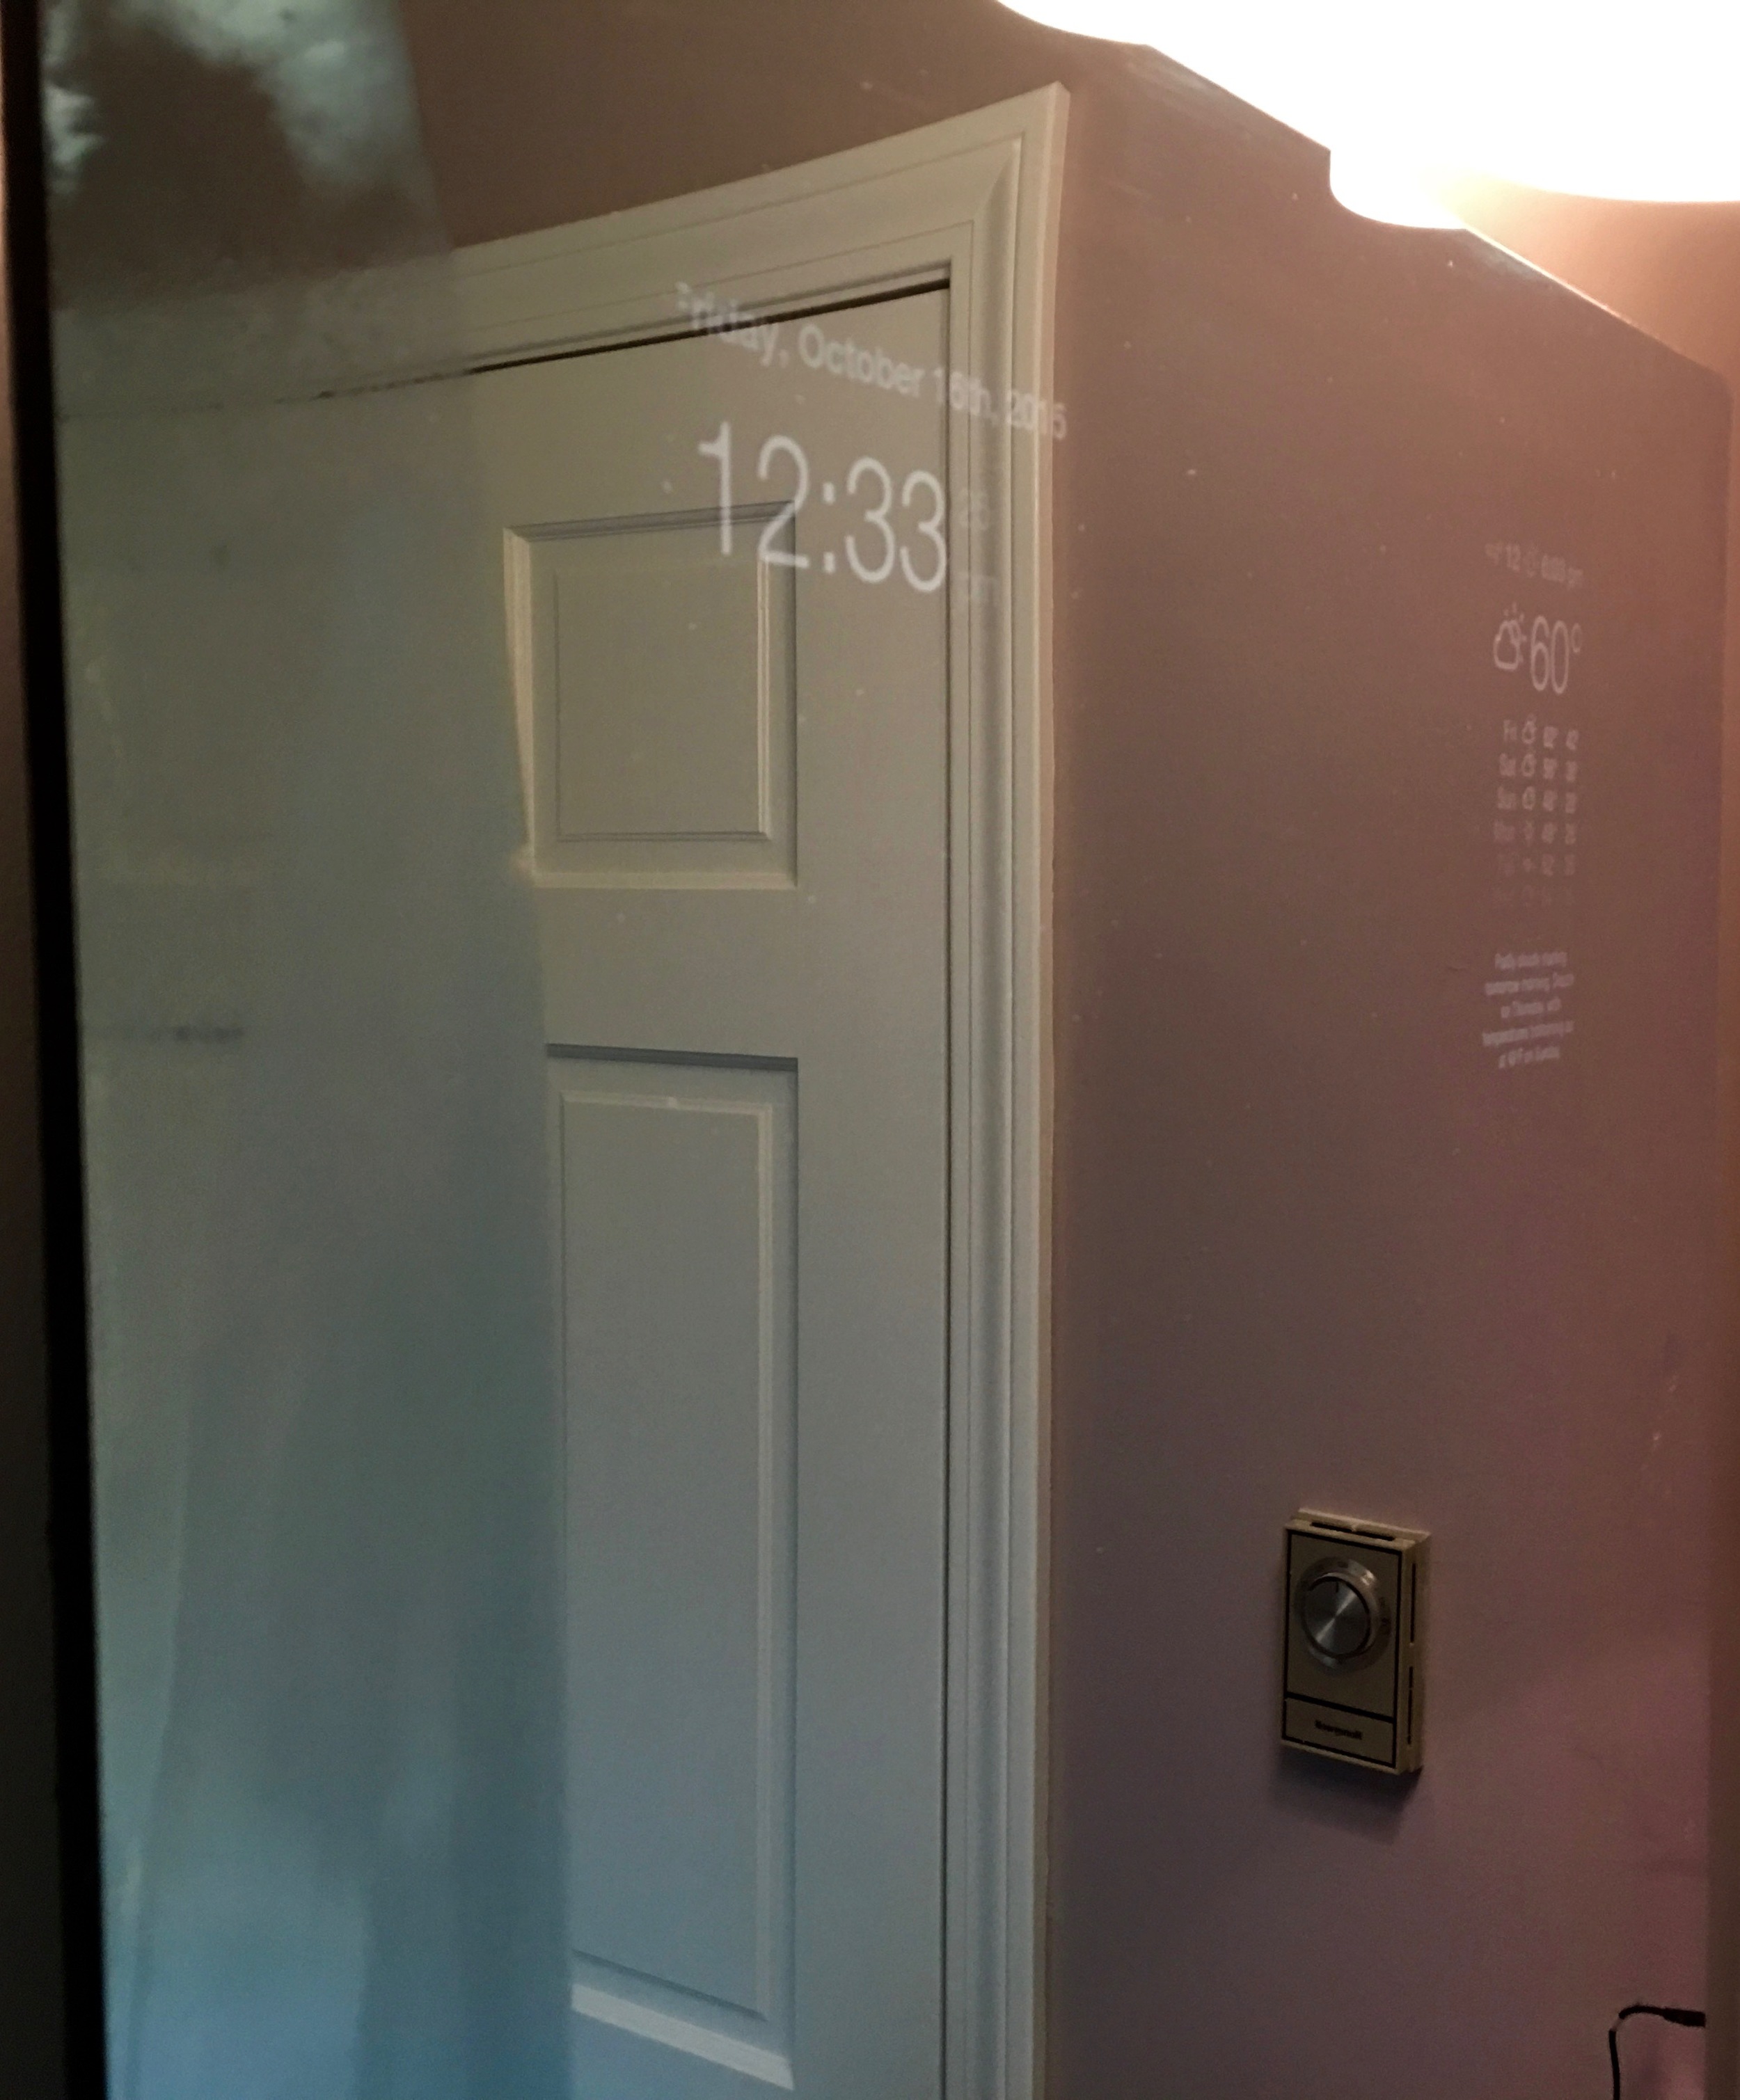
A few months back I came across Michael Teeuw's Magic Mirror project. This clever setup puts an HDTV behind a two-way mirror to create a mirror that displays useful information, thus creating a smart mirror. A Raspberry Pi running Chromium in kiosk mode displays a black web page with white text, using content pulled from the internet. The black parts cause the mirror to remain reflective, while the white text shines through. It was pretty cool, and I wanted to build my own. Luckily, Michael had provided step by step instructions for the whole process, and the source for the website itself.
As an Amazon Associate, I earn from qualifying purchases (learn more here), so if you want to support me, that’s a good way to do it.
Steps
To make one of these, you need to acquire a few things and build some others yourself:
- A thin 1080p HDTV or monitor with downward-pointing ports on the back, and preferably a USB port. (~$220)
- An appropriately sized piece of two way mirror glass (~$250 plus shipping)
- Construct a wooden frame to house the monitor. (~$50 in wood, nails and screws)
- Raspberry Pi to drive the display; I got a Raspberry Pi 2 Model B, but the original model works just as well. (~$25, depending on model)
- MicroSD card with NOoBS for the Pi (~$8)
- Pi-compatible USB wifi dongle for internet access. (~$10)
- A short micro USB cable to connect the Pi to the TV's USB port for power. (~$5 for a three pack)
- A short flat HDMI cable to connect the Pi to the TV.
- 3M VHB tape to hold the wires and Pi to the back of the monitor. (~$10)
- Wireless USB keyboard and mouse for controlling the Pi directly. (Optional, $15 for a set that only used one USB port)
I bought the Pi, MicroSD card and wifi dongle from Adafruit, just to keep things simple. I got the HDTV, USB cables and VHB tape from Amazon. The frame material was purchased at the local Home Depot.
Finding an HDTV
My intention was to use this as our new bathroom mirror. The old mirror measured about 24" by 30", which is an aspect ratio of 3:4. It's basically impossible to find a decently sized 4:3 aspect LCD monitor or TV at a reasonable price, so I decided to use a 32" 16:9 monitor turned sideways and to limit the content to the center of the mirror, with the glass overhanging the edges of the frame. This is different from Michael's mirror where the glass is framed inside the case. In my opinion, the overhanging glass gives it a more "magical" look, as it is clear that no electronics can be hiding in the framing.
Another important detail is to get a 1080p monitor. A 720p monitor would technically work, but Michael's software was set up for 1080p. More importantly, you're going to be standing right in front of this thing, so a larger monitor with a lower resolution would appear rather pixelated by comparison.
I spent a few weeks waiting for a cheap monitor to show up on deals sites before finally just buying a 32" Sceptre brand TV from Amazon. It was $220, and had the important details of being 1080p, relatively thin, and having all ports aim downwards instead of outwards. As a bonus, it also had a USB port to power the Pi.
I should mention that a side effect of using a TV instead of a monitor is that you're going to have to leave the TV on all the time. Most (if not all) TVs turn off their USB ports when they're off, and require a good five to ten seconds to power on; the Pi itself requires an additional minute and a half or more to boot up all the way into Chromium and display the page. TVs also tend not to support DPMS, which means that the display can't be made to simply go to sleep and quickly wake up when needed like a monitor can. It would be nice if TV manufacturers had a DPMS option in their software; it's not clear to me why they don't, unless they really just don't want people buying TVs when they have a computer monitor division trying to sell them monitors.
UPDATE: August 2019
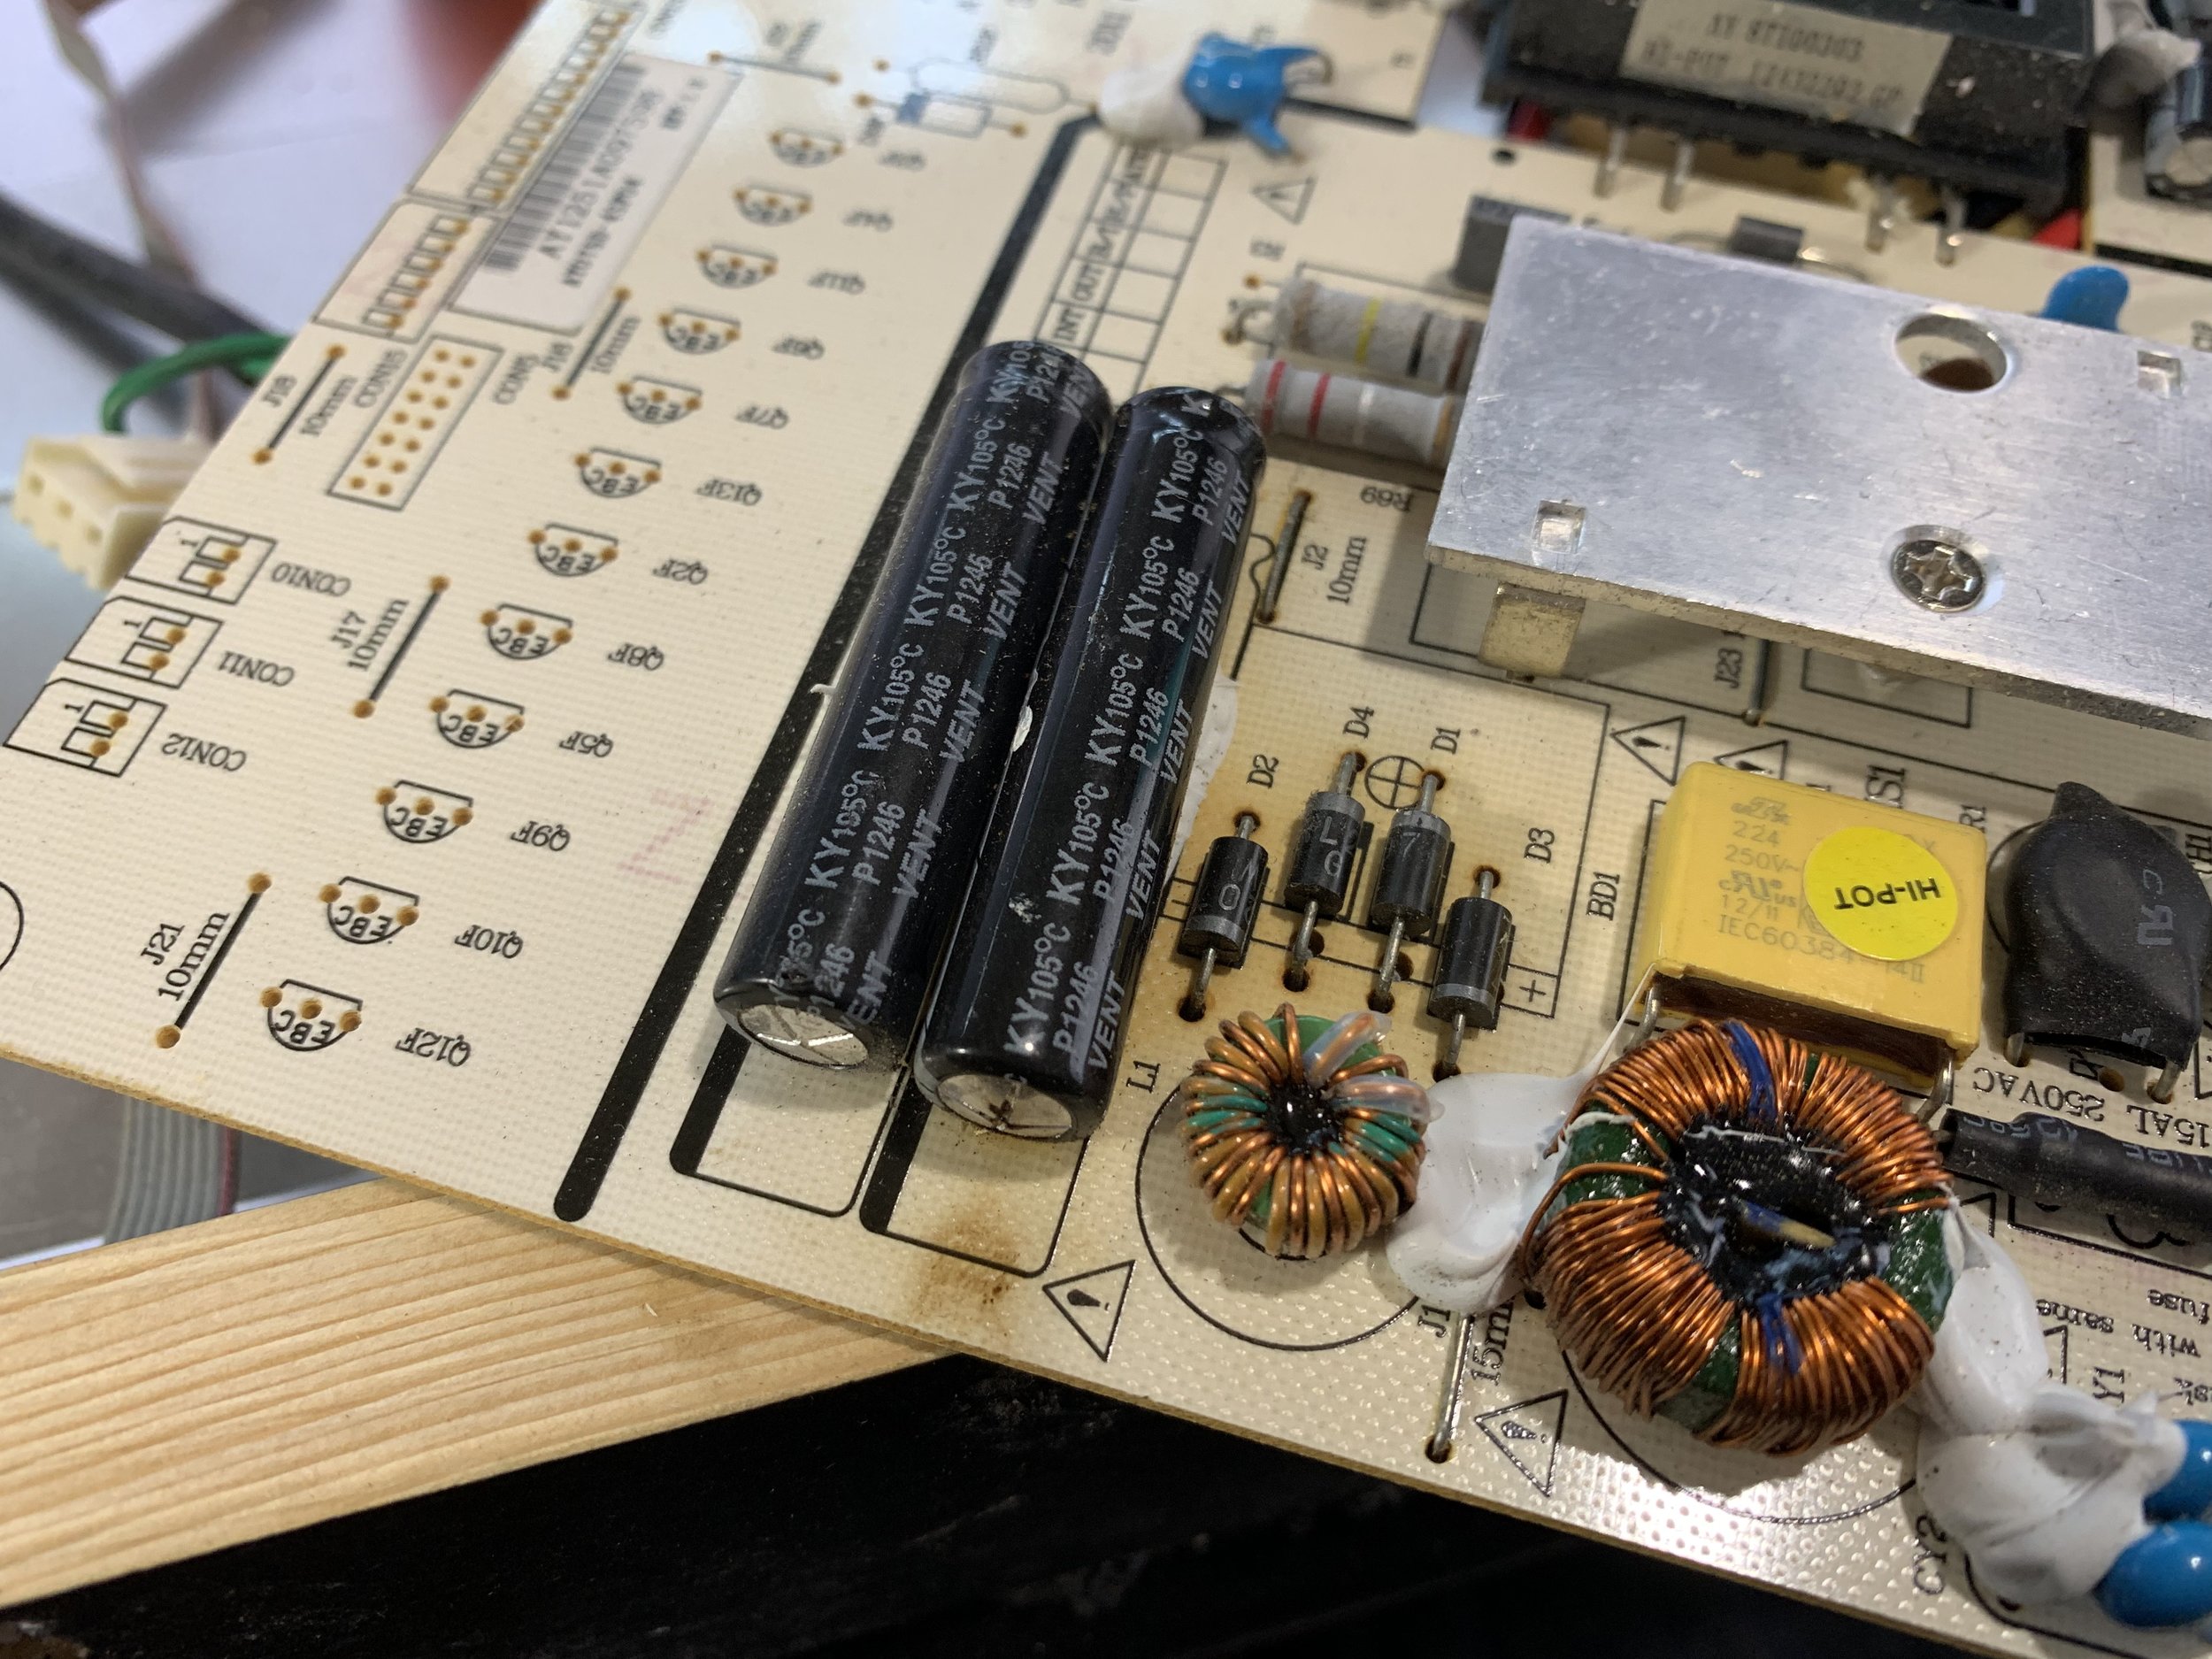
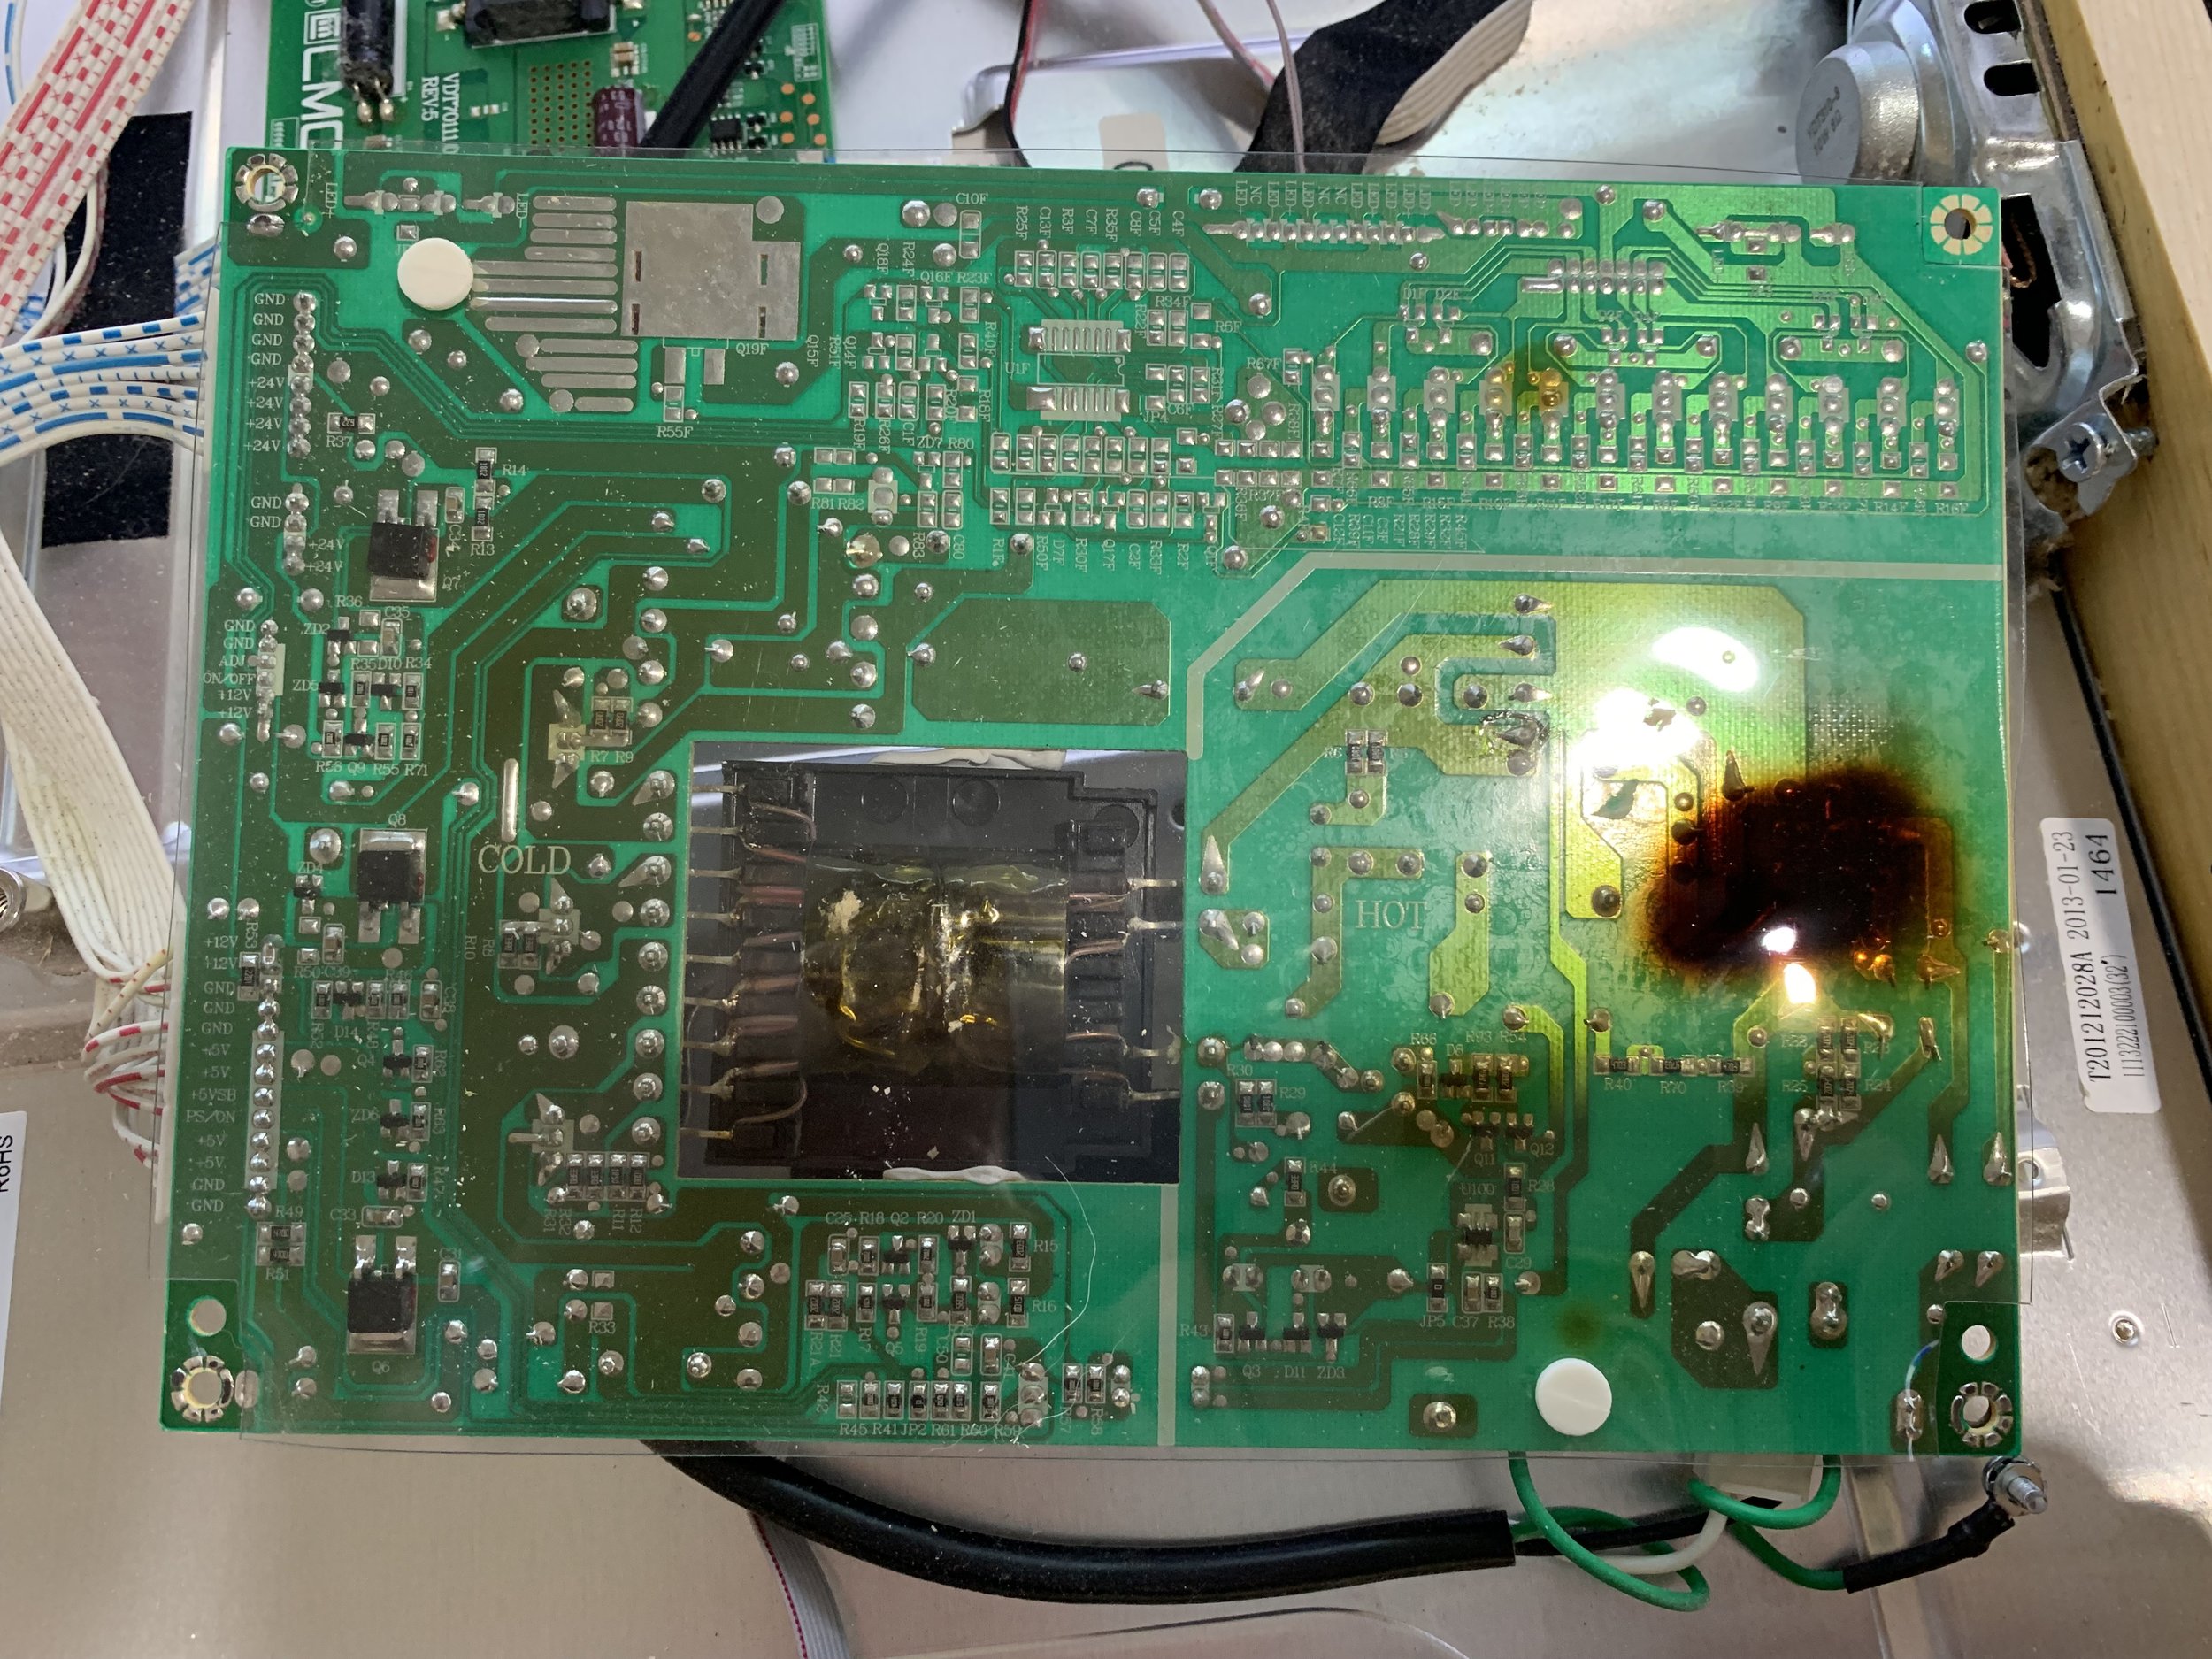
After years of operation, the power supply on the TV failed on me. At least one capacitor and I think all four diodes on the board had failed. In the end I simply entered the part number written on the board into eBay and got a replacement for $23. Before that, though, I tried to replace the entire display.
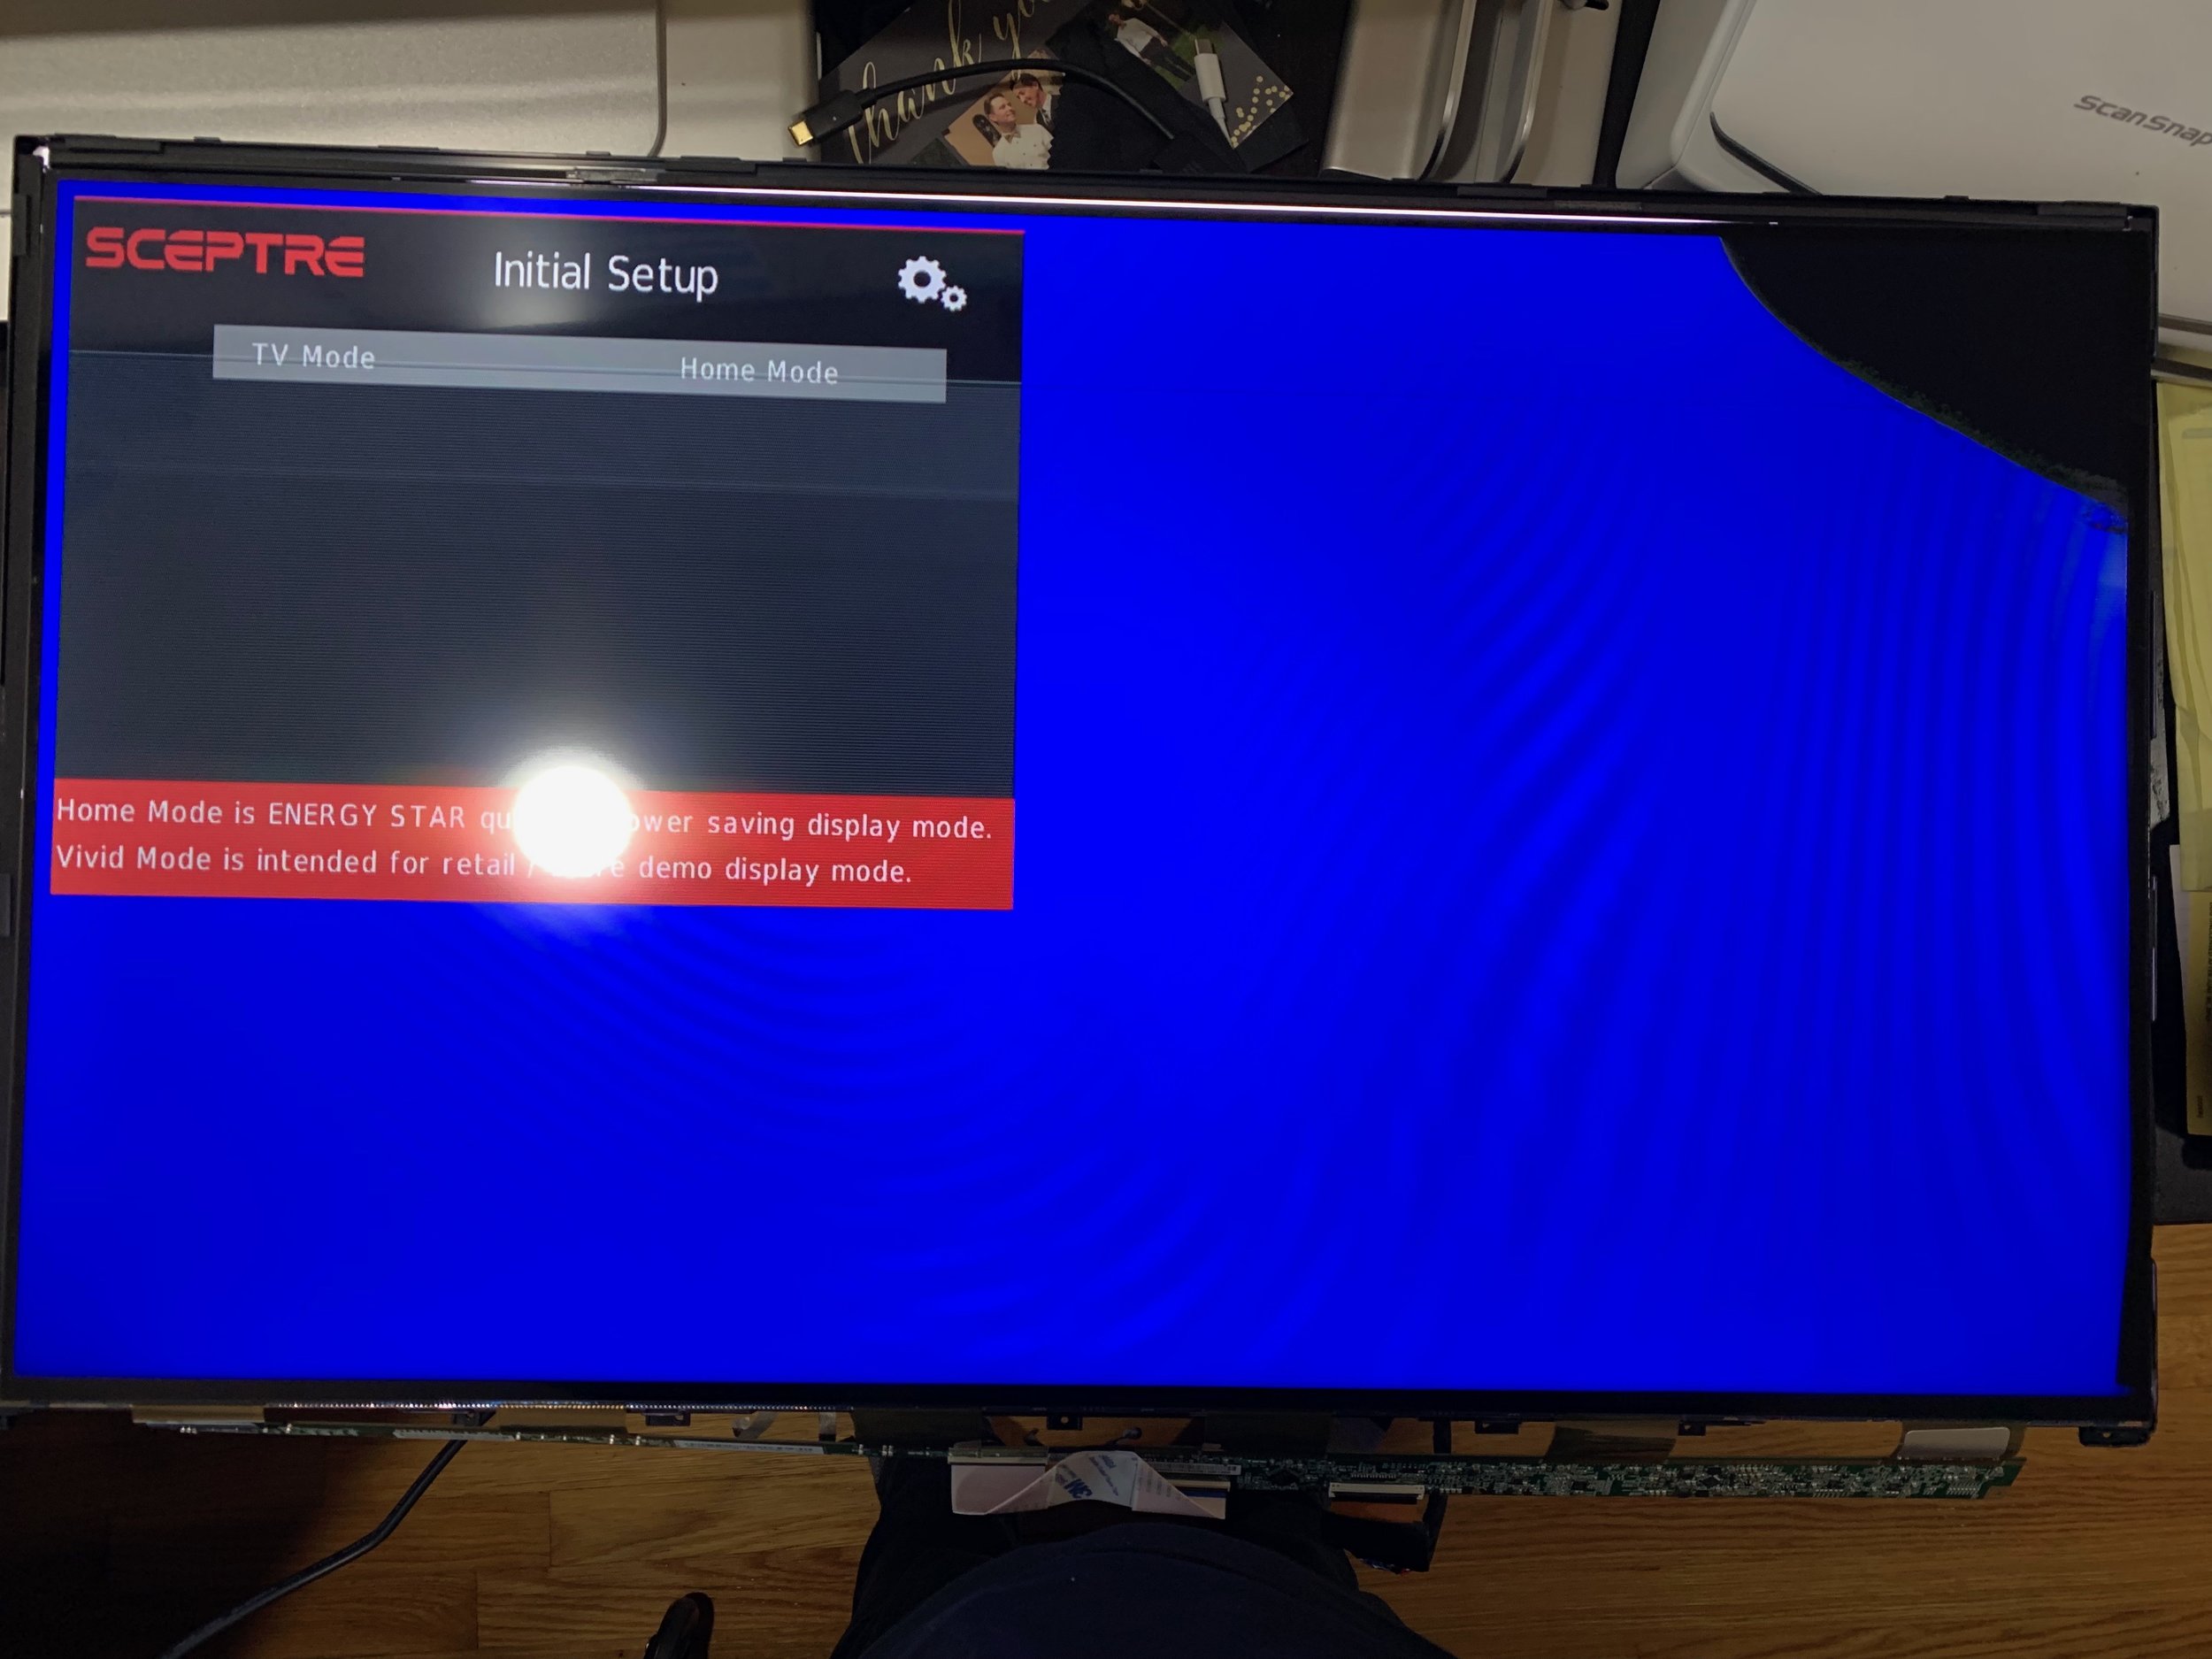
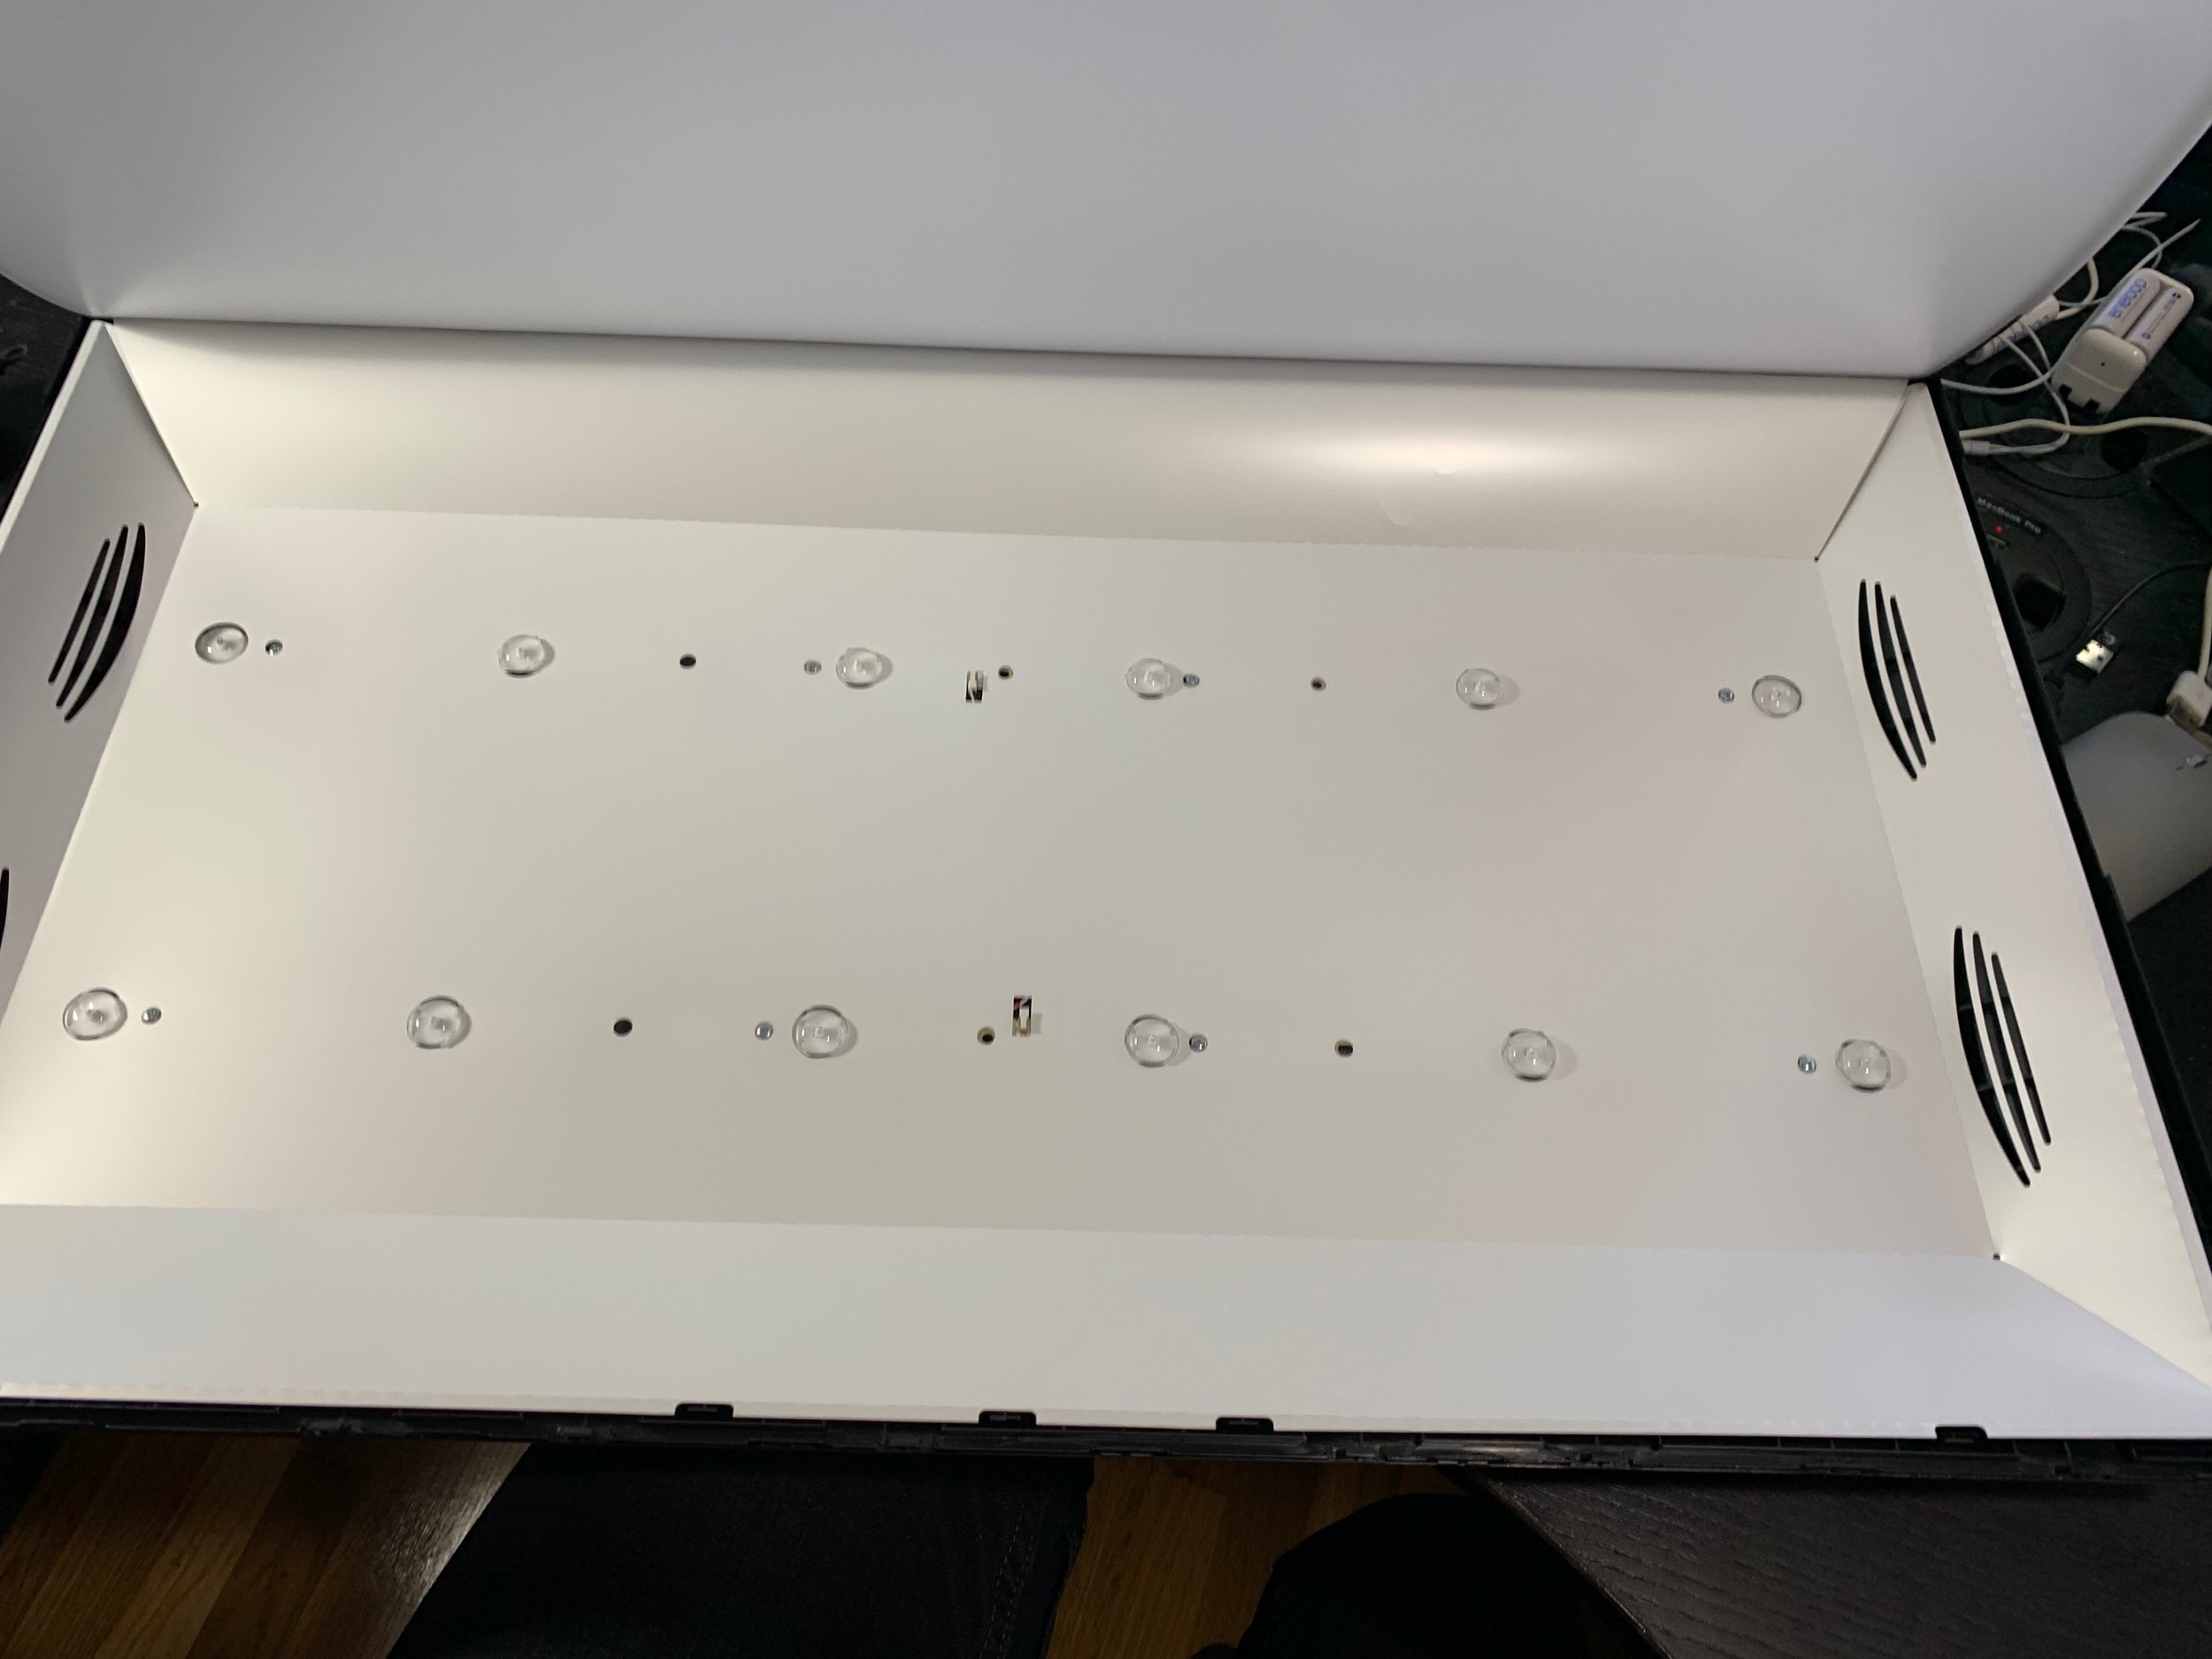
The model of Sceptre TV that I bought was no longer made, so I ordered one of their newer LED backlit models for $130 from Amazon. This would have worked, but it is a much different design from the fluorescent backlight of the old model. The screen and backlight are not housed in a metal frame behind the plastic case. Instead, the electronics are in a separate plastic case that is seamlessly mounted to the back of the TV. The LCD panel sits directly against the front plastic bezel, and has no metal frame. The LED backlight consists of ten LEDs in two strips inside of the surprisingly thick main case, surrounded by card paper that lines the case to provide even illumination. There are then three diffuser panels between the backlight box and the panel to evenly illuminate the display.
Not realizing this, I was a bit too hasty when snapping the bezel off of the case, and cracked the corner of the display. This rendered the screen unusable, as that corner was now black and there were lines running across the screen. I thought about replacing the board in my old TV with the new one, which would have worked if not for the fluorescent backlight in the old model. This requires different driver hardware, so while the new board could drive the old panel, it could not drive the backlight.
In the end I just tossed the new TV in the trash and bought a replacement power supply. I kept the board and LEDs for other possible projects.
It seems like I got lucky with my original selection of an HDTV. Be very careful disassembling your display, and try to find edge-lit TVs if you go the LED route. These will be slimmer as they don’t need the light box, and will make it possible to build a thinner frame. Some other recent research of mine suggested that VA panels have better contrast ratios and may provide blacker blacks, so I may try that for the next smart mirror I build.
Setting up the OS, Web Server and Other Utilities and Services
To start, I plugged the Pi into the still-assembled TV, a USB power supply and a keyboard and mouse and began the setup process with NOoBS. For those who are new to the Pi (like myself), NOoBS (New Out of the Box Software) is basically an OS installer and configuration tool for the Pi, and can be found pre-installed on Pi microSD cards. I chose to have it install the Raspbian Linux flavor, which seems pretty standard.
Michael details how to install the OS, but NOoBS takes care of most of that for you. He then covers how to edit the necessary files to rotate the screen to portrait mode, as well as a few other flags to make the Pi work more reliably for this project, such as disabling the screensaver and power saving options that would turn off the display. You should be comfortable with nano or a similar terminal editor, since you'll be doing this kind of thing a lot.
Wifi, Static IPs and Auto-Reconnecting
The wifi dongle was automatically recognized, which was nice. The trick is setting it up to use a static IP to make it easier to SSH into it from my other machines. This involves editing more files. I googled and came across a few threads and some instructions, but it seems that most of them are based on older versions of the OS than I was using, and it required a bit of experimentation to get everything working properly.
Annoyingly, the wifi won't auto-reconnect when the connection is lost (say, you have to reboot your router). Luckily, there exists WiFi_Check, a script that you set up as a cron task to automatically run every few minutes to reestablish the wifi connection if it is dropped. Hopefully this will be automatic in the future.
UPDATE (June 2016): I had some issues with wifi speeds being only about 4 Mbps. You can test your speed with:
wget -O /dev/null http://speedtest.wdc01.softlayer.com/downloads/test10.zip
Note that wget returns speed in megaBYTES per second, while your ISP reports speeds in megaBITS per second. Multiply the results from wget by 8 to convert megabytes to megabits. My connection is 25 Mbps, so the 4 Mbps (about 500 kilobytes per second) result is quite a bit slower than that.
A bigger issue I had was related to laggy connections, where ssh would just pause for 5-10 seconds for no obvious reason. Googling suggested that some people had trouble with the drivers for modules with the RTl8192cu chipset, so I swapped out mine with a Panda module. This fixed the laggy connections, but it didn't affect transfer speed -- it was still stuck at 4 Mbps. However, I was now able to do AirPlay streaming without dropouts, and my ssh no longer had those weird issues.
It's likely that the issue with my old module was wireless power management, but by the time I realized that I already had my new module. If you want to try disabling that, you can use sudo nano /etc/network/interfaces to edit your network interfaces and add the line wireless-power off anywhere inside the file and save it (ctrl-x, y, enter). Executing sudo /etc/init.d/networking restart will restart wifi, and iwconfig should show that power management is off.
Apache and PHP
Next Michael covers installing Apache and PHP to serve the web pages, and Chromium to display them. This is mostly entering commands to get the packages and install them. Expect to do a lot of copy and paste, but it's pretty straight forward.
The default location for website files on Linux is /var/www (UPDATE: that was on Raspbian Wheezy; in Jessie, it's /var/www/html). I hit a small snag here, in that I didn't actually have write access to that directory for some reason. Some googling found articles like this one, which suggest adding your account to the www-data group and changing the ownership of the directory to that group, thus giving you write access.
UPDATE (June 2016): After updating my Raspbian Wheezy install to Jessie, I found that Chromium seemed to auto-start in the background, never showing its window. I'd have to kill and restart the browser manually for it to work properly. After failing to find a solution to this, I decided to try Midori, a lightweight WebKit-based browser. The basic setup is the same. You install Midori with sudo apt-get update & sudo apt-get install midori . Then you use sudo nano /etc/xdg/lxsession/LXDE-pi/autostart to edit your auto-start, comment out Chromium by putting an # in front of it, and add Midori with @midori -e Fullscreen -a http://localhost .
Unfortunately, the font rendering in Midori looks really bad, especially for small text. Chromium is much more readable. This should be possible to fix by installing the correct fonts with sudo apt-get install ttf-mscorefonts-installer and restarting Midori. This didn't work for me, though.
Magic Mirror Website
Finally, you need to install the Magic Mirror website source itself. Michael has this on his GitHub account, so you can just get it from there (or use my customized version, also on GitHub). Not being overly familiar with Linux commands, I downloaded it as a zip and uncompressed it on my Mac, then used Panic's Transmit to copy the files to the Pi through SFTP to /var/www (/var/www/html on Jessie). Later I'd use WinSCP to upload customized website files from my Windows machine through SFTP.
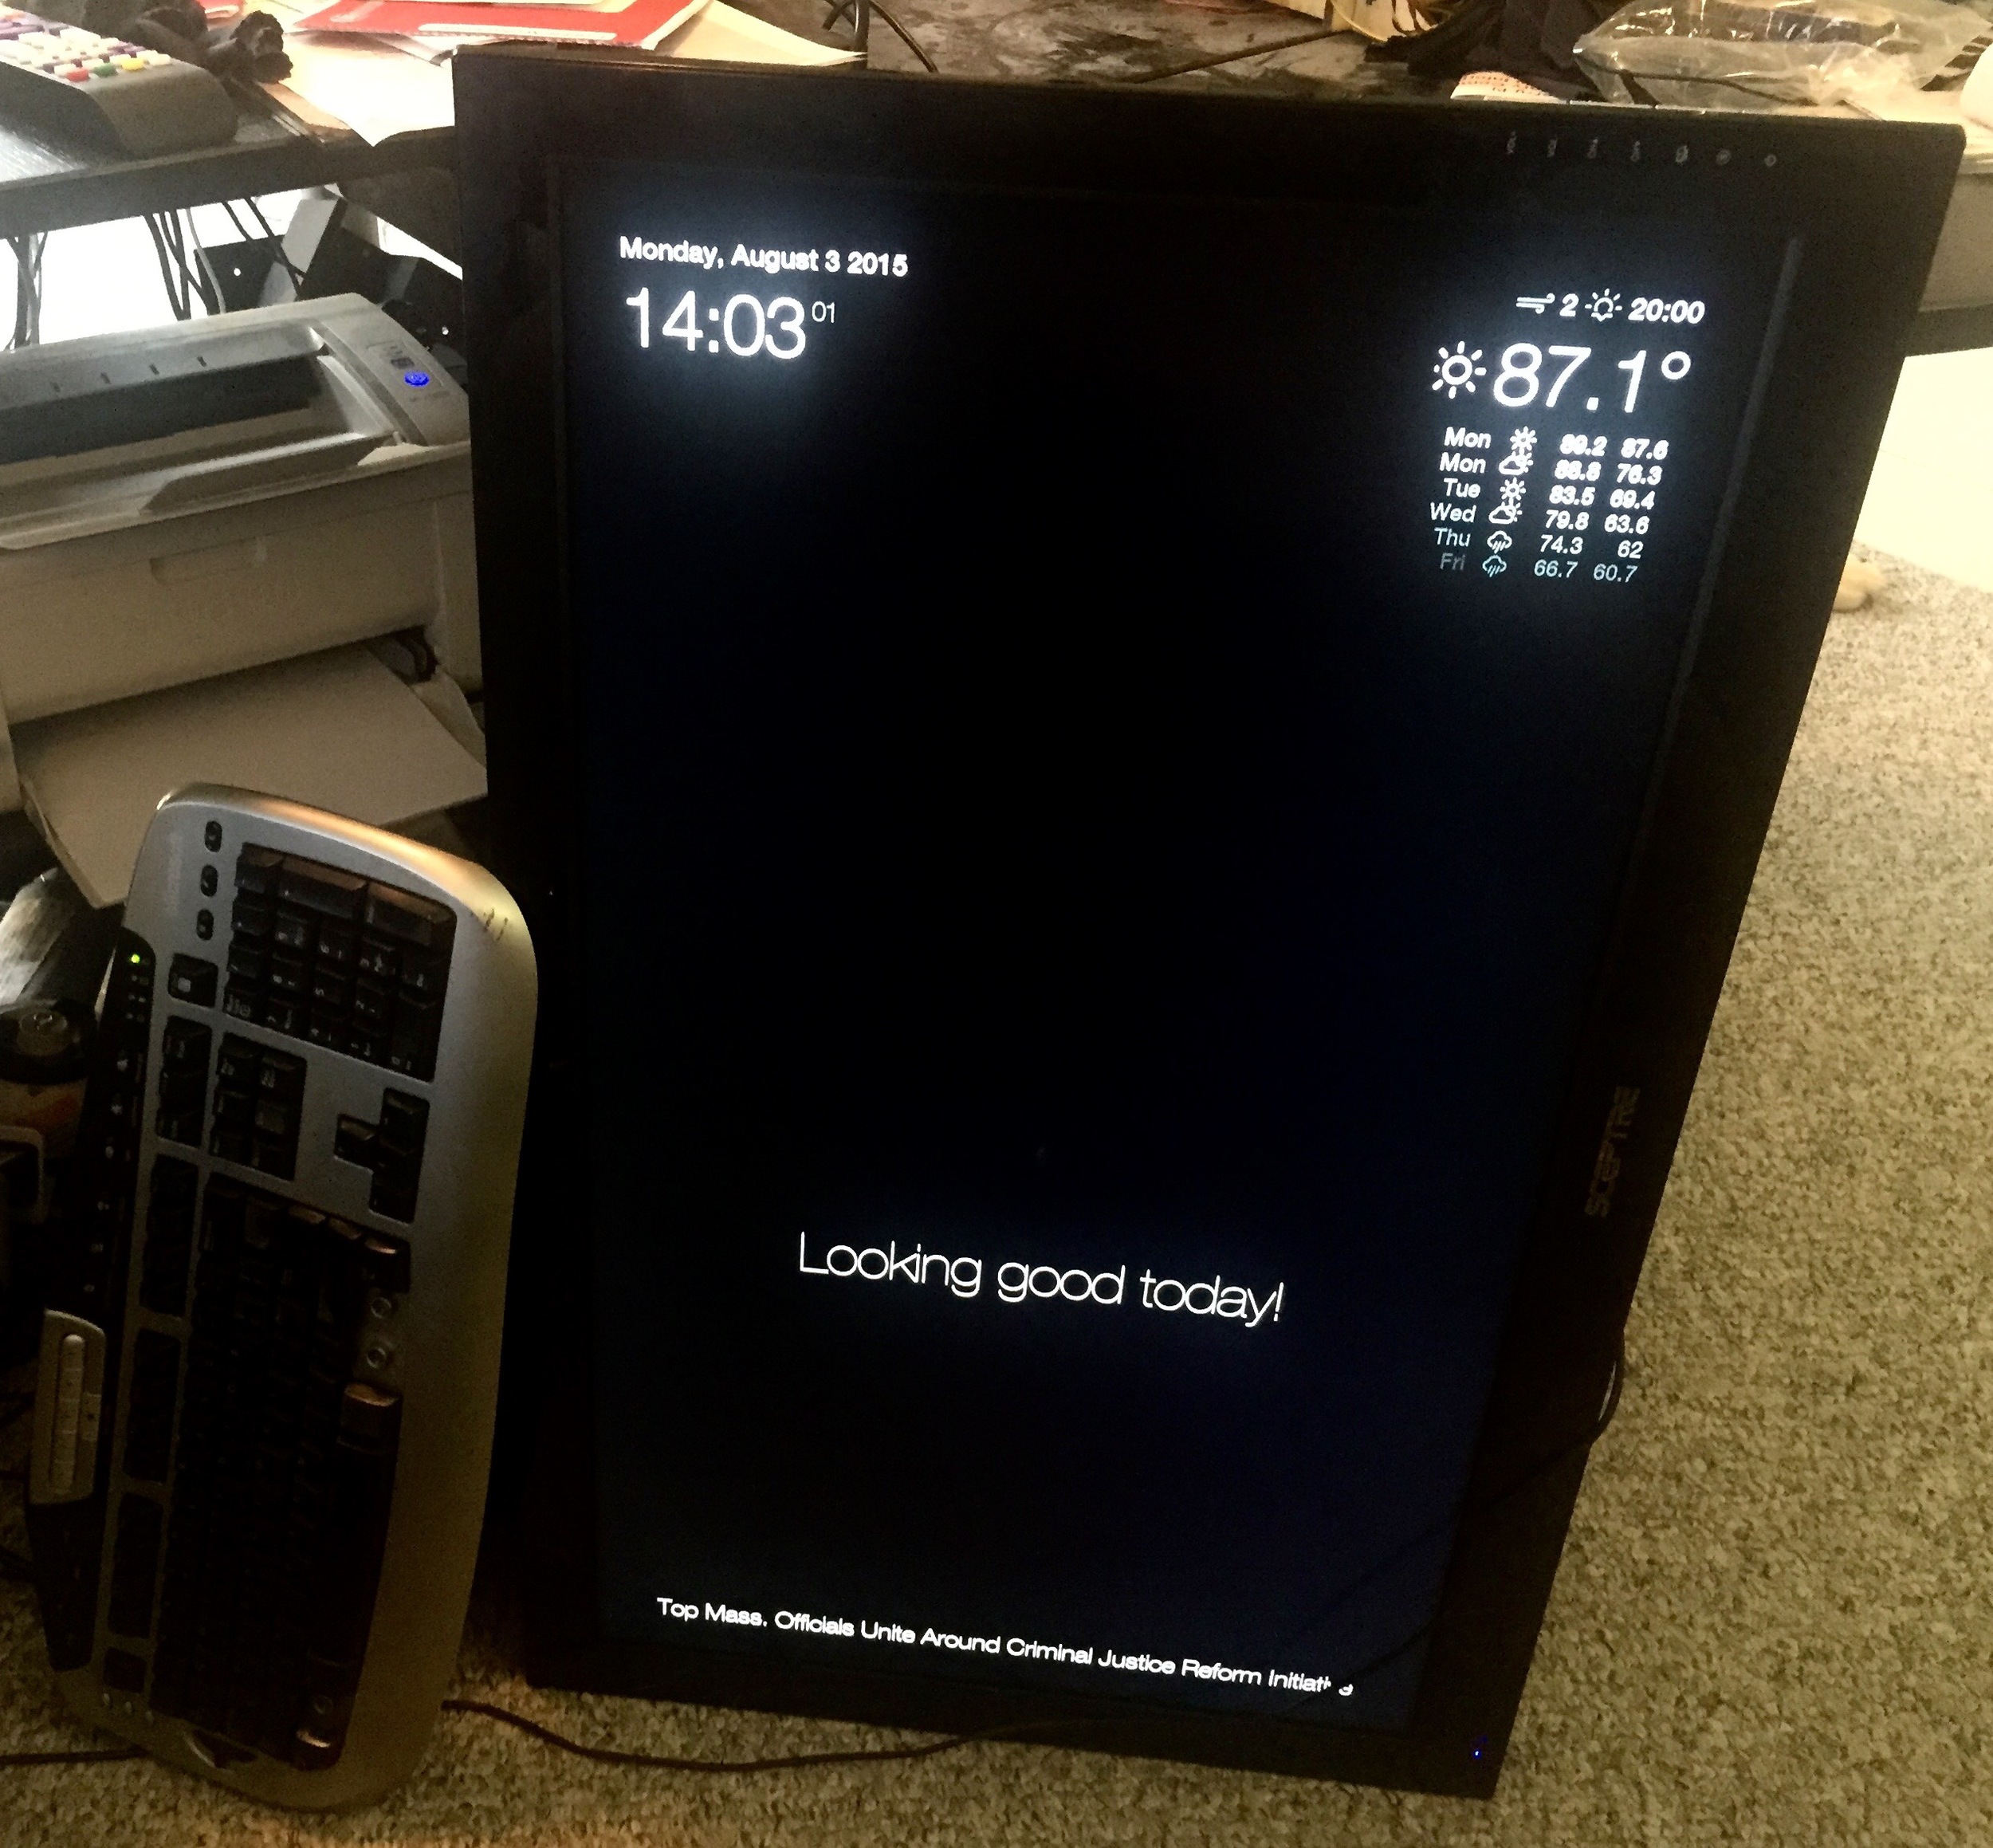
Once you're done, the Pi will boot directly into the desktop and launch Chromium and display the Magic Mirror pages on localhost.
AirPlay Support
Since the TV has speakers, I wanted to be able to use them for music. This is easily handled by installing Shairport, a Linux implementation of the Apple AirPlay streaming audio protocol. Googling found various instructions for installing it on the Pi, like this one. It's also possible to stream video with some of these, but that wasn't really useful for my application.
While I have it installed and running, it hasn't been very successful in general. It seems to connect, but doesn't play music and eventually just disconnects. I'm not quite sure what the problem is, but I haven't really looked into it much; it was more a neat feature to have, but not something I'd really tend to use.
UPDATE (June 2016): I decided to switch from Shairport to Shairport-Sync. I mostly did this because I thought my Shairport install was a problem, but it was really my wifi adaptor. It has some advantages over Shairport, but for my limited use that wasn't a huge change, although the metadata pipe poses some interesting future possibilities. I just had to remember to stop Shairport so that only one of these was running at a time.
VNC and OS X Finder Access
Another feature I set up was VNC, which allows me to screen share to the Pi from my Mac. It even shows up as a share on my network so that my Mac can mount it. I followed this tutorial, which covers how to install netatalk so that you can browse the file system from Finder, TightVNC for screen sharing, and Avahi (Bonjour) for discovery.
Note that logging in with VNC will show you the desktop, not the full-screen browser running over it for whatever reason.
Basic Magic Mirror Website Configuration
One thing I quickly learned is that Alt-F4 quits Chromium, much like how it closes windows on Windows. More usefully, F5 will reload the page, again just like on Windows. These are good to know when you want to tweak things and avoid rebooting the Pi all the time. You can also go through SSH and kill the process that way, but it's easier to use a keyboard and mouse hooked up to the mirror itself.
The first trick was to set the timezone, and automatically set the date and time through an NTP time server. For some reason this didn't happen during the installation process, which it is apparently supposed to do (the time zone bit at least). Some googling came across this thread, which had links on how to set things up, but it just boiled down to editing more files (yay, Linux).
Next I followed the instructions in the Magic Mirror config to change my location for the weather report, and changed the RSS feed to my local Boston NPR station's news feed. I wound up turning off the iCal calendar support entirely, as I couldn't find a good calendar to use for general holidays, and my own calendars are a mix of iCal and Google that don't really work well here.
Magic Mirror Website Customization
I decided to make a few tweaks to the website, beyond just the normal configuration features above. This took me a bit, since my Javascript is pretty rusty and predates JSON, AJAX and all that stuff, but since I already had the existing site it wasn't too hard to set up. Much of this was done after the mirror was mounted.
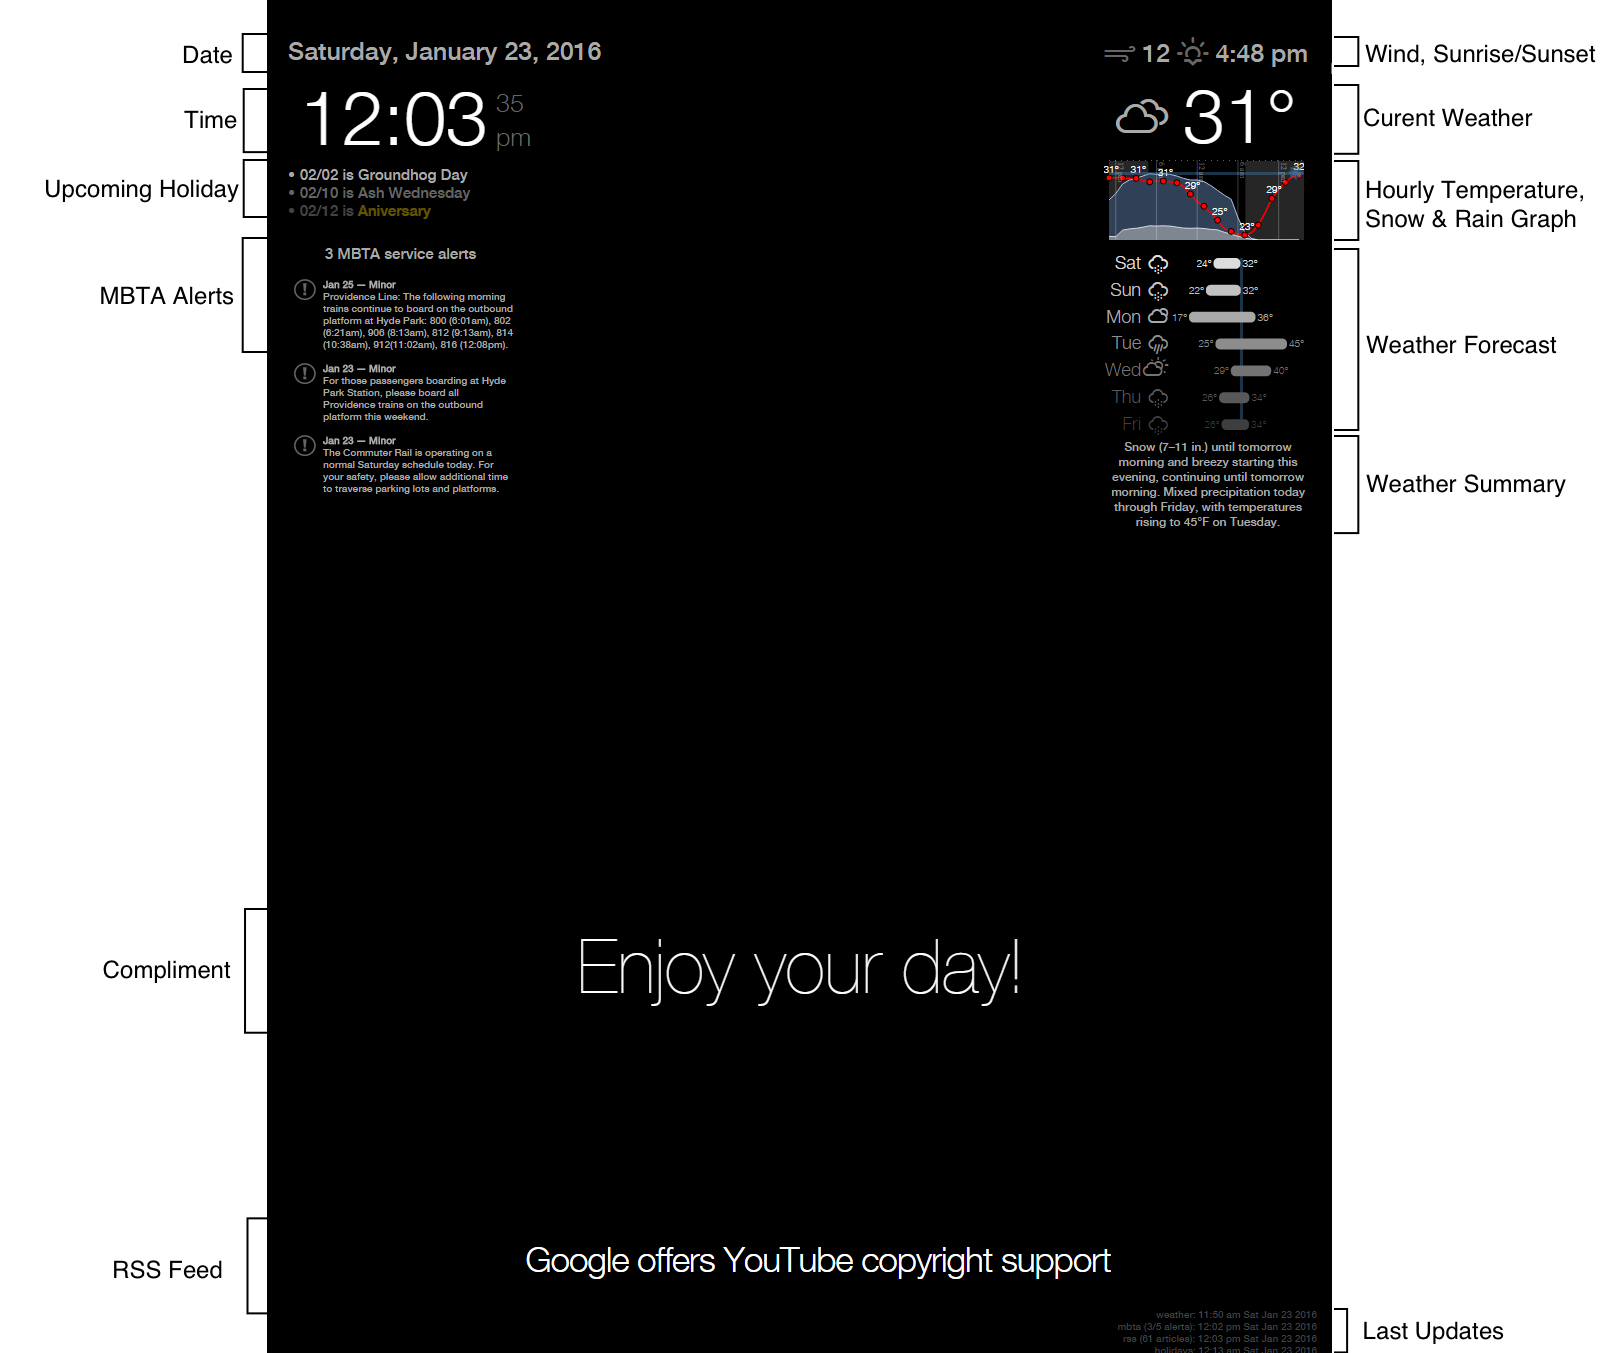
- Added basic localization so that the clock and other times can be displayed in 12 or 24 hour mode, as well as displaying temperatures in Celsius or Fahrenheit, with a configurable number of decimal places. Time changes were done through moment.js, which was already being used elsewhere in the mirror code but not for the current time for some reason.
- Switched the weather from OpenWeatherMap to Dark Sky's Forecast.IO. You need to create your own API key, which is very easy, and you get 1000 free requests per day, so I decided to get updates only every fifteen minutes instead of every minute to keep from abusing their service too badly. I also unified the code that gets the weather so that I only do one fetch instead of two separate ones for the forecast and current conditions. Unfortunately, this change took longer than expected, as forecast.io can't be accessed from Javascript directly due to cross site scripting protections in browsers. I wound up using the proxy.php from the unofficial forecast.io Javascript library, and directly accessing the JSON-generated object in my code.
- Added error recovery to the getJSON() calls so that it will try again if it couldn't get the state. Since the timer was previously only restarted on success, this would mean that if there was any failure, the weather and RSS would never be updated again. Re-arming the timer from the failure case fixes this.
- Inlined the RSS wrapper so that I could add a failure case. I'd have updated the old code, but my Javascript-fu isn't good enough to update the existing function.
- Added textual summaries of the day's and week's weather from Dark Sky as a block under the forecast.
- Added a graph of the temperature and chance of rain between the current temperature and the forecast table showing the next 30 hours with marks for freezing and "hot" (80 degree F) temperatures. I later added precipitation accumulation as a white filled area at the bottom of the graph, which is very handy if you're expecting snow. Lines every six hours and a slightly lighter background behind the daylight hours help indicate the time at different parts of the graph. The general presentation is similar to the Weather Underground iOS "Today" widget. Implemented using D3.js (added November 22nd, 2015).
- Replaced the weekly forecast table with a weekly weather bar graph based on the one in the Dark Sky iOS app. This again uses d3.js and has freezing and "hot" markers. The bar graph makes it easier to quickly see the temperature extents of the week and the relative temperatures across multiple days (added December 26th, 2015).
- Removed the decimal points from the temperatures, and adjusted table spacing to compensate for the now-narrower columns. I'm guessing that the fractional temperatures are probably more useful in celsius than fahrenheit.
- Added upcoming holidays and if today is a holiday via Holiday API. These are displayed just below the current time (added November 8th, 2015). Originally showing only one holiday, it was later refined to show the next three holidays (configurable), the ability to filter out holidays I don't care about by date or name (also configurable), and to add custom "holidays" drawn in gold (updated November 29th, 2015).
- Added weather specific "compliments" based on an idea from Neal Thomas. These are customizable through the config file, and are merged with the normal compliments. There are two sets, one based on the current weather by matching the weather icon string from Dark Sky, and one based on the average temperature over the next 12 hours. Multiple messages can be set for each temperature range and weather condition (updated January 23rd, 2016).
- Reduced the left and right margins, since my mirror extends well beyond the edges of the display itself.
- Moved the lower third down to more of a lower quarter, freeing up more of the center of the mirror for your reflection.
- Increased the RSS feed step delay so each headline stays on the screen a bit longer depending on its length (an extra 20ms per character).
- Added MBTA commuter rail alerts below the calendar block. This uses an MBTA API key, which grants 10000 requests per day. I only list the alerts for the line that Zoe uses to get to work each day. I again used the PHP proxy for the AJAX/JSON calls, since I couldn't figure out how to get JSONP to work here.
- Configurable alert times, which changes the clock to a different color and displays a message just above the holidays, such as "Hurry or you'll miss the train!"
My version of the source can be found on GitHub for anyone who wants to use it on their mirror. Many of the additions I've made are configurable from the same config.js as the original.
Disassembling the HDTV
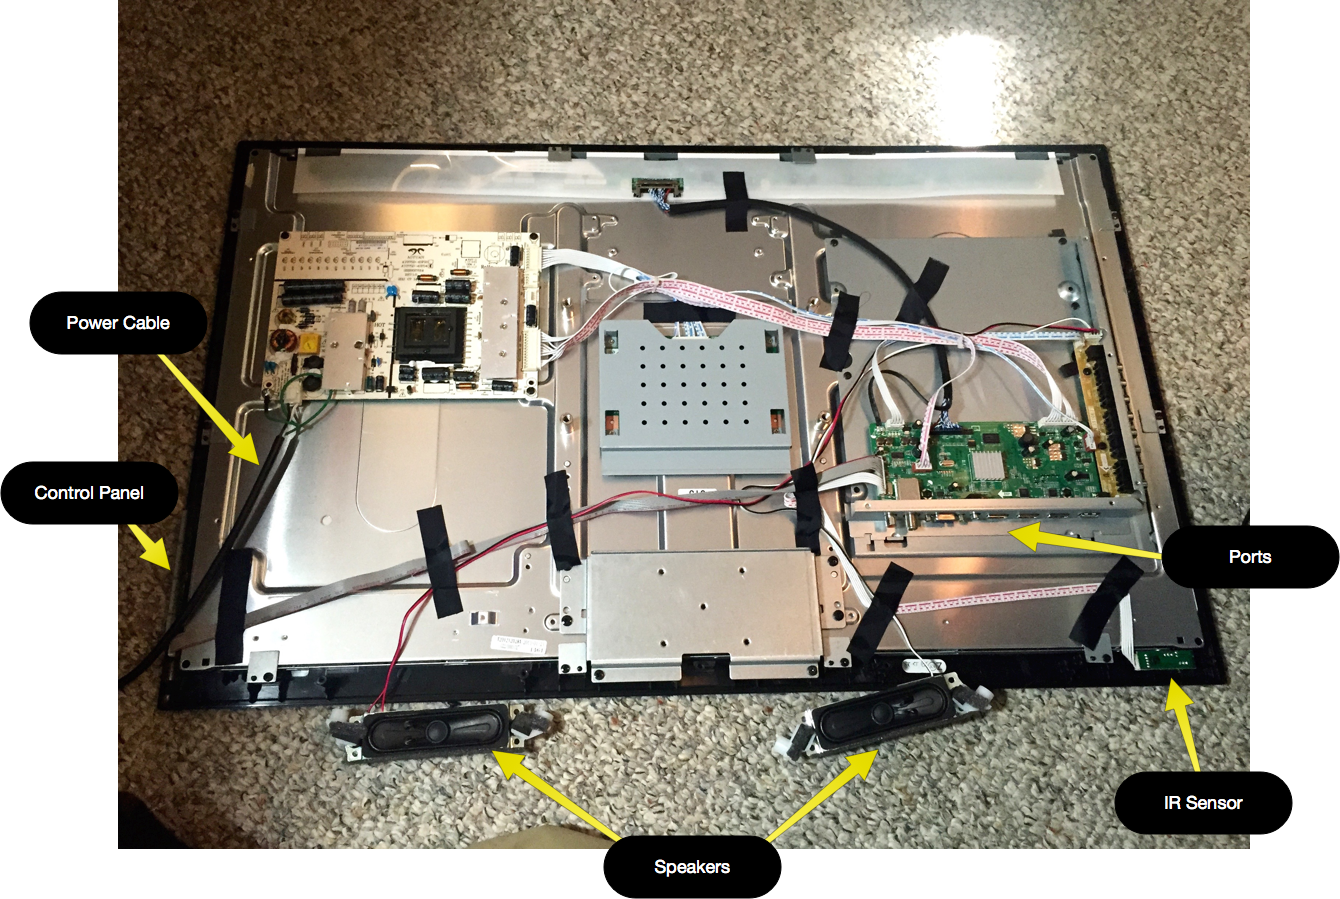
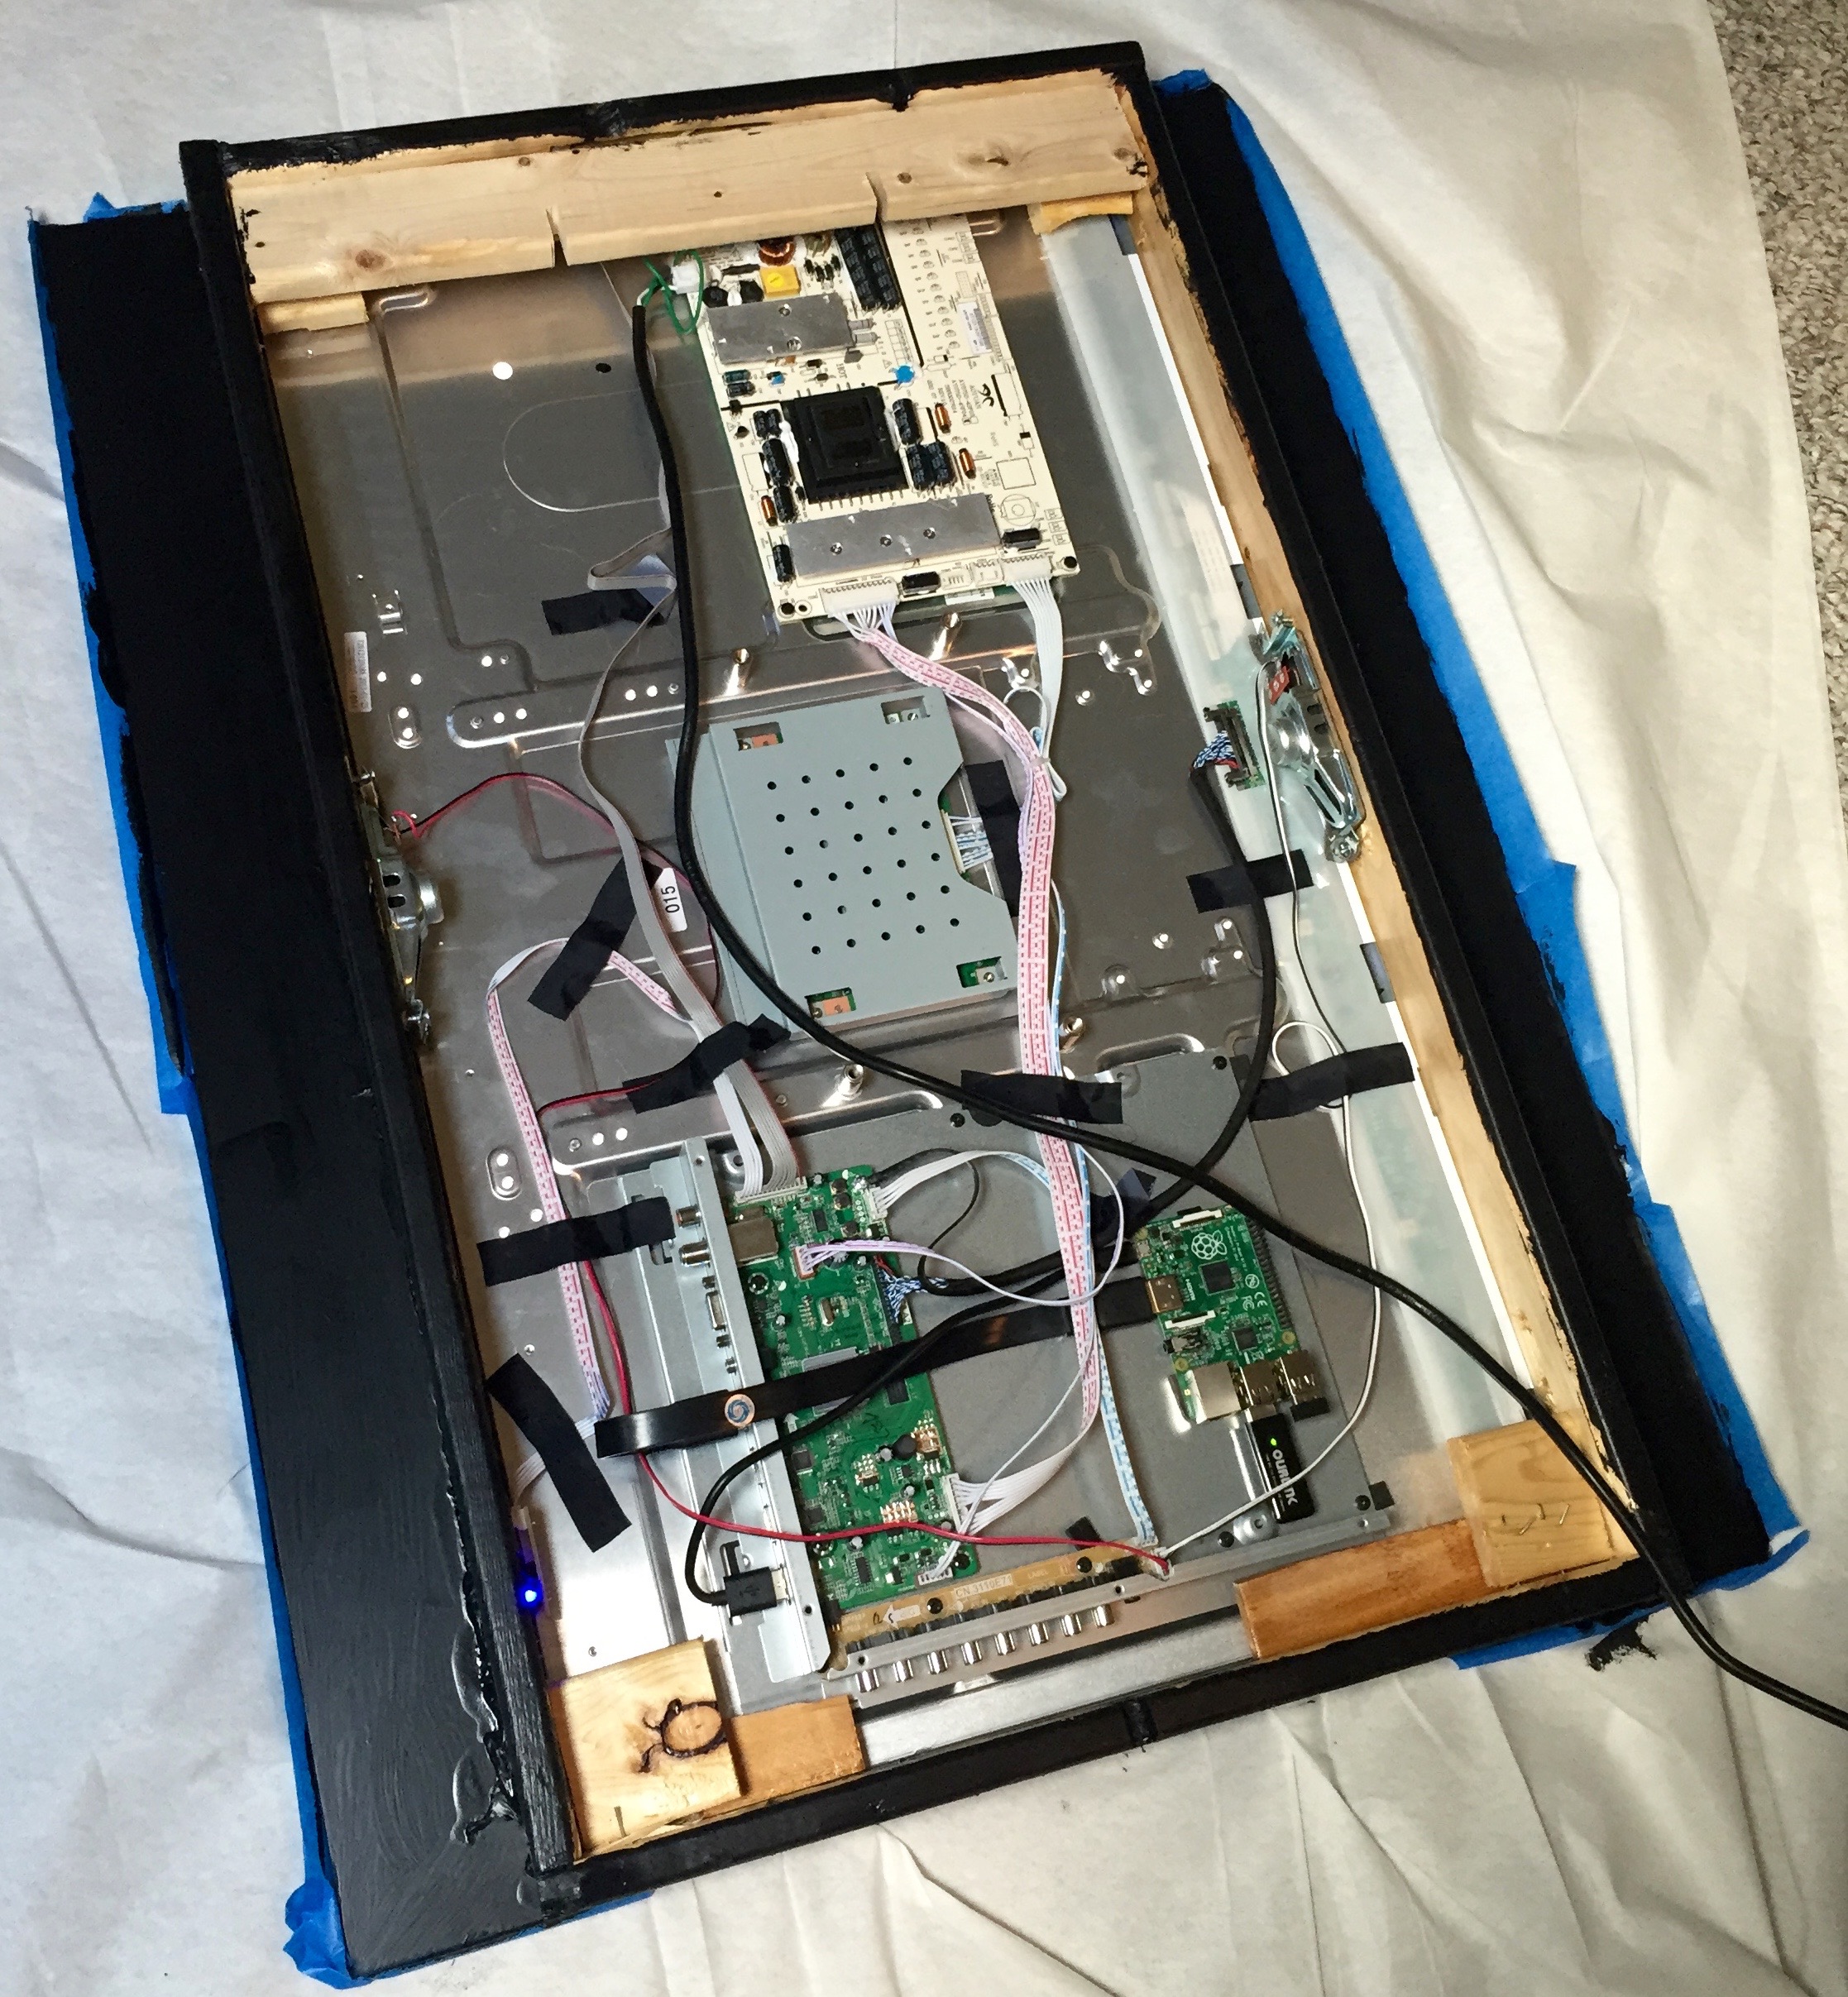
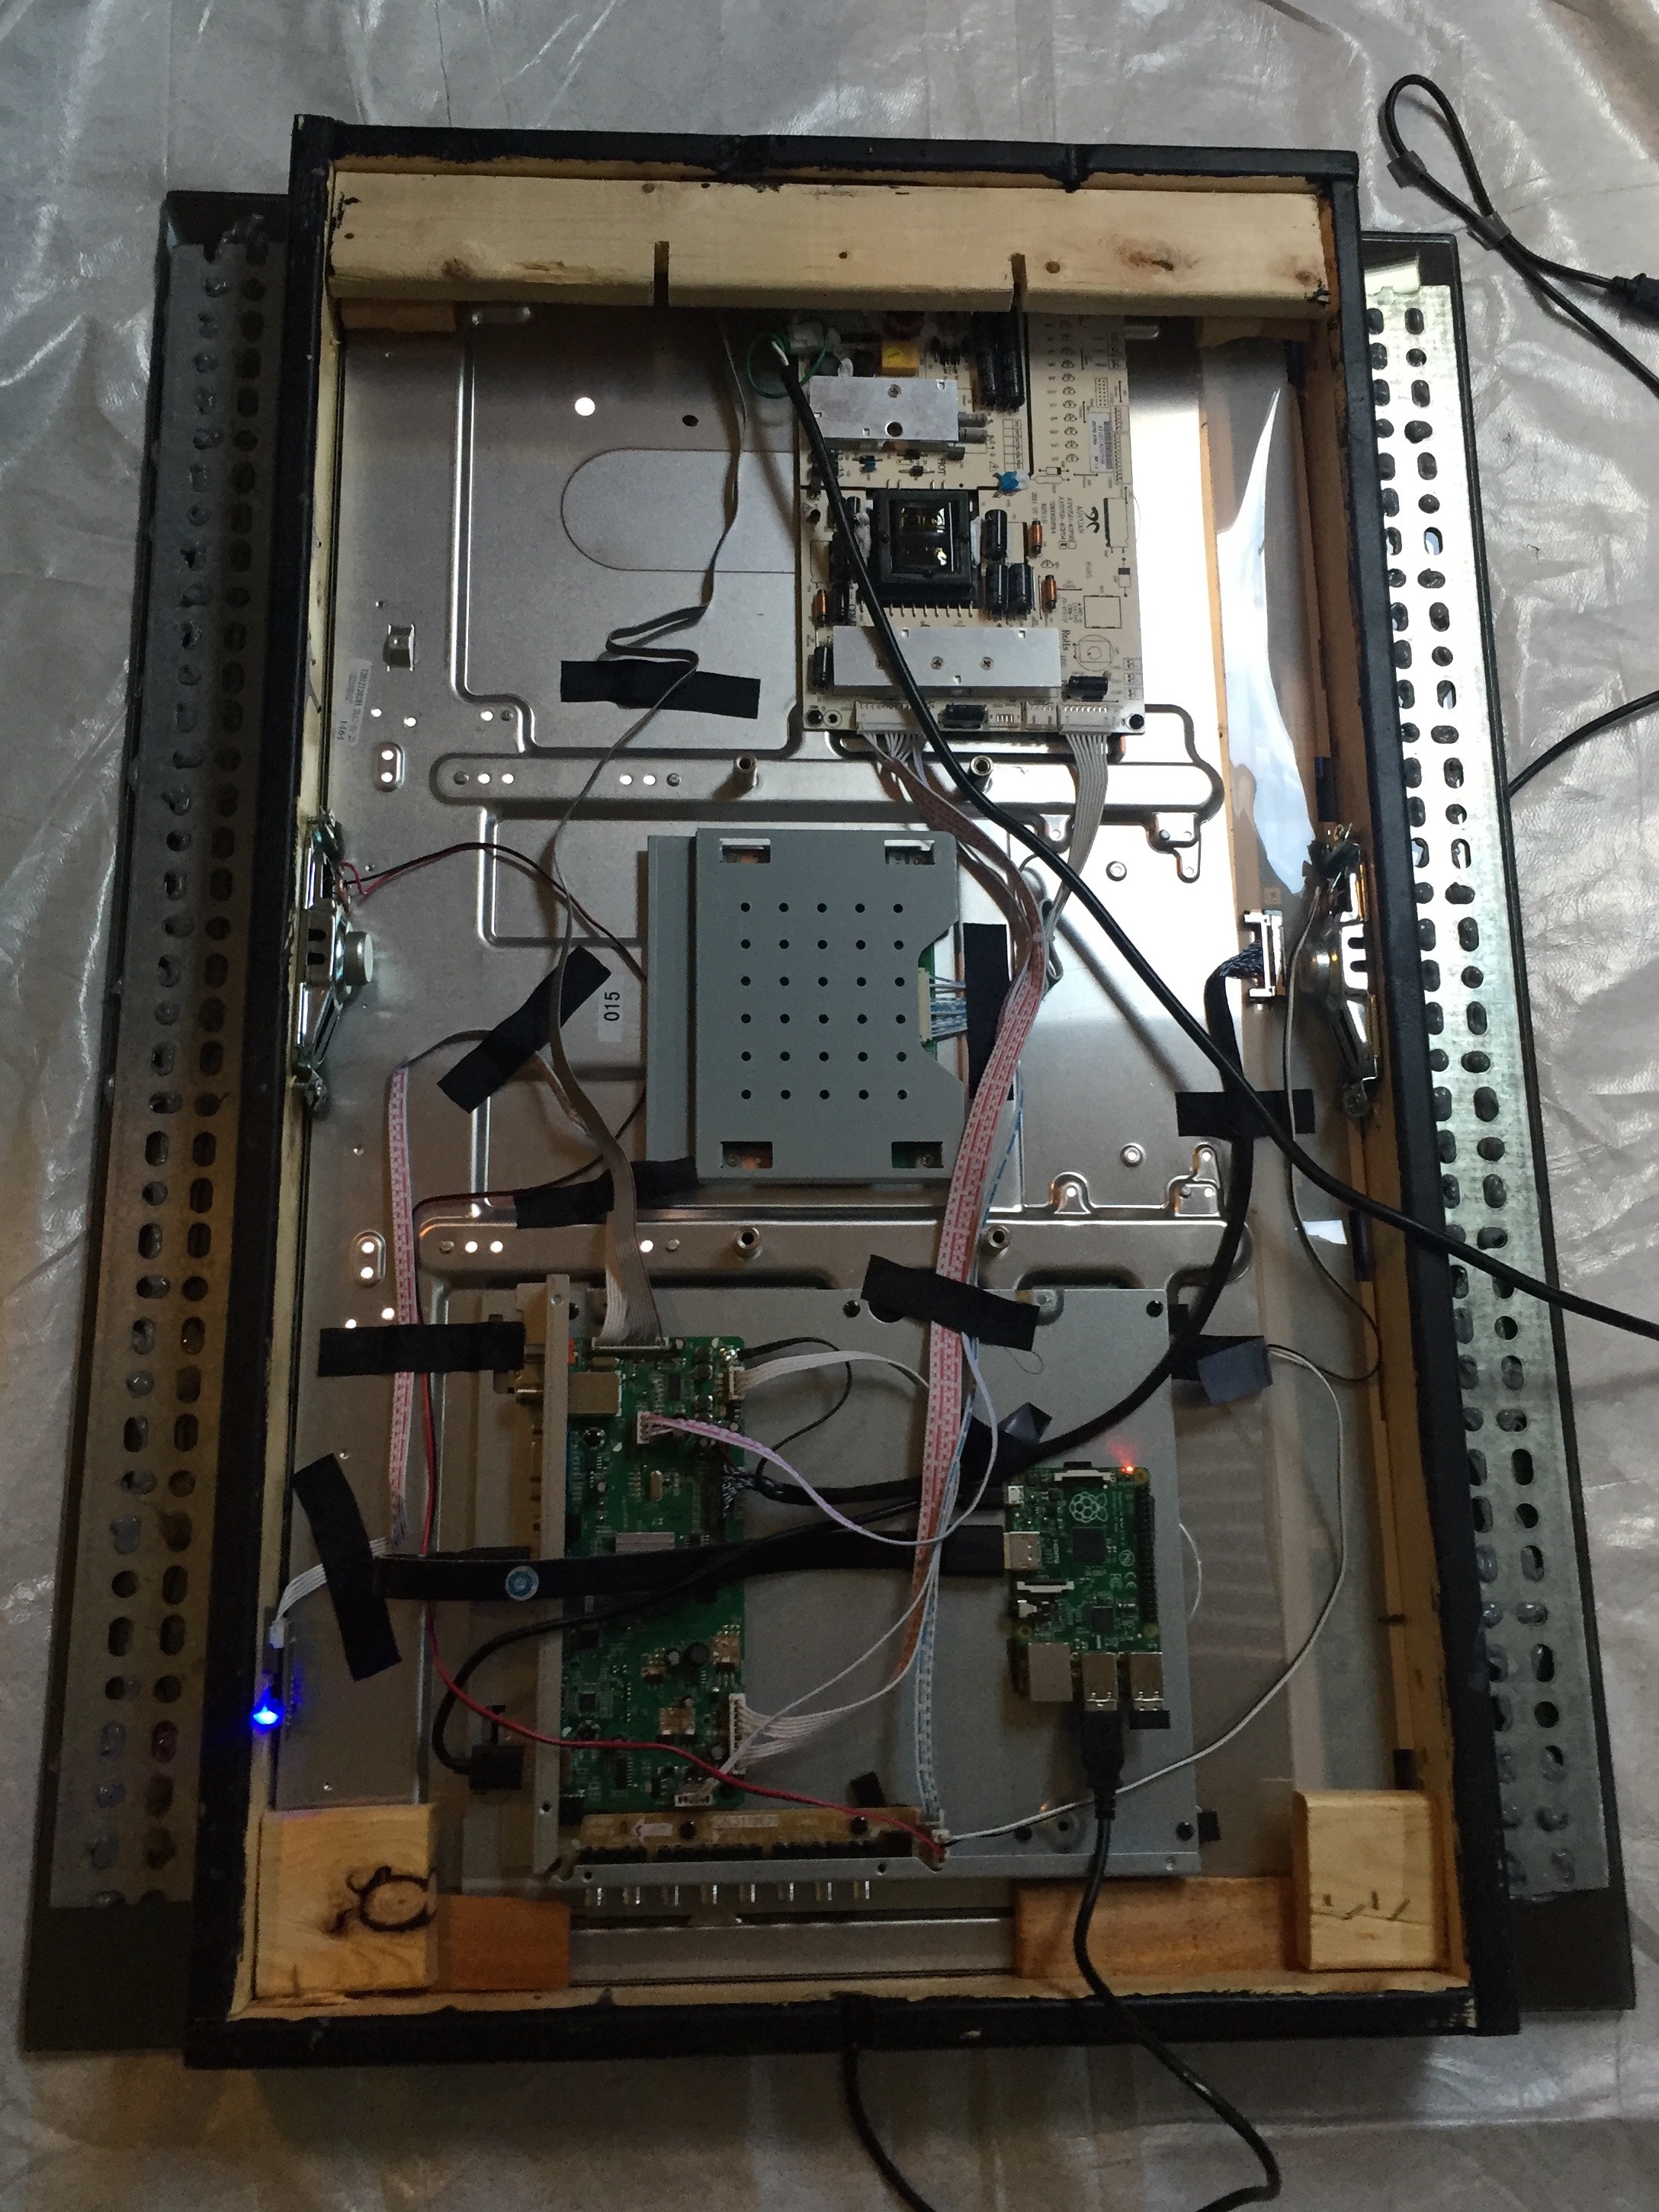
Again following Michael's advice, I took the entire case off of the HDTV to remove bulk and to ensure that the glass sat as close to the display as possible. This included a rather sizable number of Phillips screws. The screen was further held to the case with screwed-in metal clips.
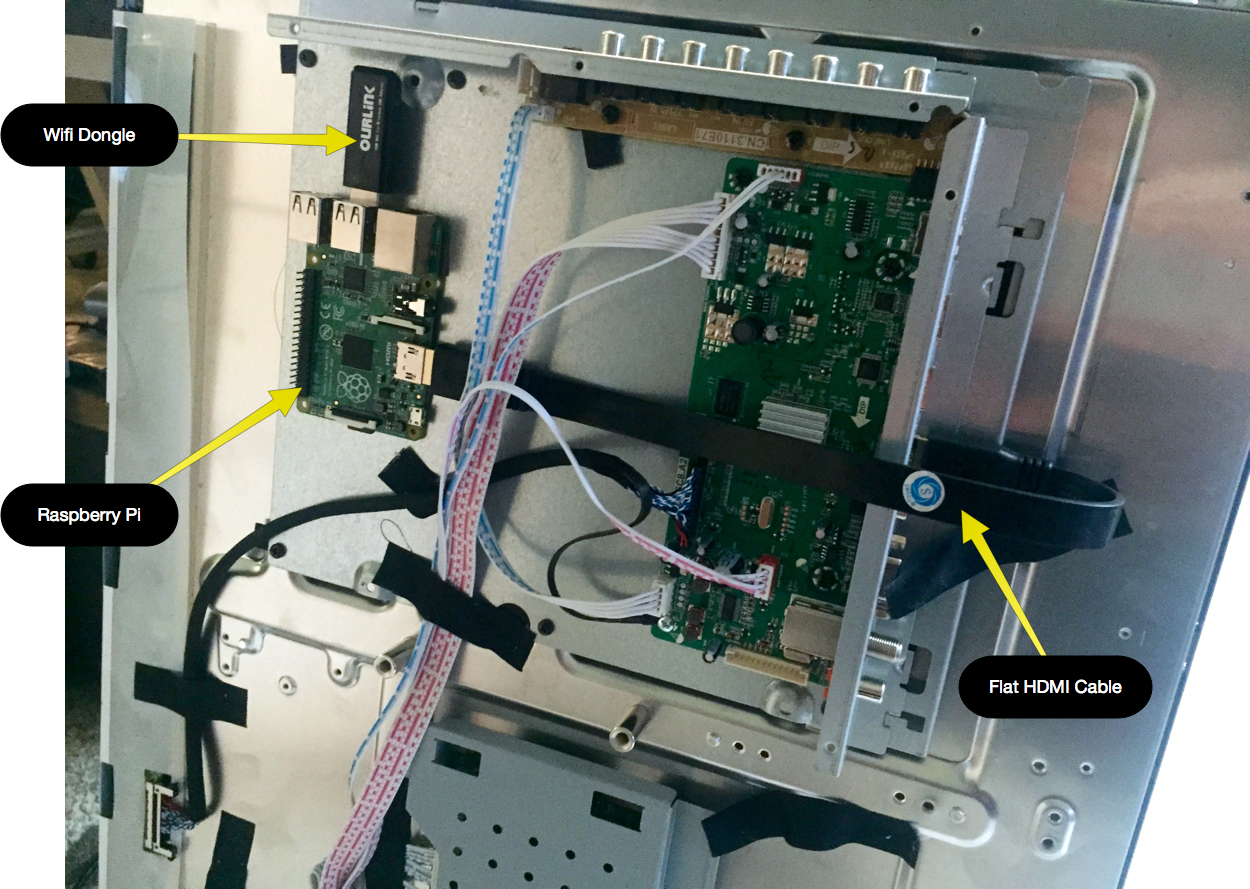
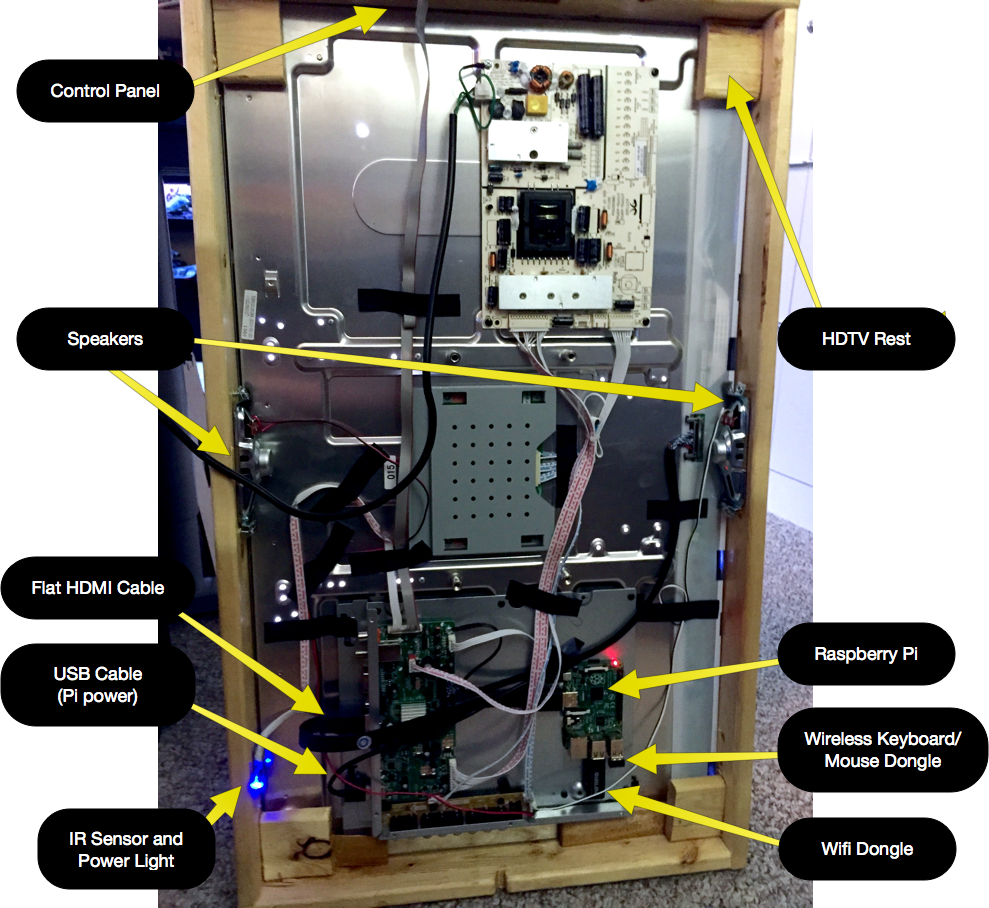
This TV used quite a lot of extra wire for the speakers, IR sensor and control panel. The wires were held in place with tape and plugged into the boards with easy to remove connectors. This was all quite advantageous, as it meant I could reposition all of those for use later on.
Mounting the Raspberry Pi
The Pi setup was pretty straight forward. You do need a keyboard and mouse plugged into the Pi for setup. Initially I used a spare Windows USB keyboard and mouse I had lying around, but later I bought a wireless EagleTech set that used a single USB dongle for both the devices.
The USB wifi adaptor just plugs into one of the USB ports. If for some reason the keyboard won't work, swap the ports that the wifi and keyboard are plugged into. This seems to be a somewhat common problem for some reason.
Note that I later learned that this was a bad place for the wifi antenna, since it's basically surrounded by metal. I later used a USB extension cord to move the dongle to the edge of the case, significantly improving the signal.
The Pi was attached to the back of the TV with 3M VHB tape. This stuff is fairly thick, flexible, has a very strong adhesive, and is electrically non-conductive. The tape both held it to the monitor and kept it from shorting against the TV's metal back.
Building the Case
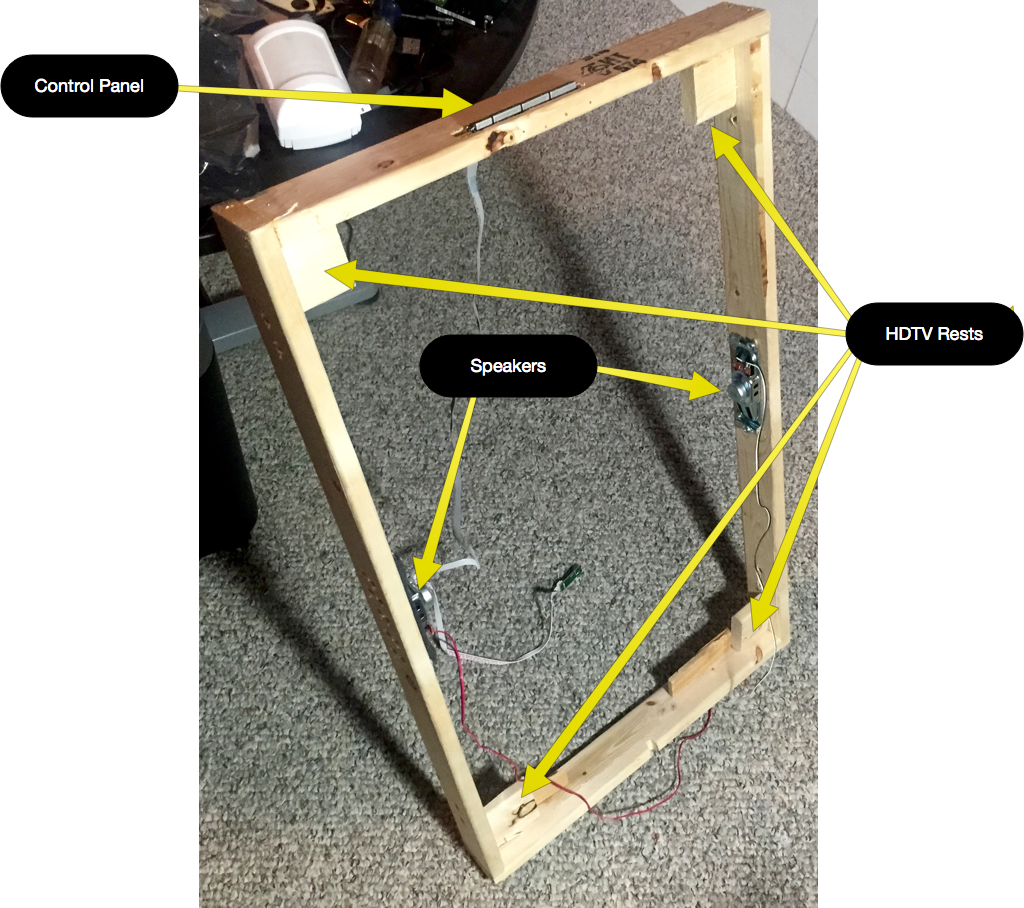
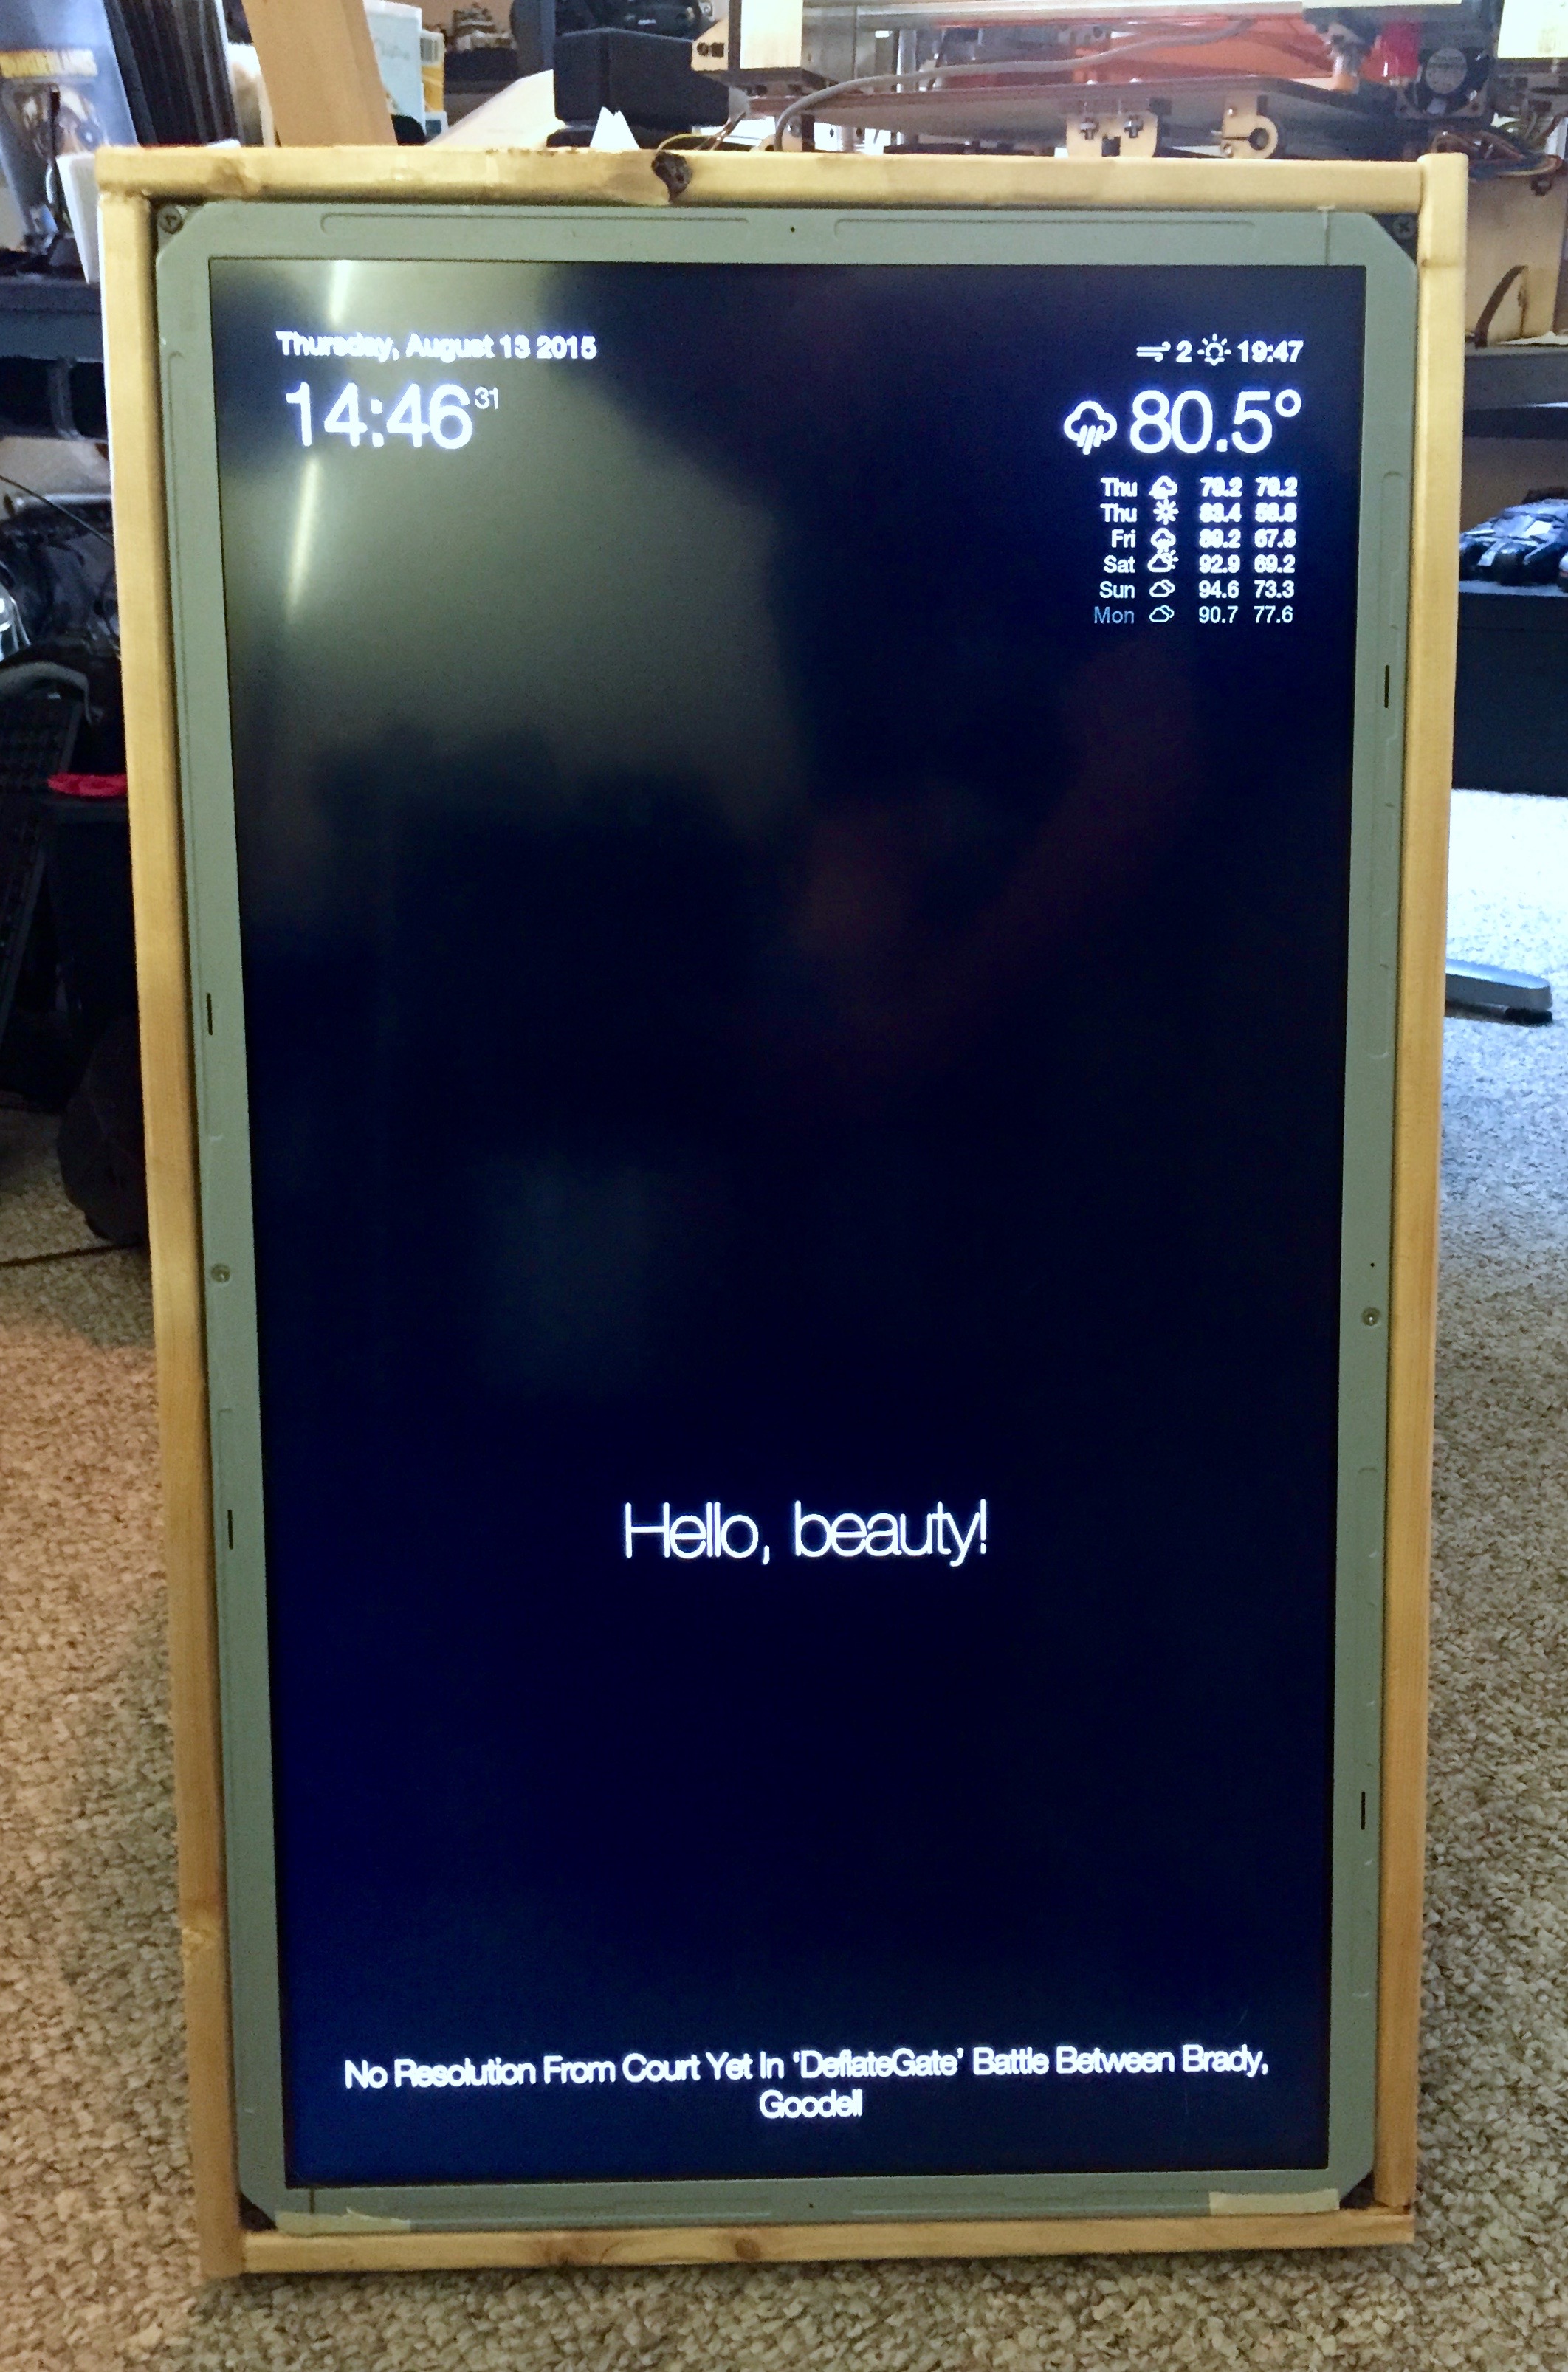
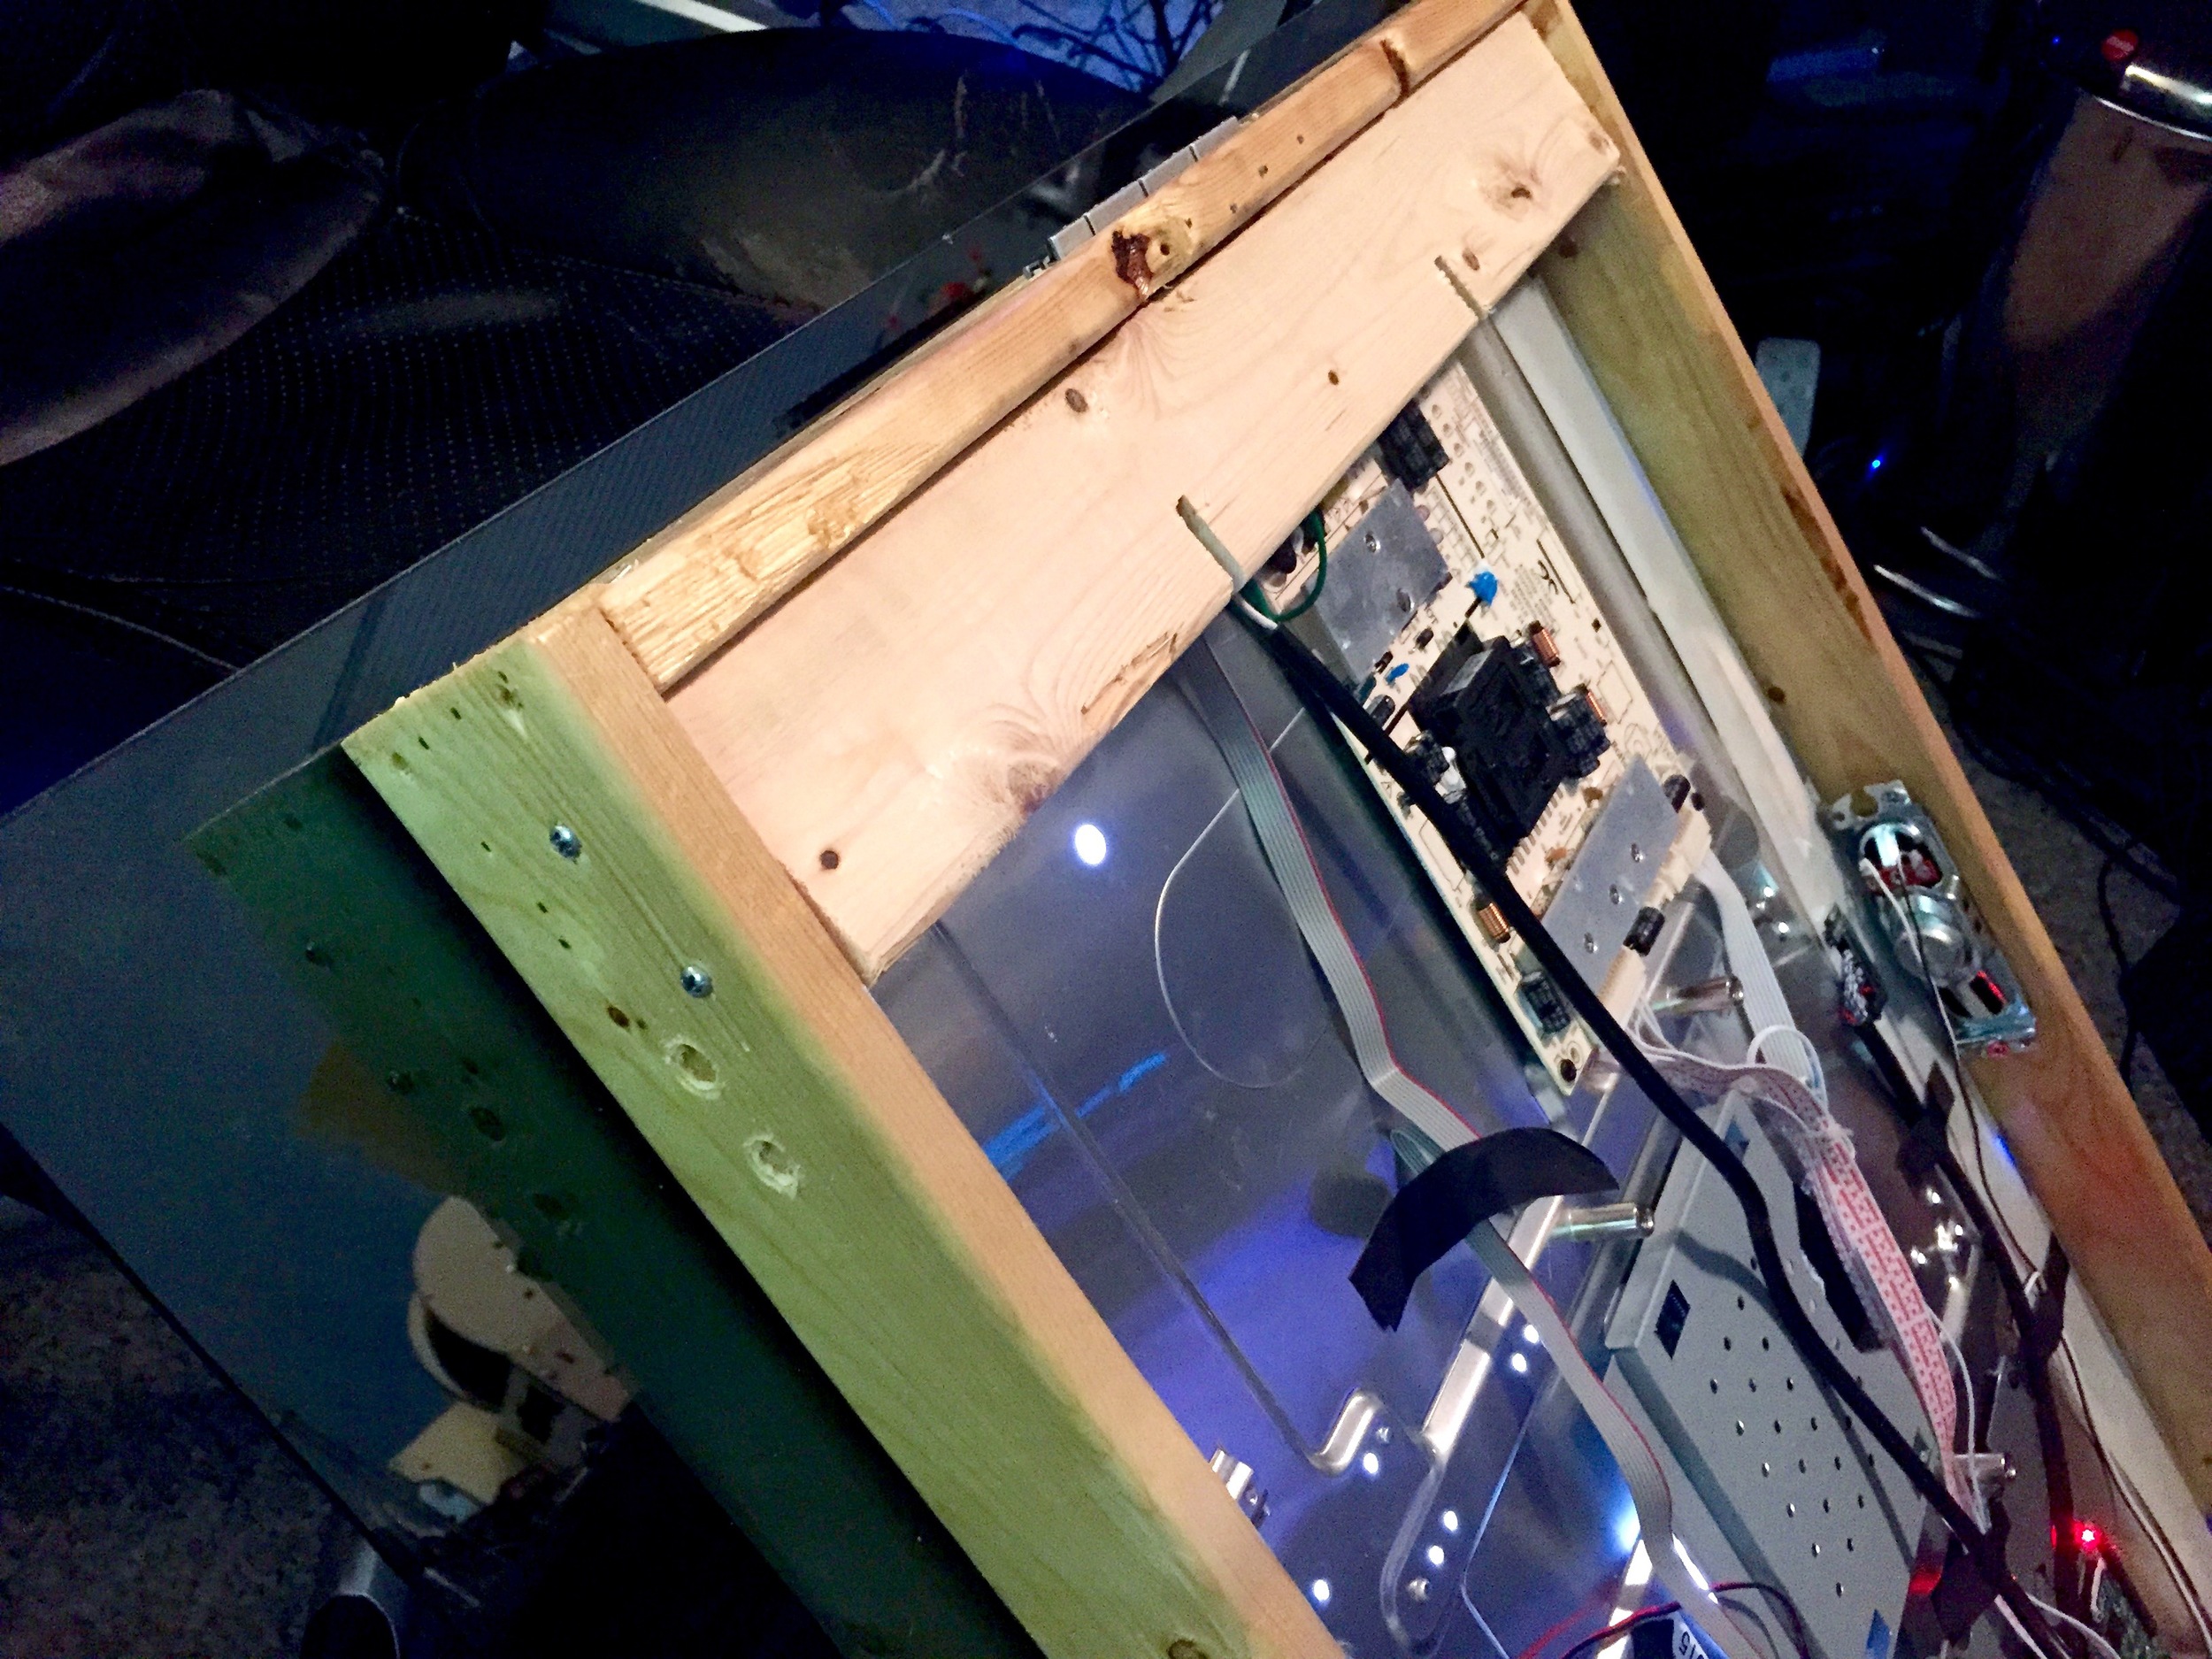
Since my case wasn't going to be visible, I could be pretty crude with its construction. I bought two eight foot long one-by-threes from Home Depot, cut them with flat ends and screwed them together. I used sheetrock screws, which are really not the right kind of screw and split the wood, so I put some brad nails in and removed the screws. I was worried about the strength of the nails, so I poured wood glue between the pieces and held them together for a couple of minutes by hand to ensure that they wouldn't go anywhere.
I built the case pretty tight, to the point that it was actually difficult to seat one edge of the display. To make sure the monitor stayed put and flush against the mirror, I followed Michael's lead and cut four squares out of the 1x3s to create corner shelves that the monitor would rest against, nailing them in place from the sides. I also screwed the TV into these from the front, as there were convenient mounting holes in the corners of the display's metal frame.
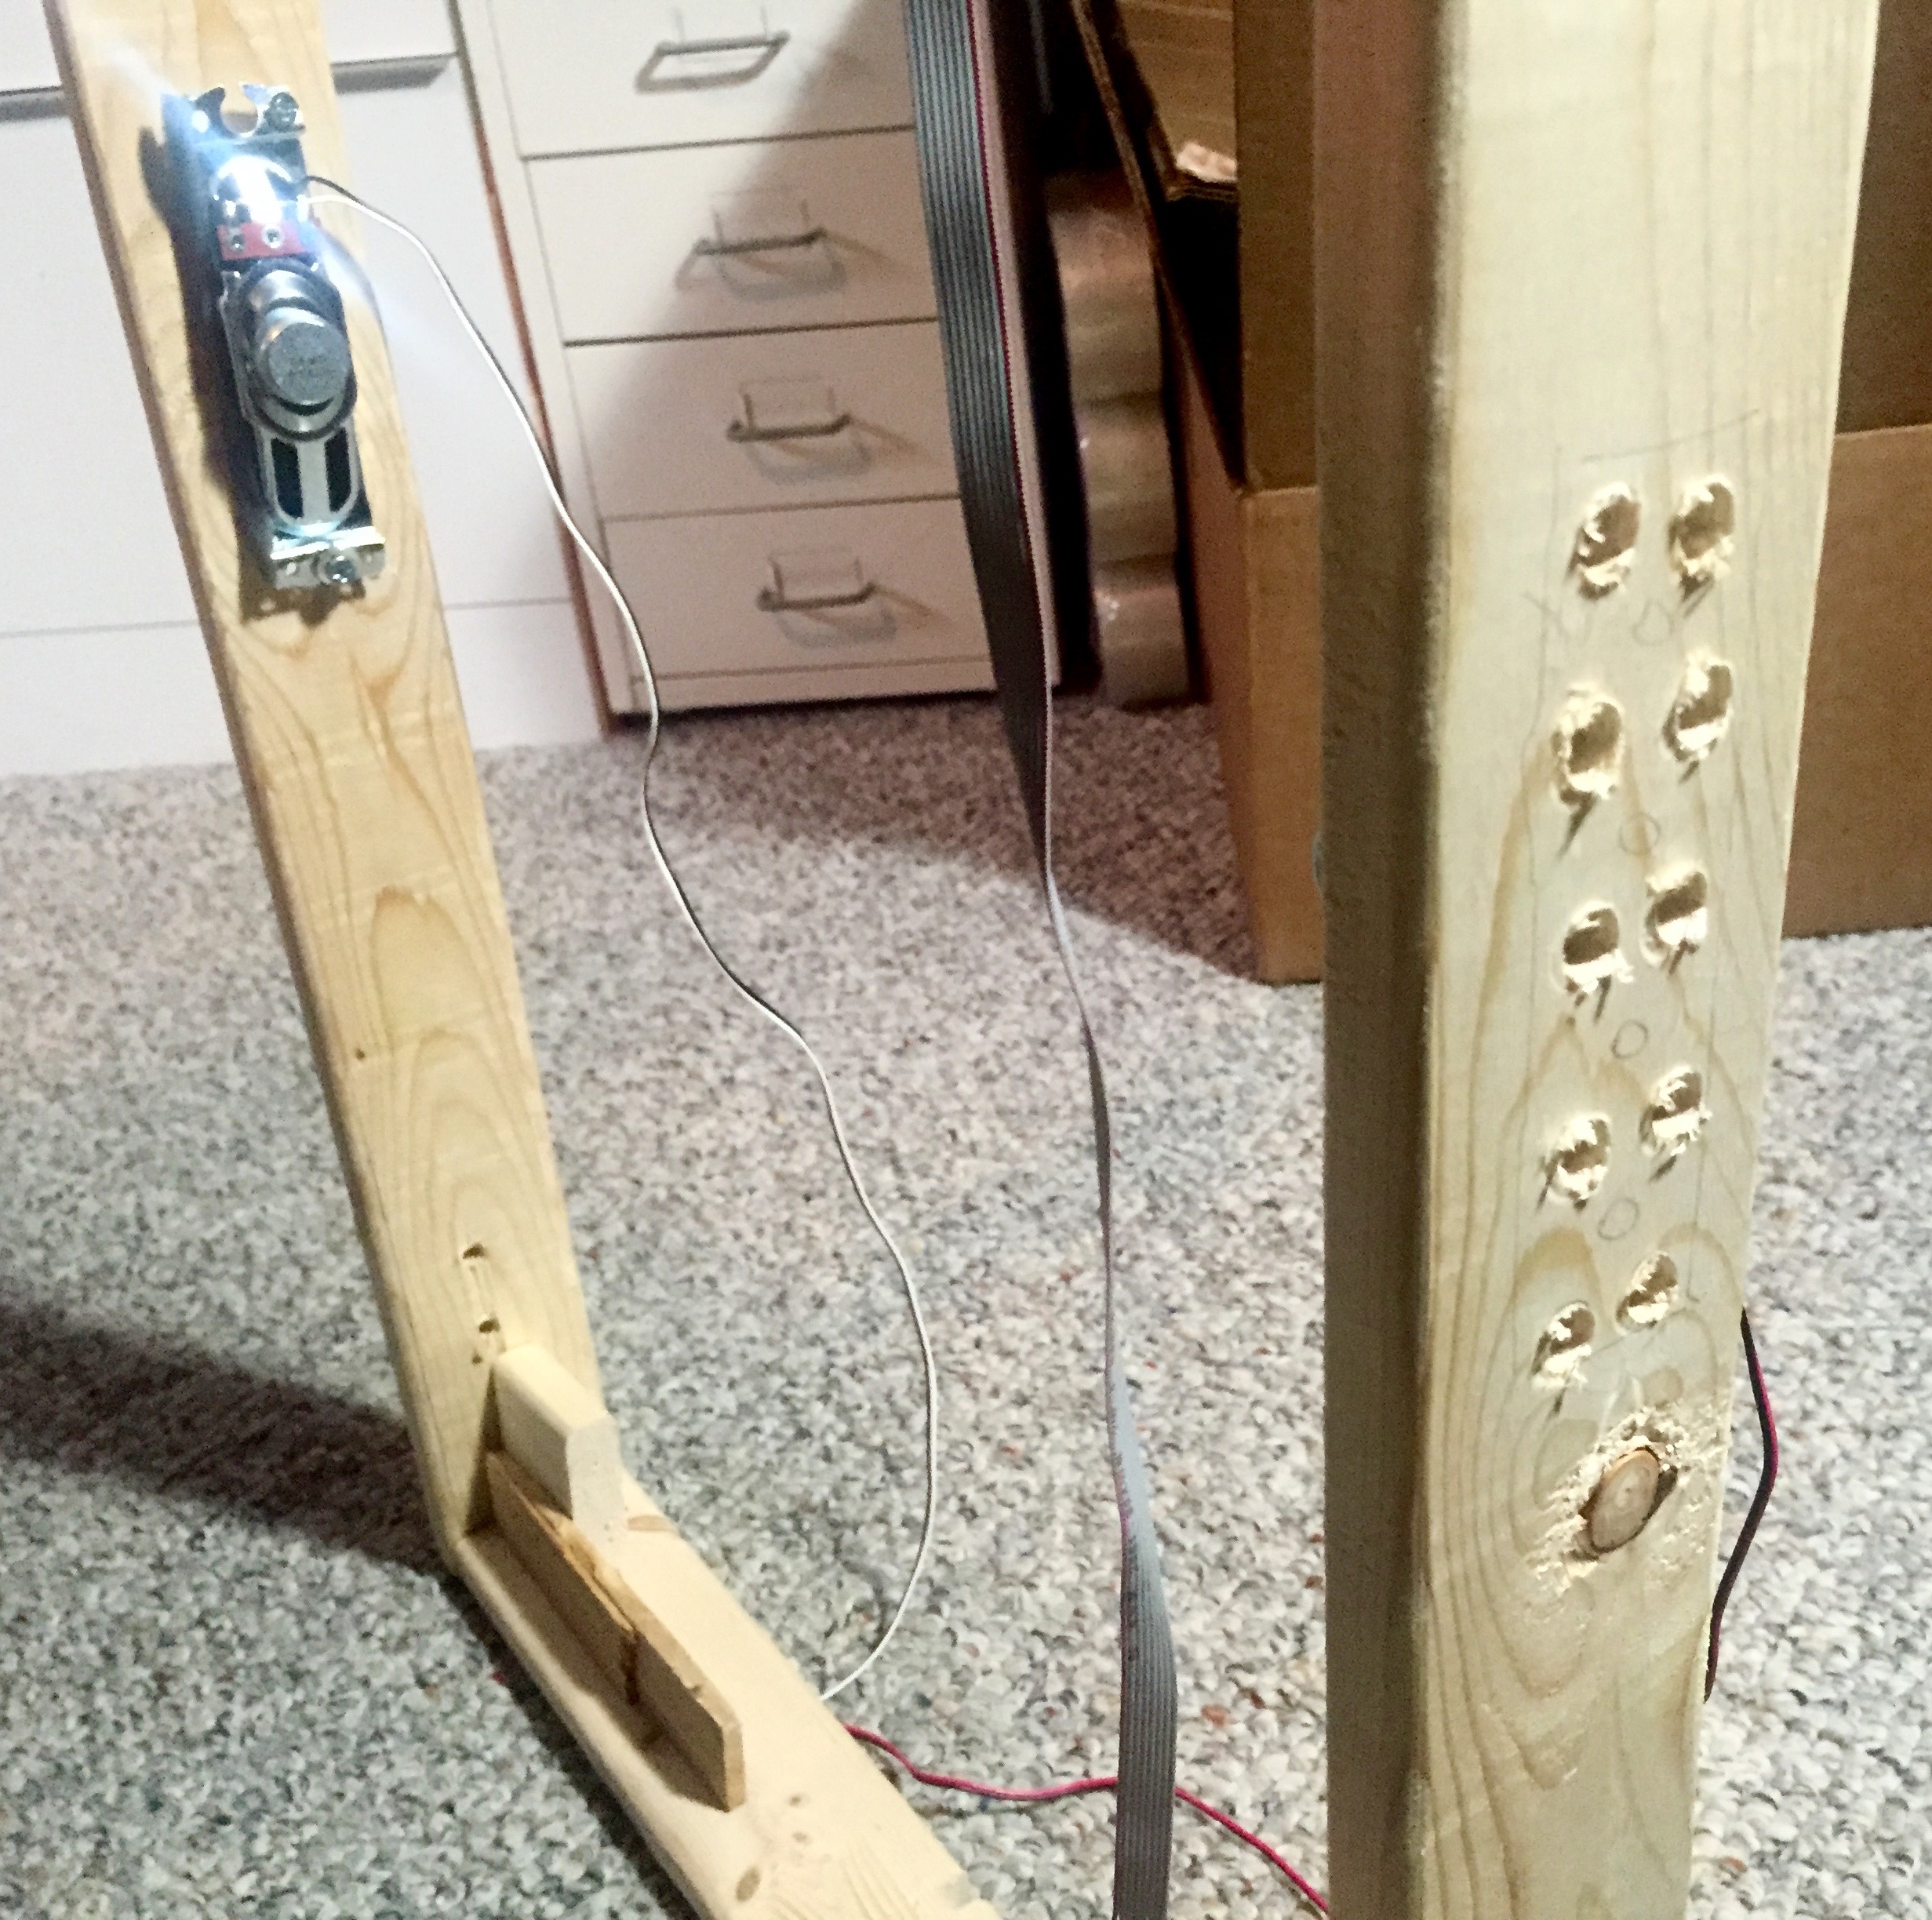
I also wanted to use the speakers, so I placed each speaker against the side of the case, about halfway up, and traced it with a pencil. I then drilled a half dozen poorly-aligned holes in two columns so that sound could escape the frame. The speakers were easily screwed into the inside of the frame behind the holes. I drilled two more holes at the top and bottom edges of each side of the frame to provide some ventilation, as the LCD does get pretty warm and I didn't want it to overheat.
I decided to also expose the TV's control panel and IR sensor, just in case I needed it. I used a drill and a jigsaw to cut a rectangular hole in the top edge of the case, where you wouldn't really be able to see it. I kept the panel from falling through by just putting some nails through the wood, creating a shelf of sorts. For the IR sensor, I just aligned it with one of the ventilation holes on the bottom of the case and held it in place with VHB tape.
To mount it to the wall, I did something similar to what Michael did, cutting two slots out of a piece of 1x3 and nailing it to the back of the frame. I tilted it slightly so that when it was placed on its mounting bolts it would snug closer to the wall. In practice, I couldn't tilt it very much due to how thin the frame was, but it worked well enough.
Since this was going in a bathroom, I decided to apply a couple coats of polyurethane to keep the wood from being damaged by the water and humidity, just in case.
Sourcing and Attaching the Two Way Mirror
Two way mirrors aren't super easy to come across. I did some quick googling for observation glass near me, but didn't really find anything. I decided to go online, ordering my glass from www.twowaymirrors.com. For my roughly 3:4 aspect, I ordered a mirror that was 24" by 31" (anything larger than this caused the price to nearly double). It was the most expensive part of this project, in part due to the shipping cost -- $90 to get it to me via FedEx. I expect much of that was due to the need to build a special foam-filled box to transport it.
To glue the mirror to the front of the frame, I bought black CRL Gunther Mirror Mastic, as recommended by twowaymirrors.com. I got it in a tube that fits in a caulk gun. My main concern with strength was that normally you can apply glue to the entire back of the mirror before you stick it to the wall, but I could only apply it around where the frame would meet the mirror, since otherwise I'd be blocking the screen. Still, this stuff is strong, and it had no problem holding the mirror in place. I also used it to fill in the gaps between the monitor and the frame to ensure that no light leaked in from the back. The mastic itself is black and opaque, so it completely blocks any light where it is applied.
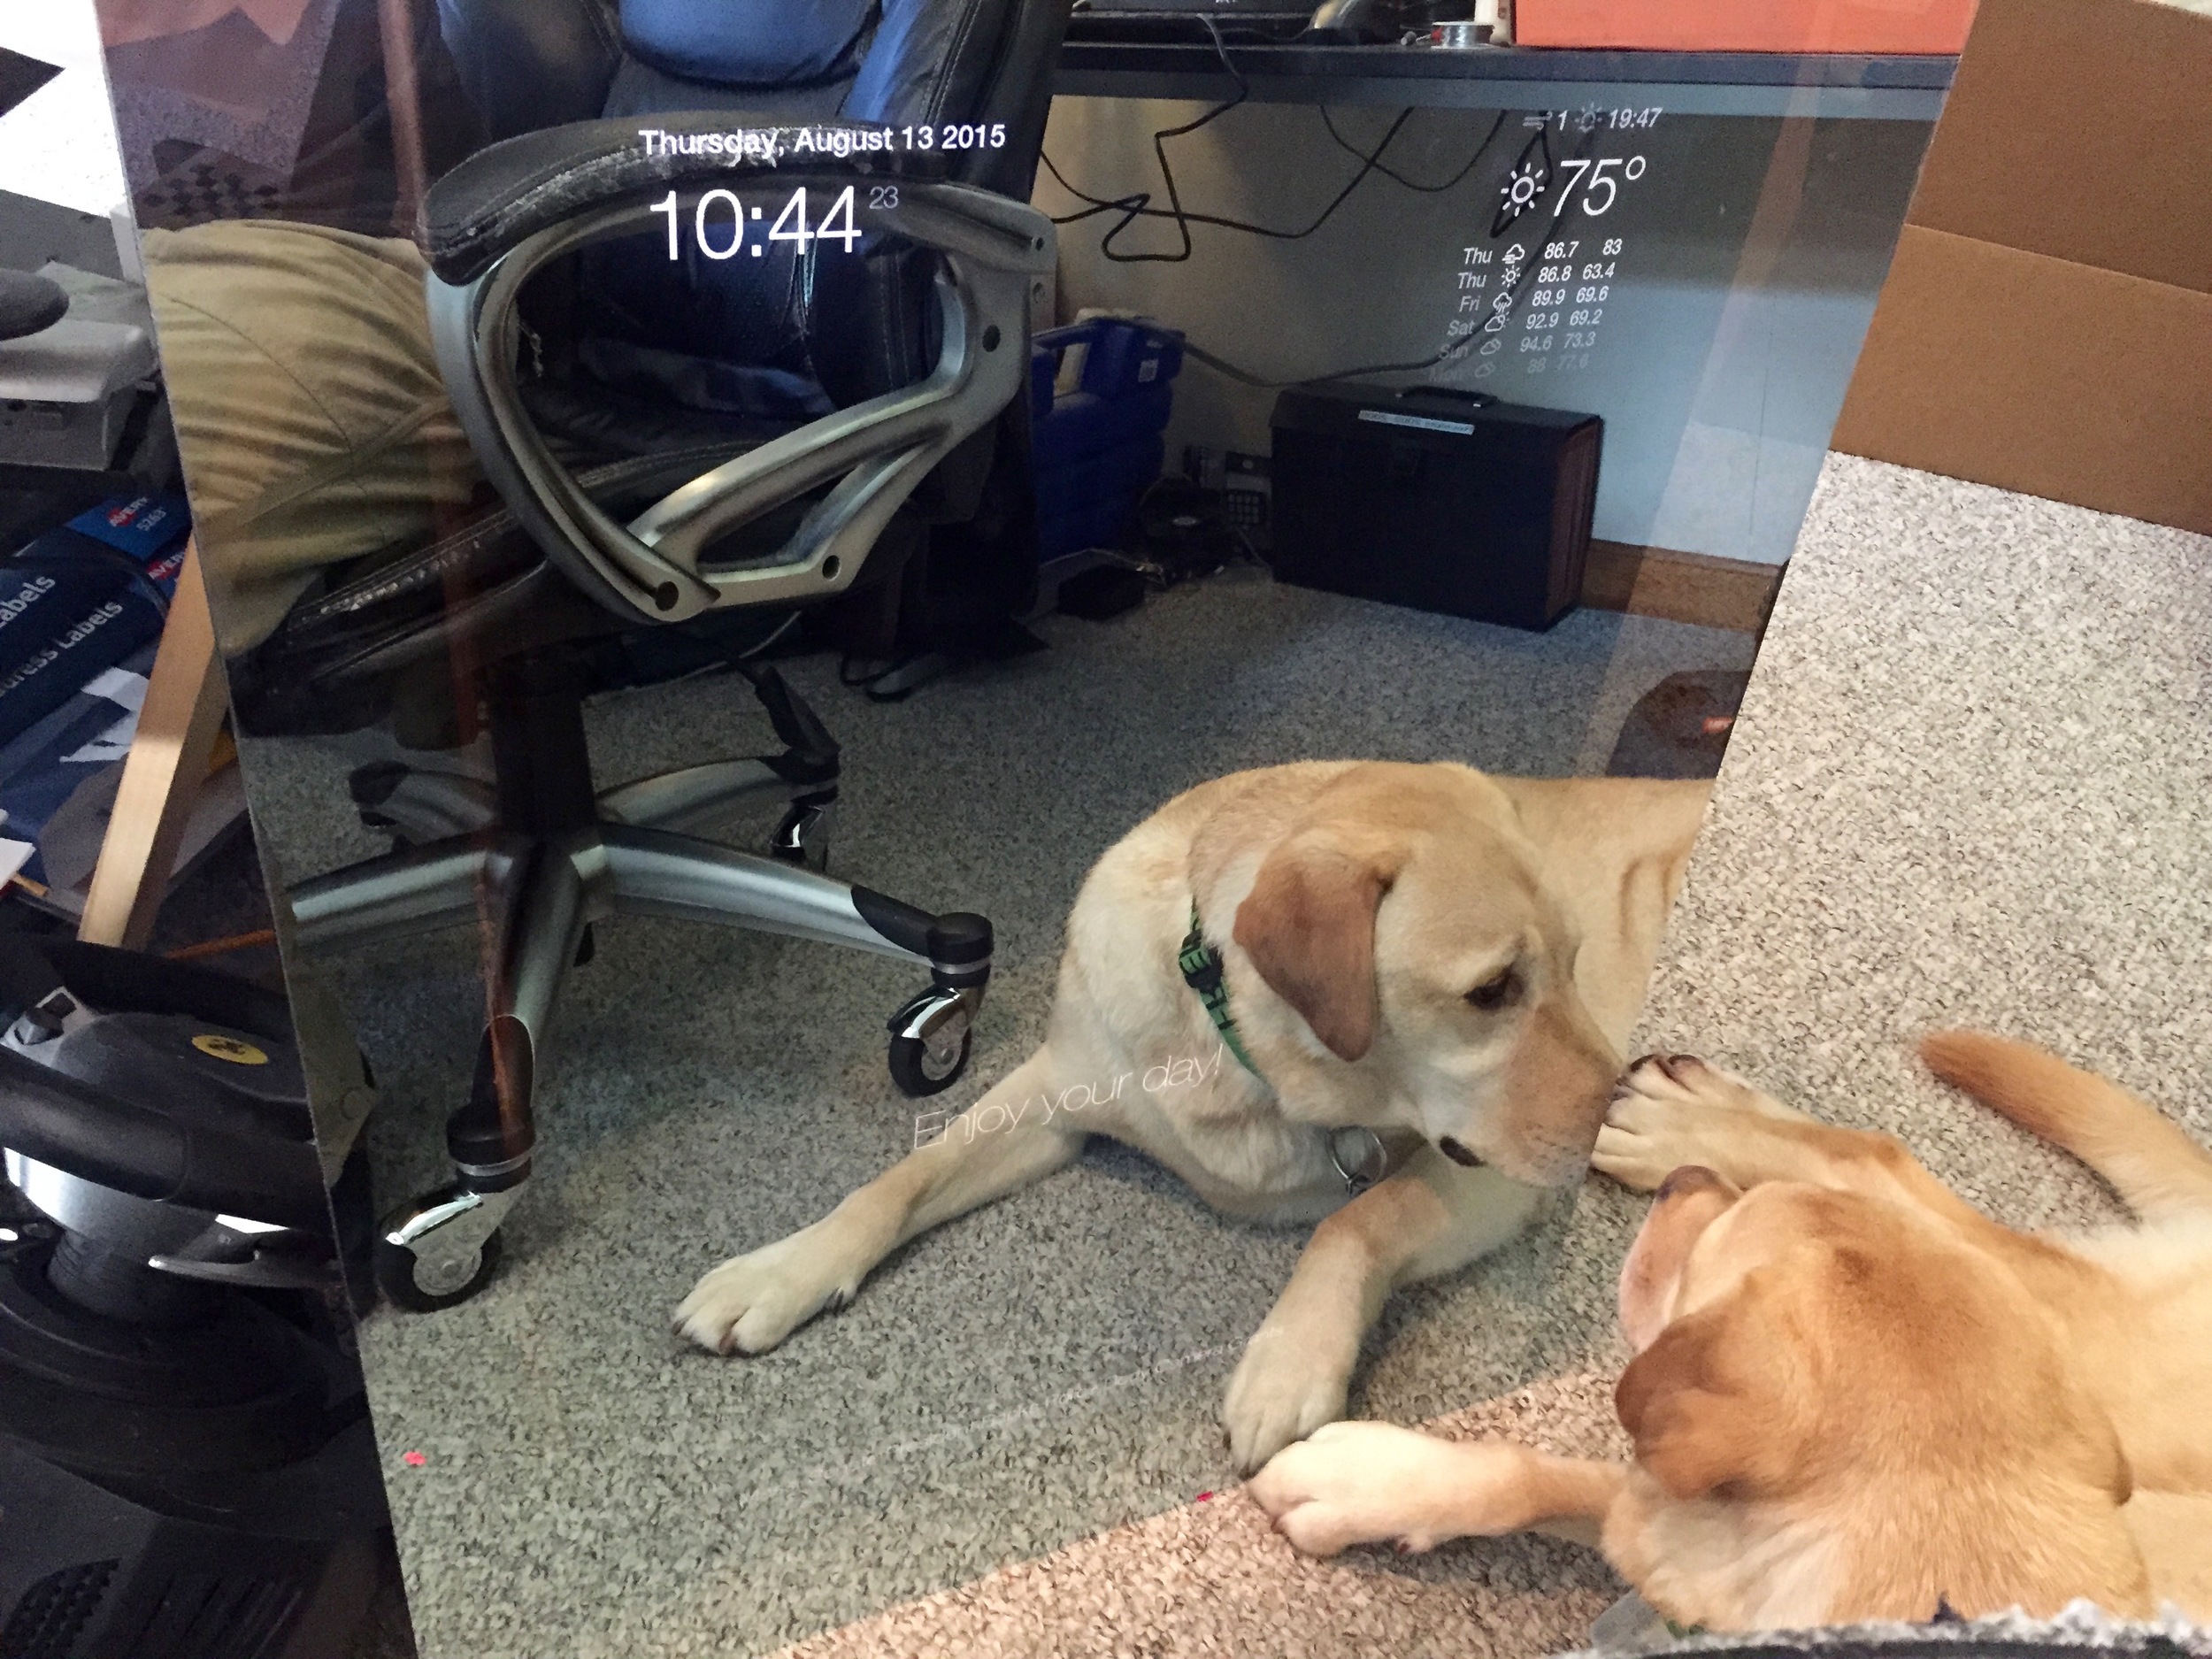
I spent a lot of time making sure both the back of the mirror and the screen were as clean as I could make them. I later found out this wasn't nearly as important as I had expected, as anything dark will simply show the reflection instead. Even scratches on the display are basically invisible once the mirror is mounted, as the vast majority of the screen is black.
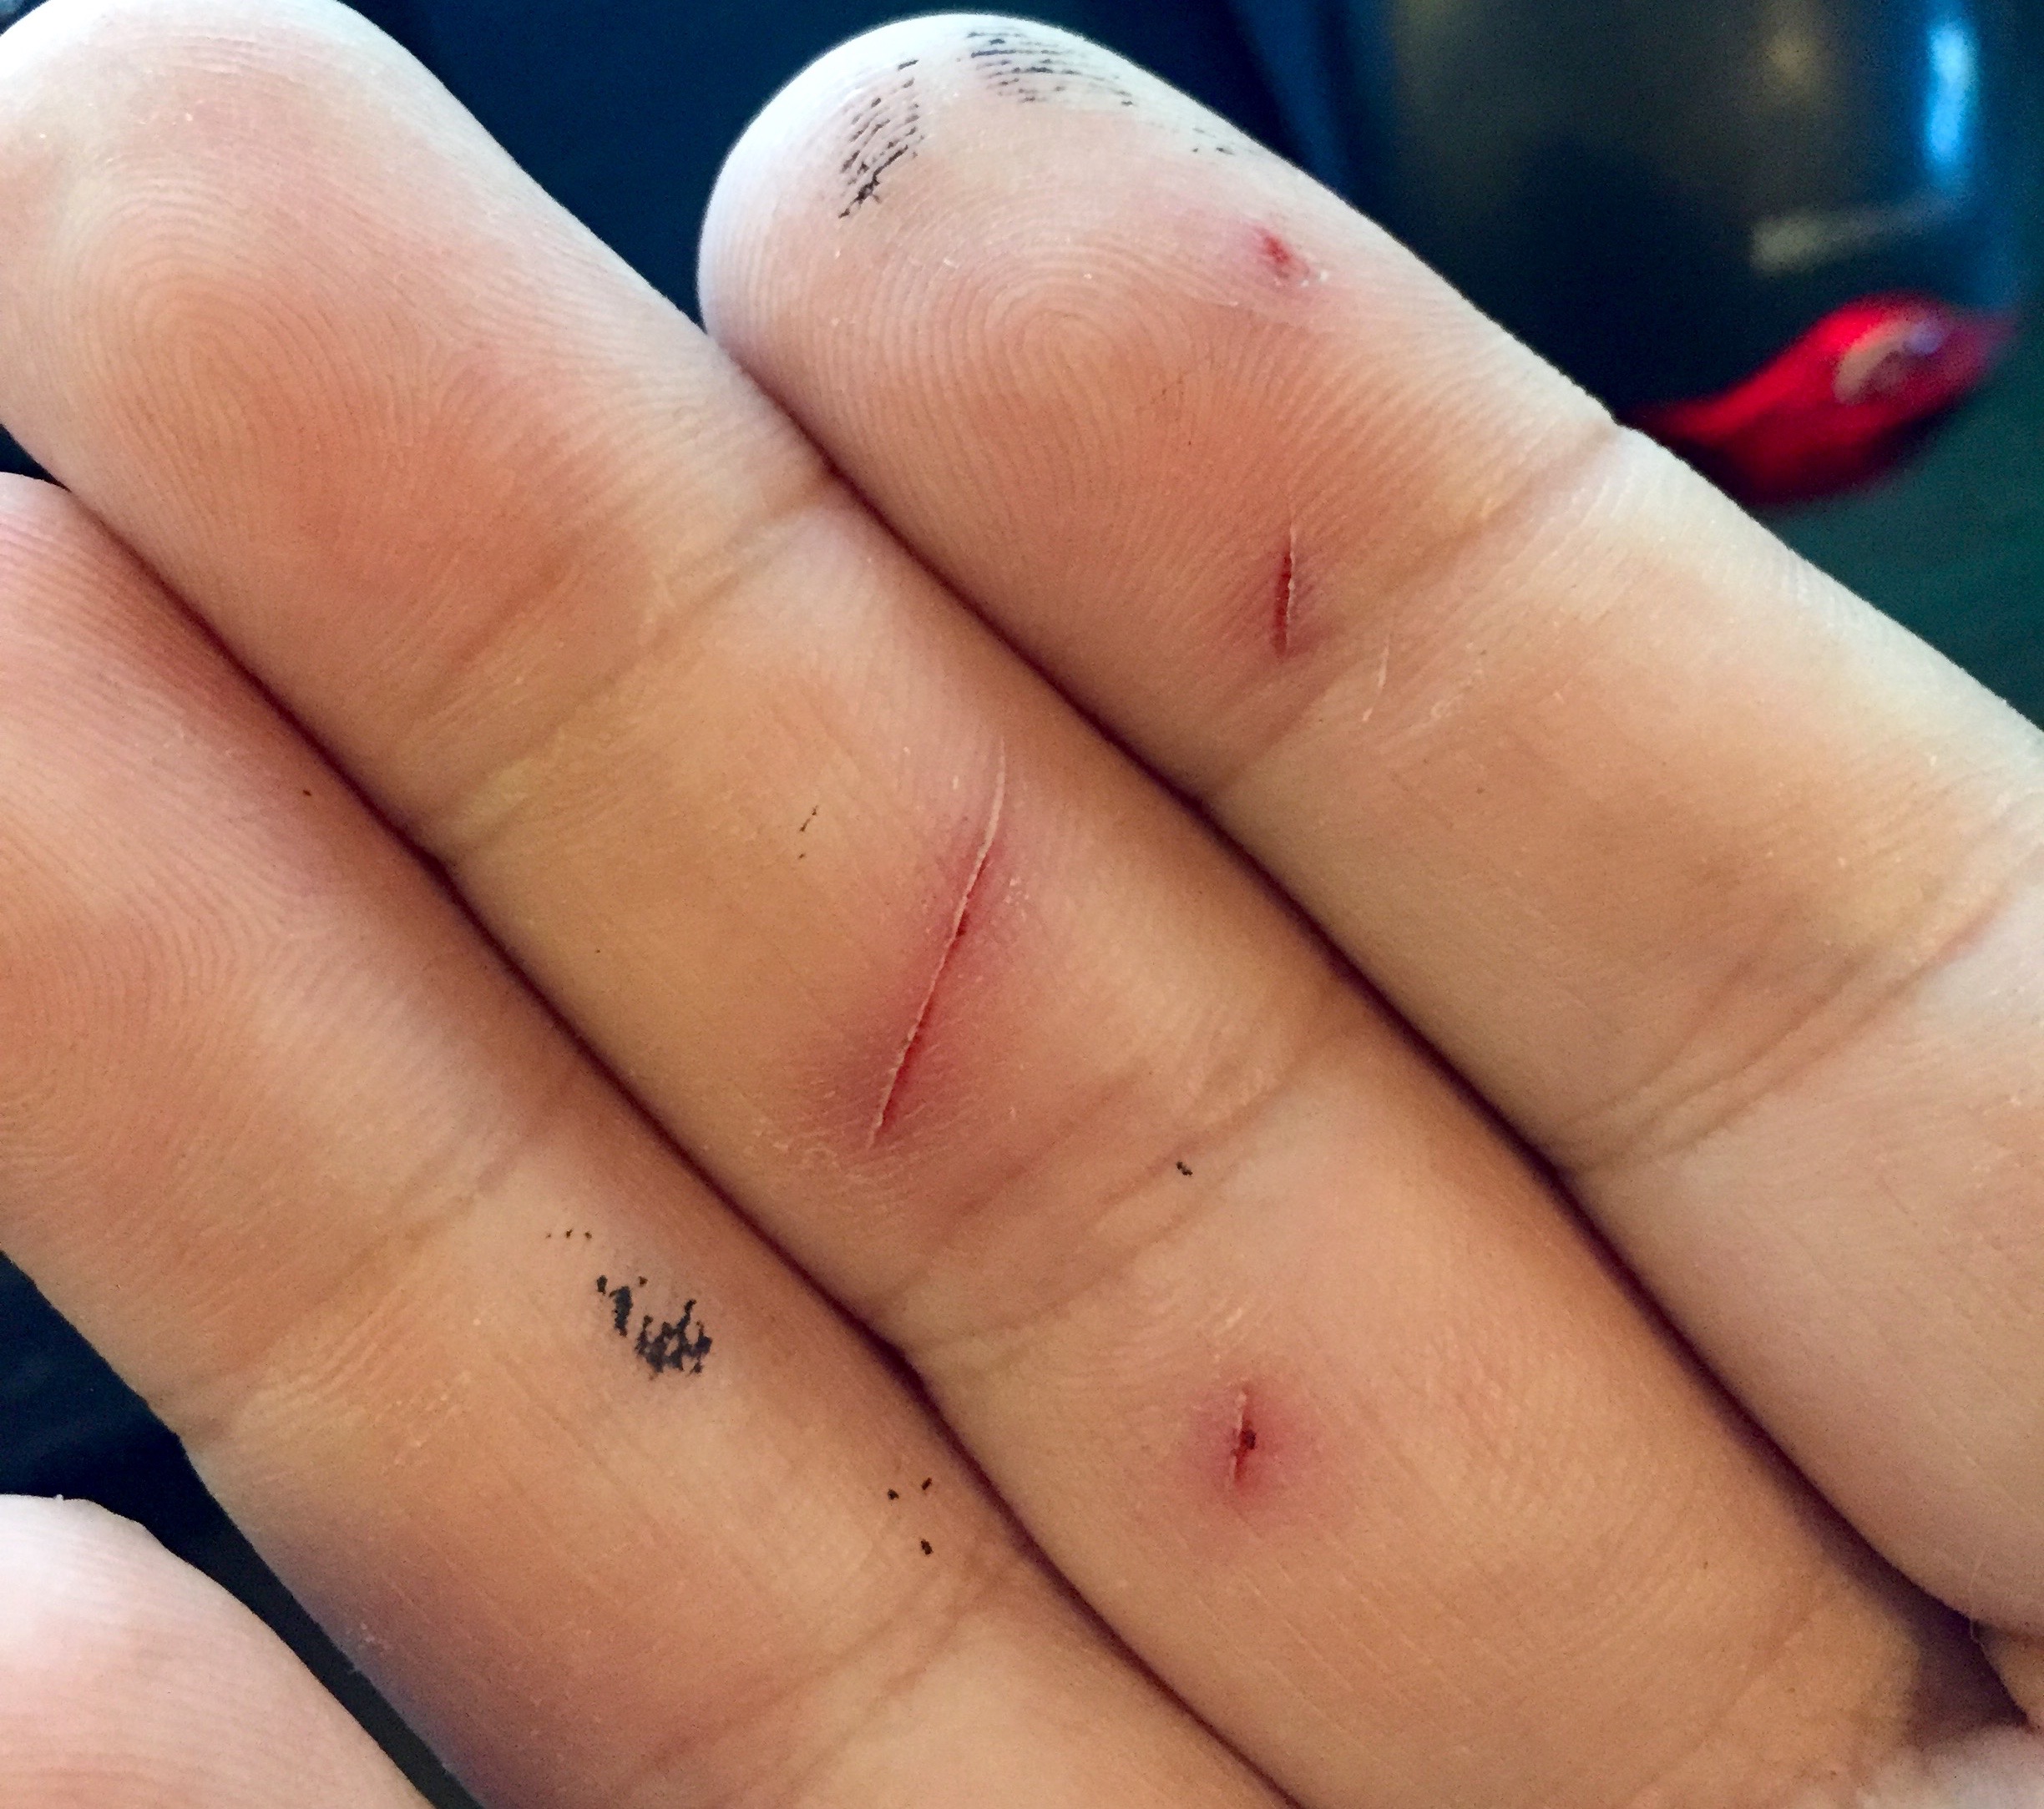
I screwed up the alignment a bit, unfortunately. I was able to push it back to the right position, but this dragged mastic that was on the mirror across the face of the monitor (but not onto the monitor itself, thankfully). Luckily, it isn't visible at all -- there is a margin around the web page contents, and none of it is occluded by the smeared mastic. You'll only see it if you're looking at the Pi desktop, which you really never will do. I also discovered just how sharp glass is, as I wound up getting faint cuts on two fingers while trying to push it into place. These were so fine I didn't even notice them initially, and only realized they were there when I saw some blood spots.
For the parts of the mirror that weren't in front of the monitor and frame, I painted the back with two coats of black enamel paint. I also painted the frame itself black while I was at it.
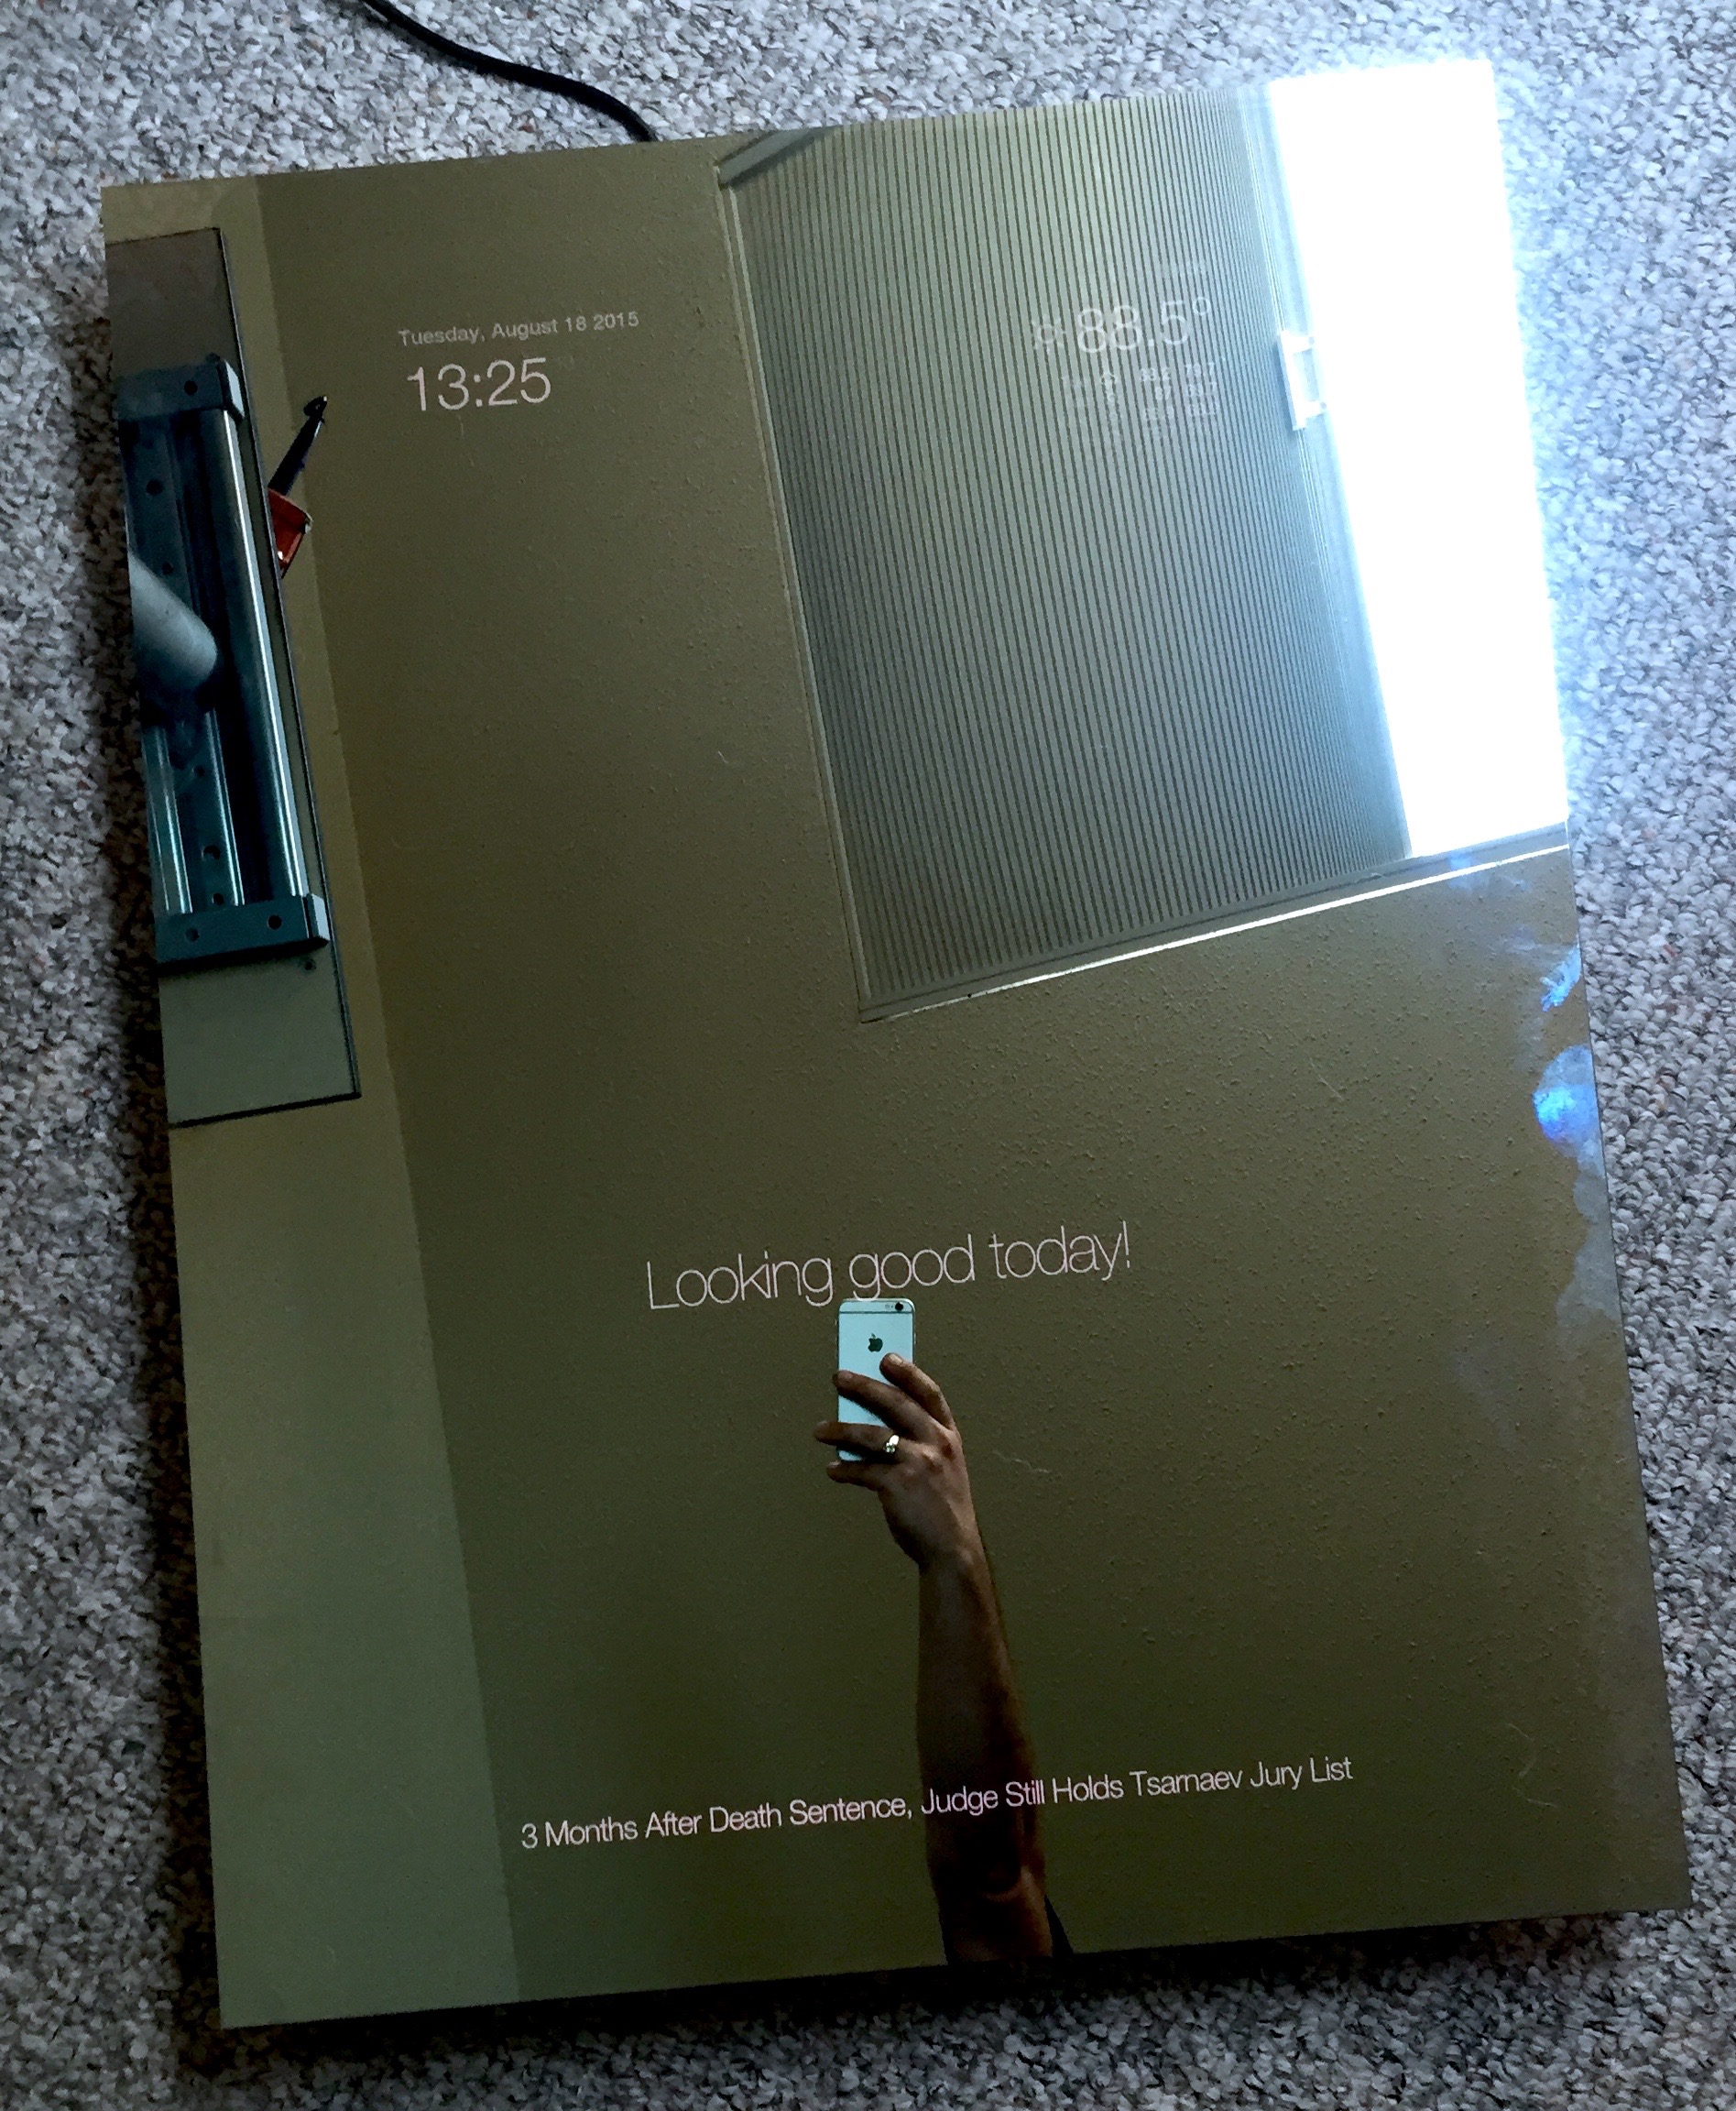
Mounting
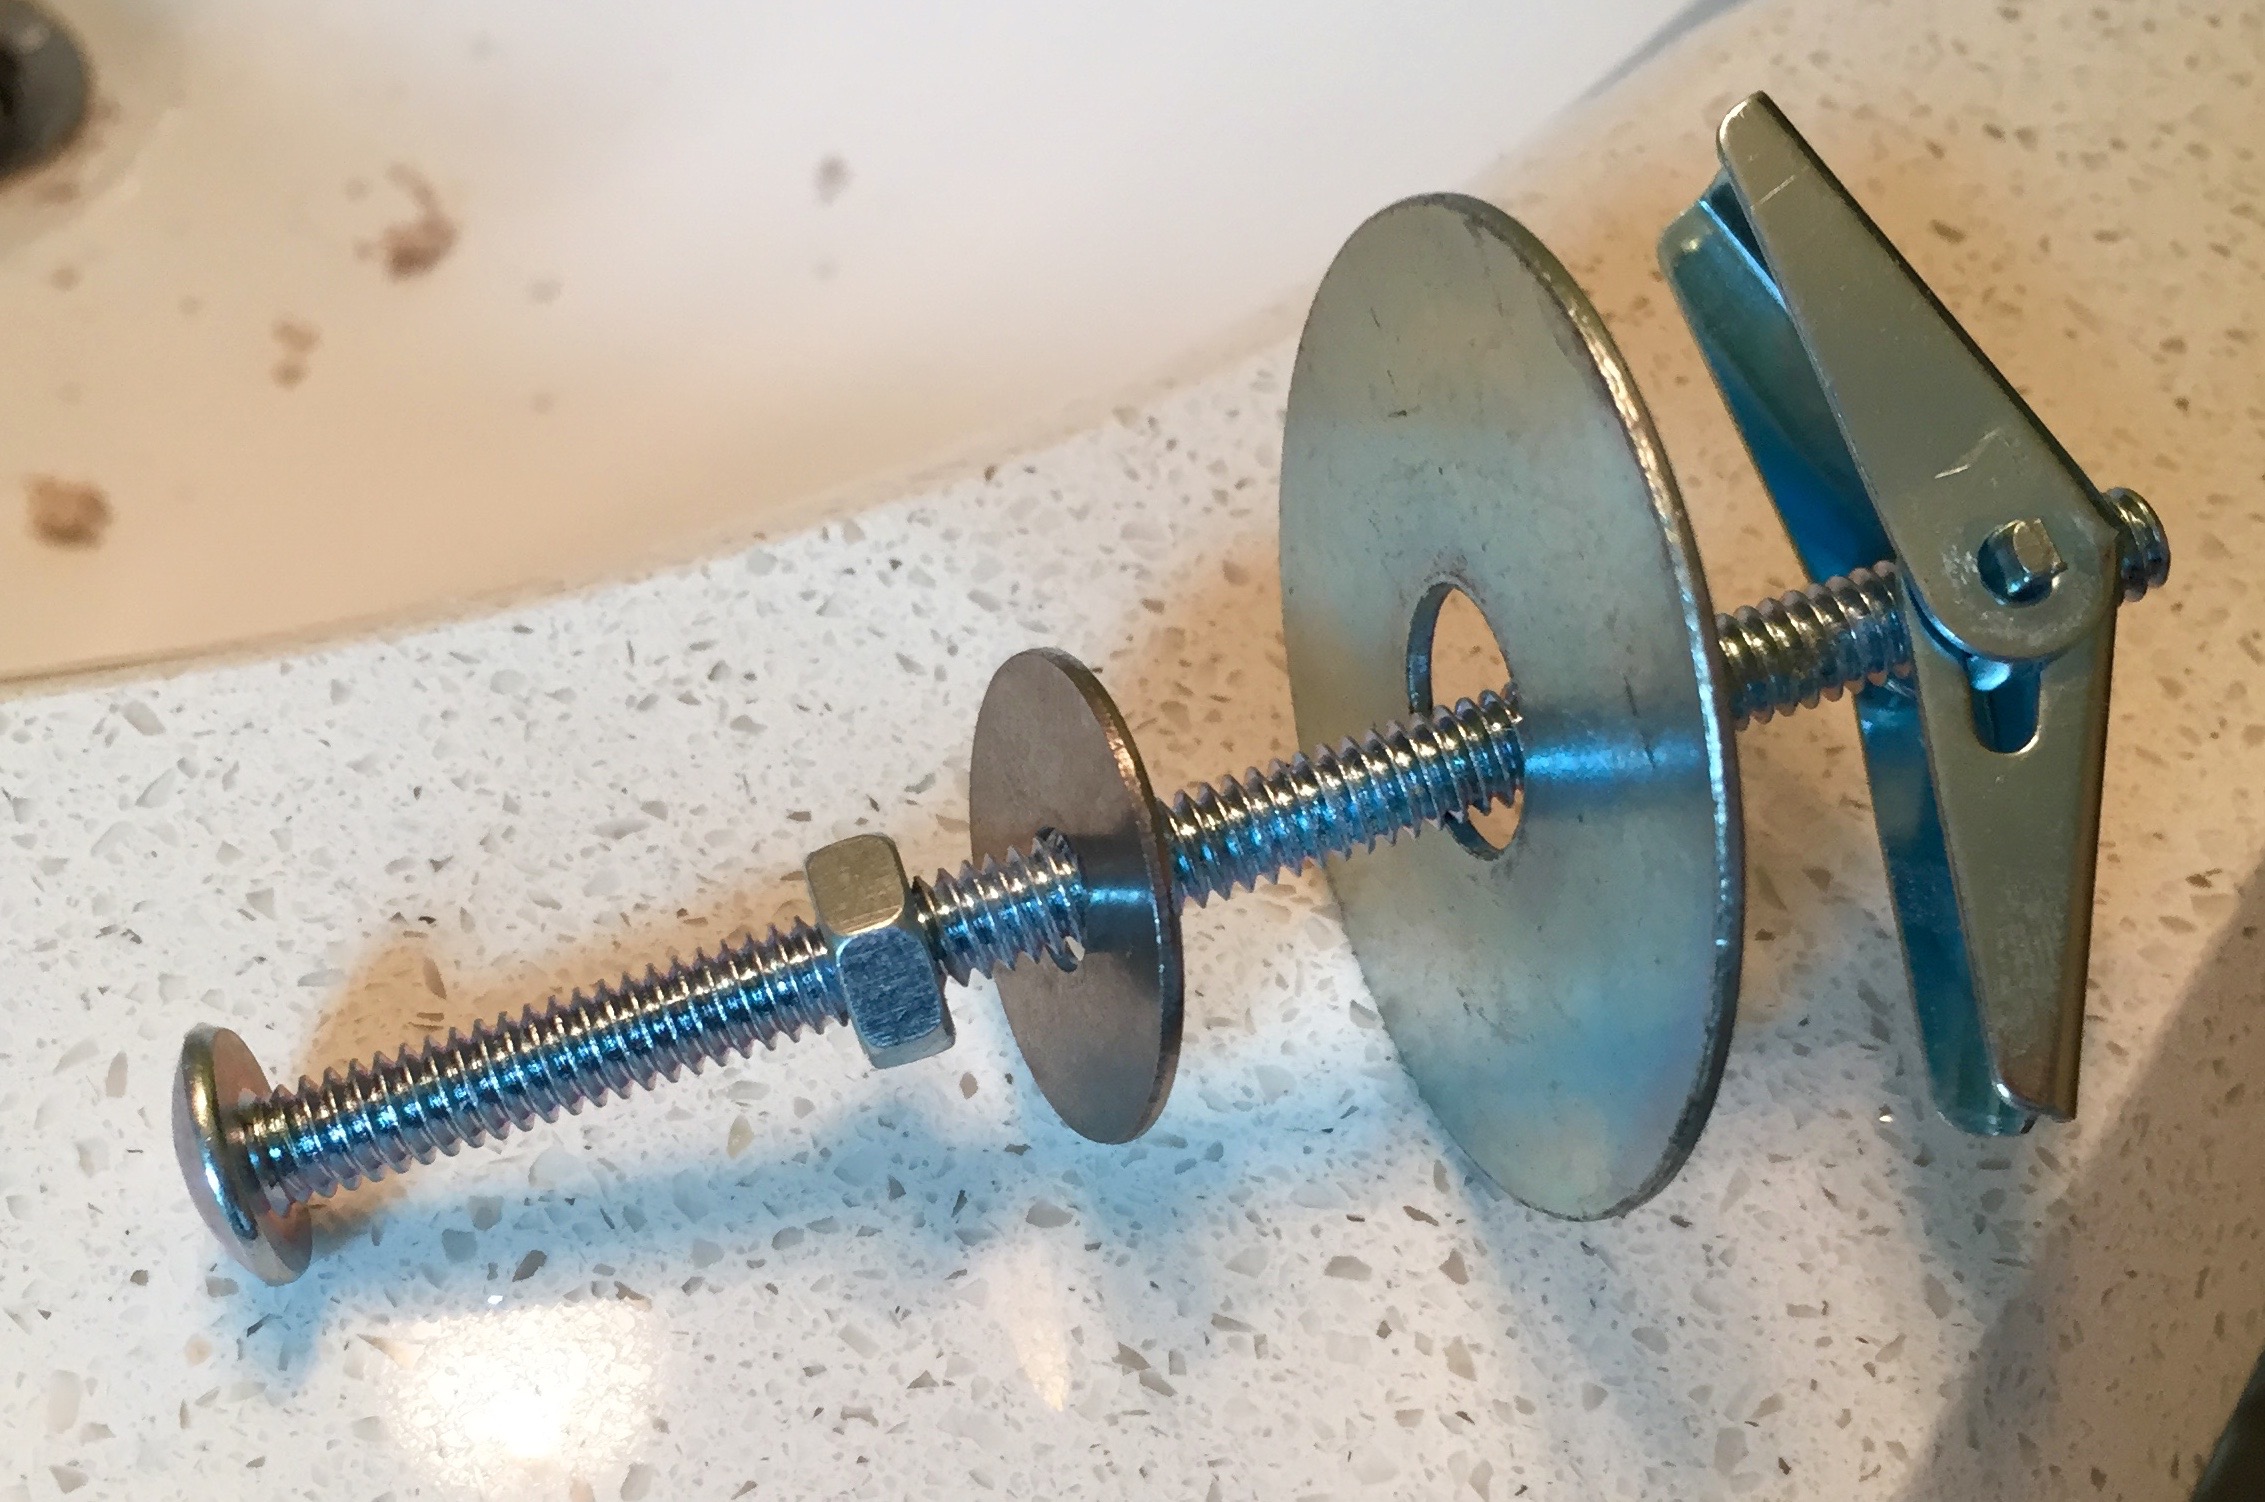
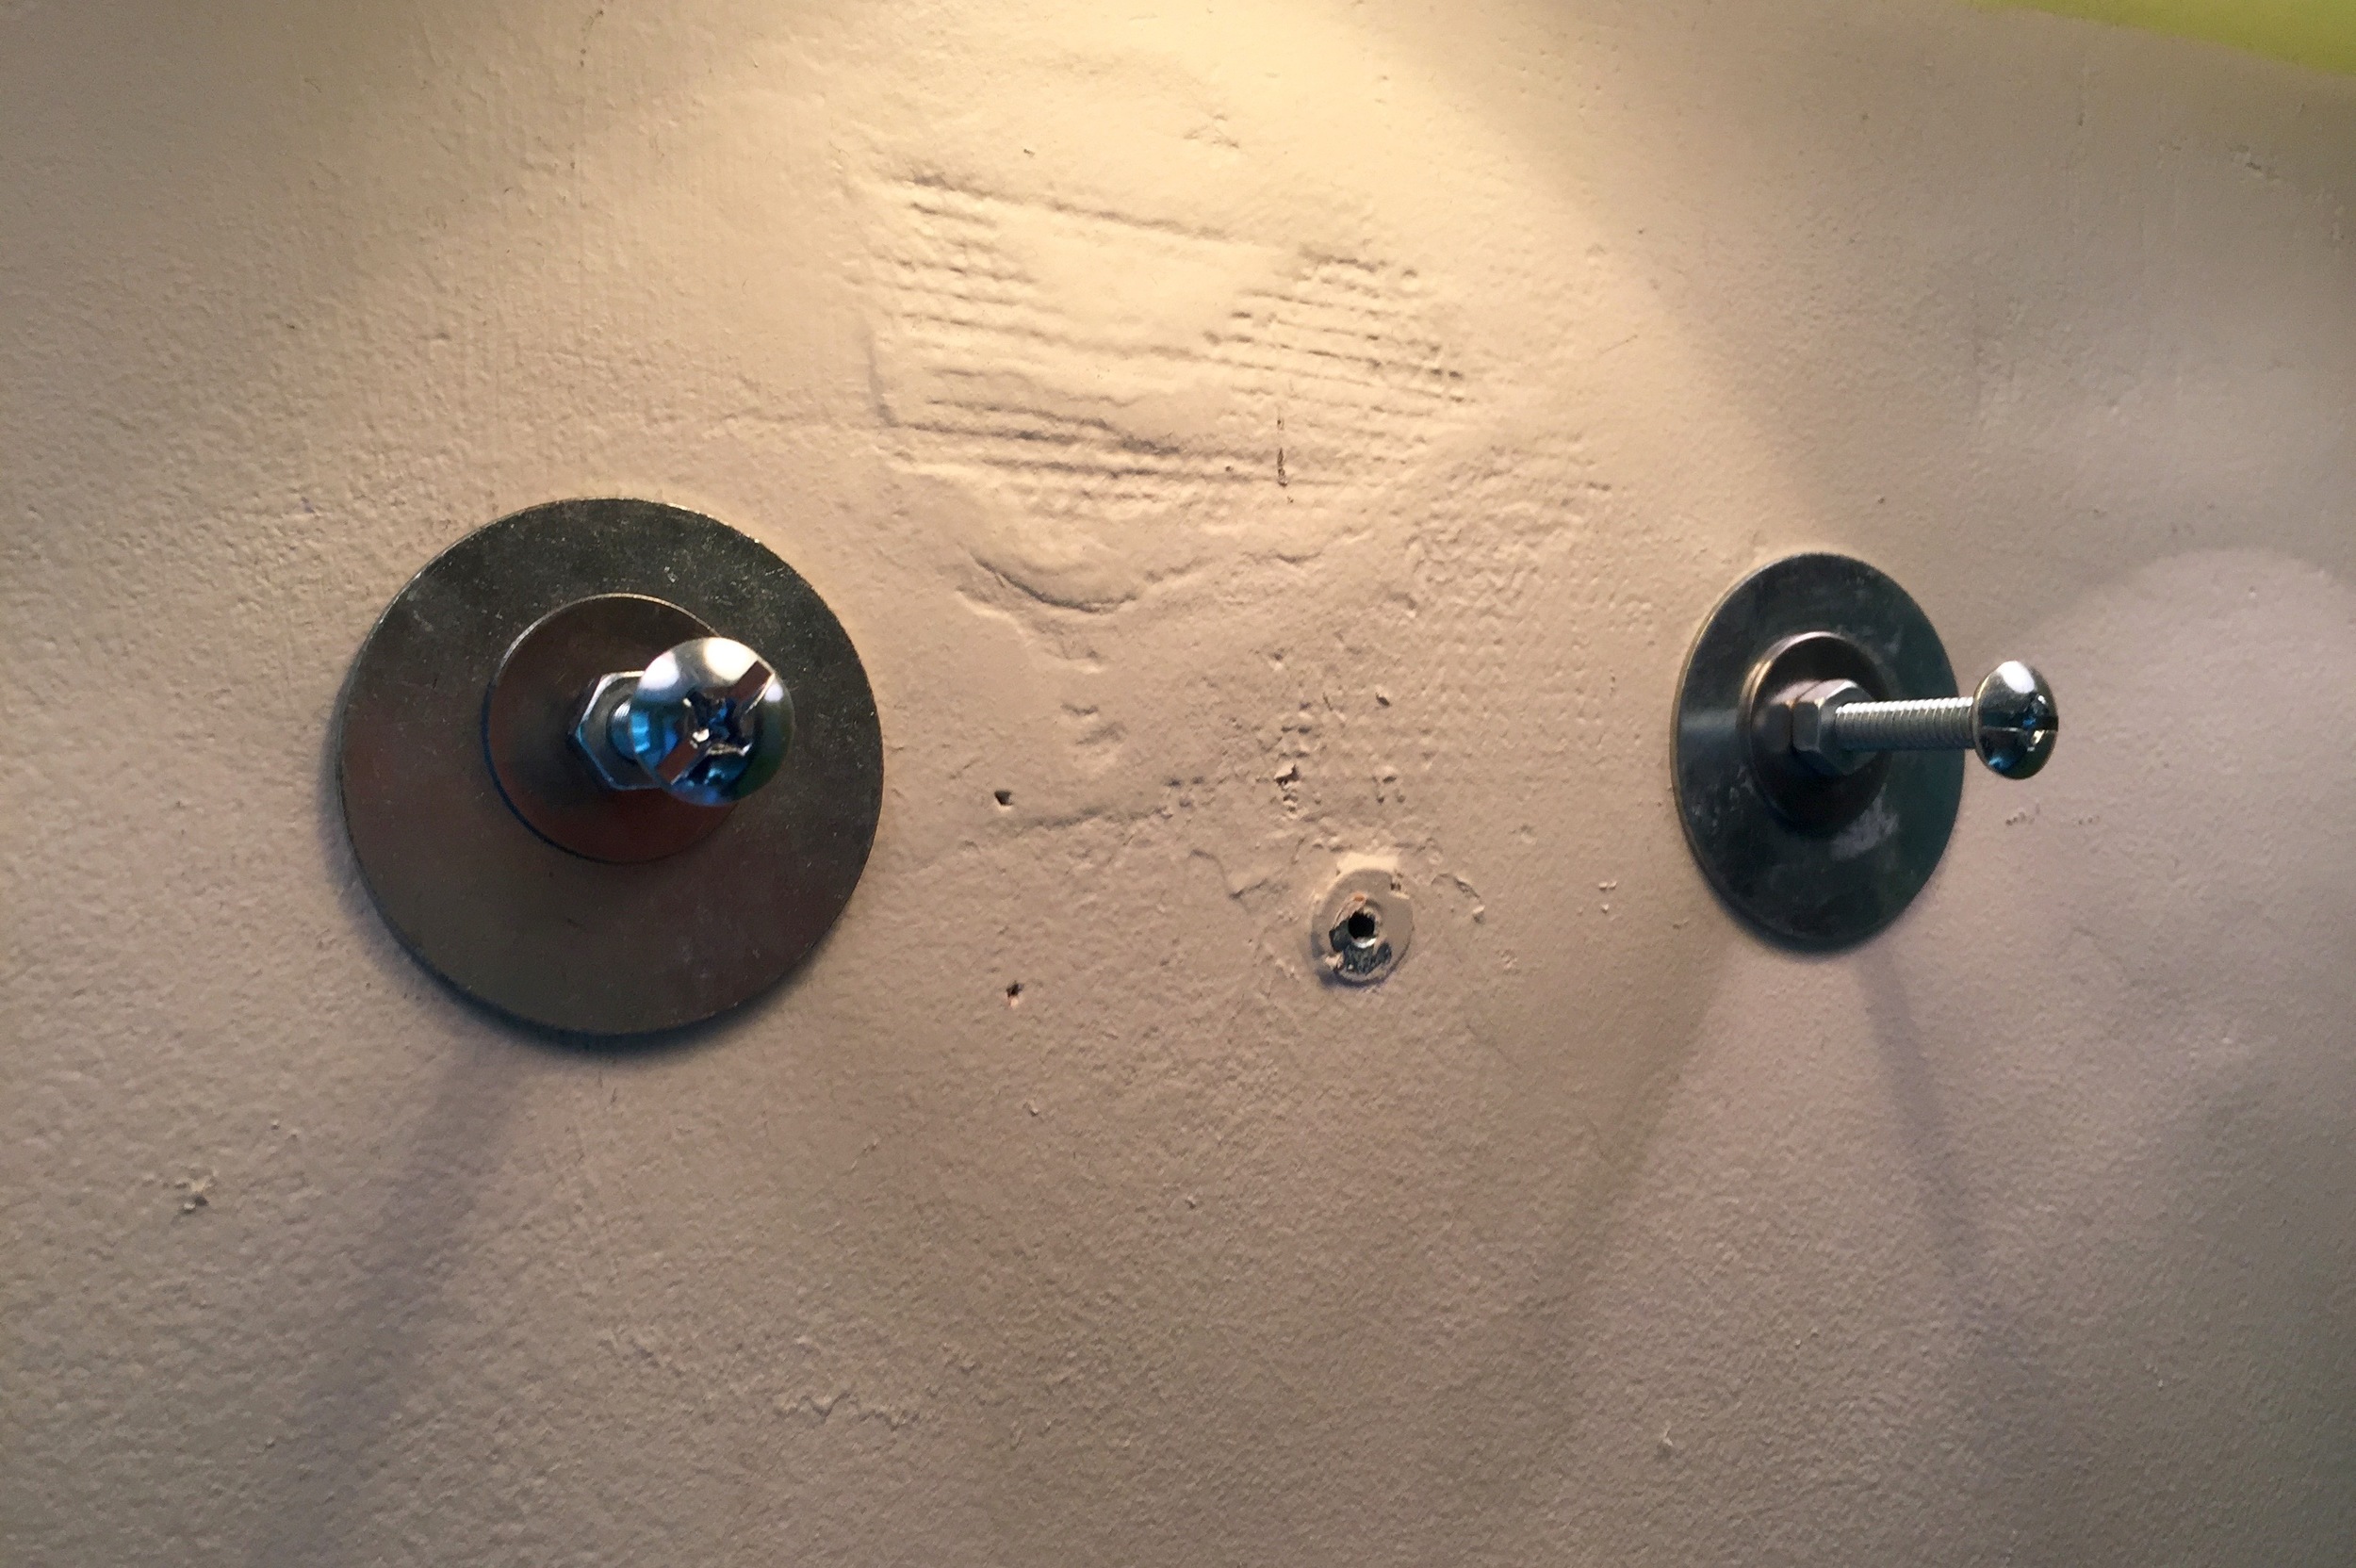
After figuring out how to get the old mirror off the wall, I needed to figure out how to mount the new one. The solution I came up with was to use two long wall anchors. Since I needed the anchor screws to stick out of the wall, I placed two large washers and a nut on each screw. I then turned the screw as far into the wall as I thought it needed to go, and then tightened the nut against the washers to keep the anchors in place. Now I had two studs to hang the mirror off of.
After that, it was a "simple" matter of sliding the mirror's mounting block onto those anchors. The tricky part is actually getting both aligned with the slots in the back of the mirror. I had to measure, push the screws around, carefully slide the mirror onto one screw, and then wobble it around until I found the other screw. I think this taking it off the wall and putting it back on again is when I chipped the corner of the mirror.
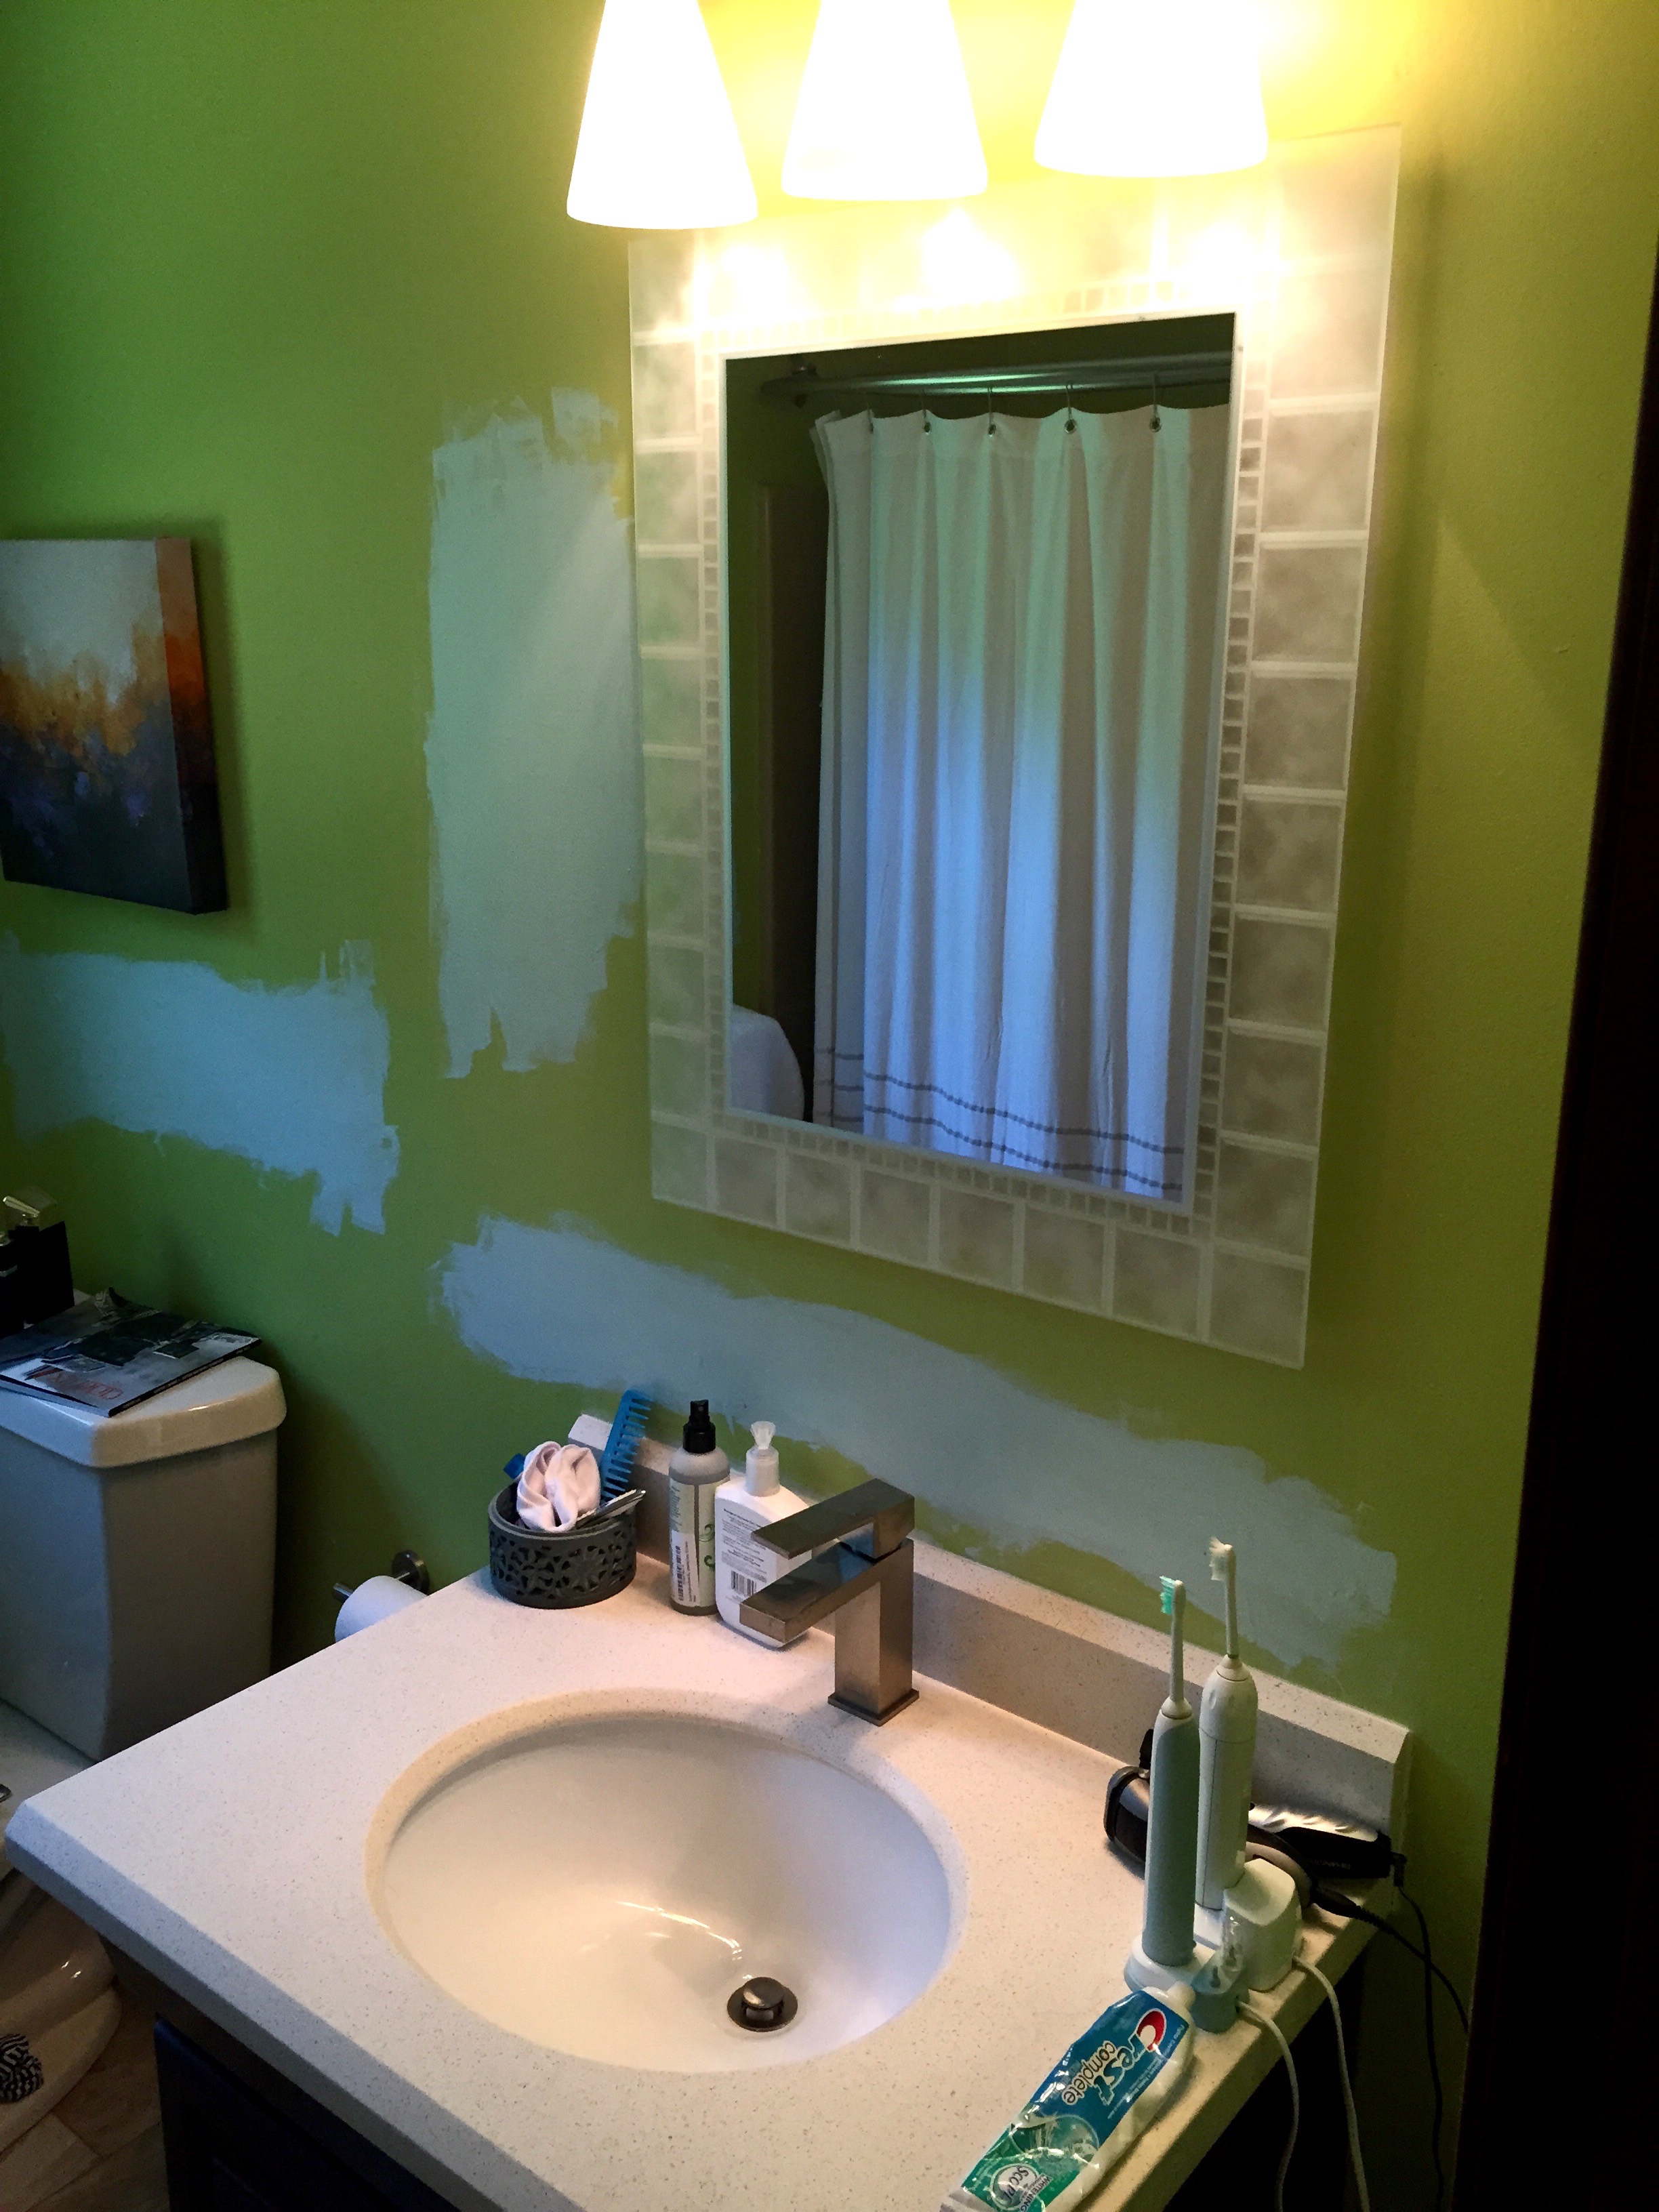
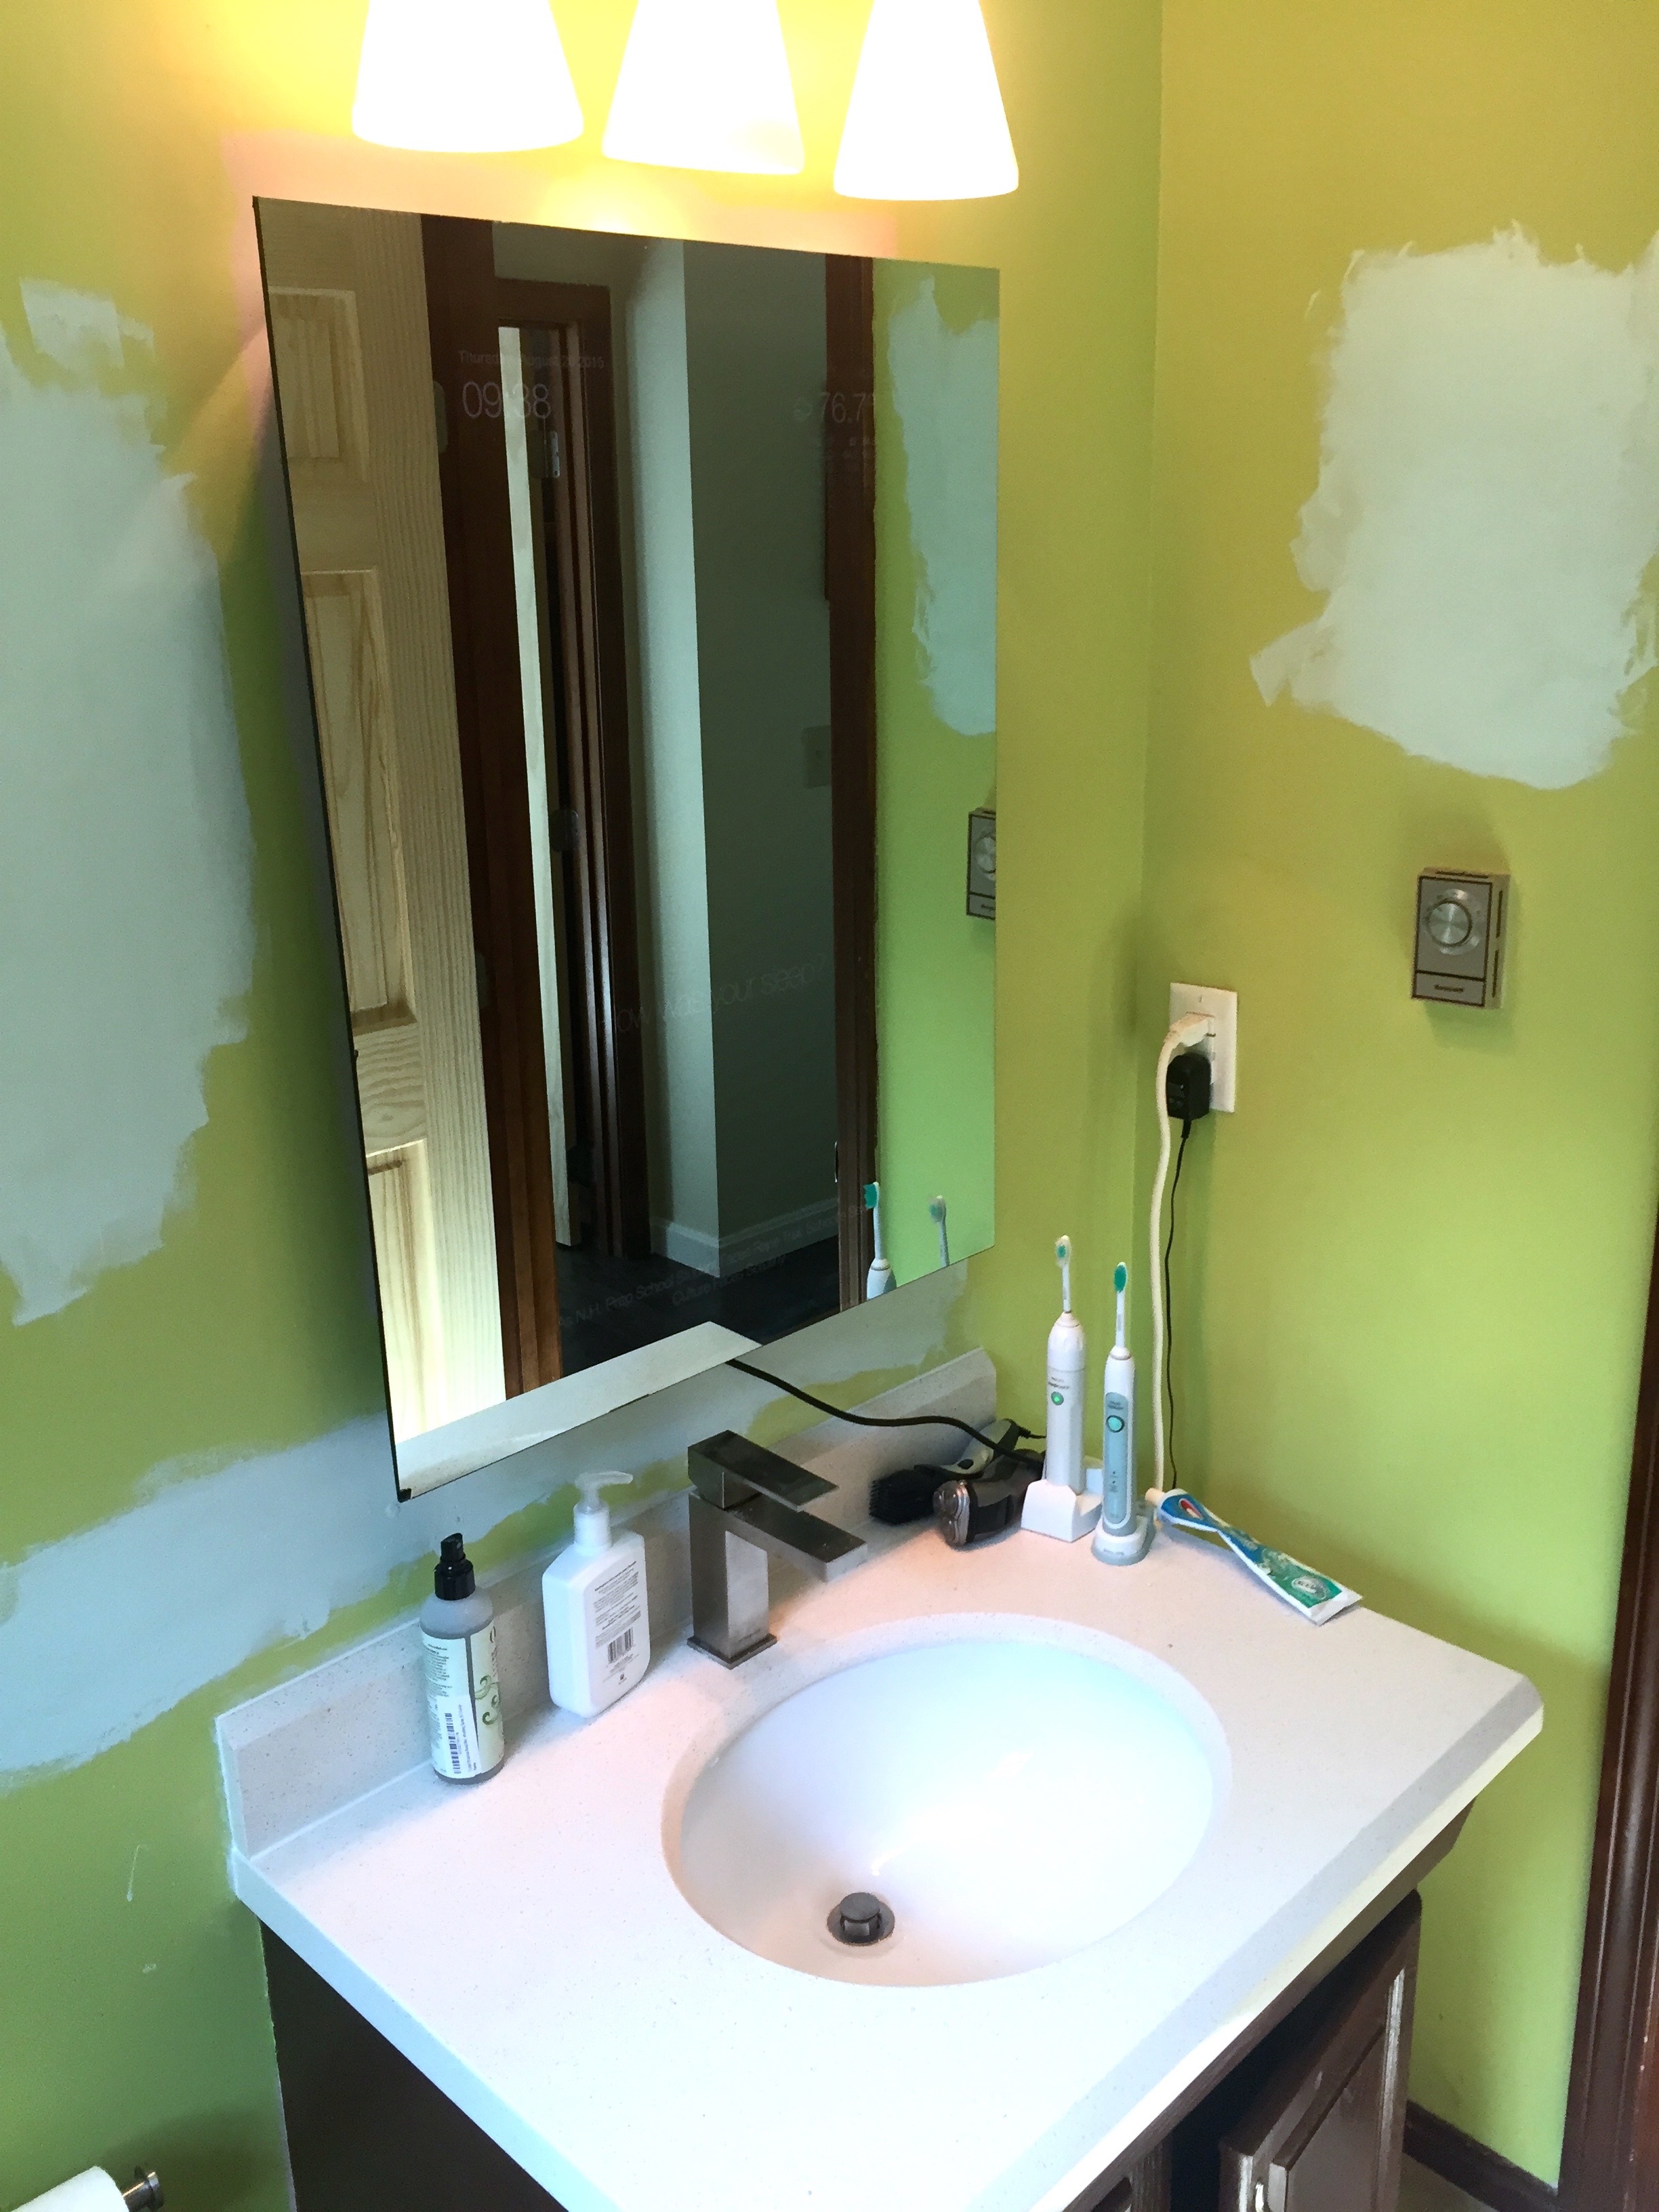
Metal Framing
For the mirror I had gotten the cheaper simple glass, not tempered glass. This wound up being a mistake, as normal glass is relatively brittle. I went with normal glass because I was more worried about damaging tempered glass, as once hit hard enough tempered glass will just disintegrate into a pile of glass pebbles, and I had thought that I could get away with more mistakes with the plain glass. In reality, I wound up chipping the corner of the mirror on the bathroom's tile floor while I was trying to figure out how to mount it.
The chip in the mirror was small, but still pretty annoying, so we decided to build a rustic metal frame for it. I used my oxyacetylene welding gear to create a crude frame from some flat iron I bought at Home Depot. The idea was to leave the frame plain and unpainted. It was glued to the mirror with some simple mirror mastic from Home Depot. Some black caulk was used to fill in the gaps between the frame and the mirror glass, which mostly worked, but didn't look as polished as I'd have liked.
The real problem, though, is that framing just didn't look right -- besides not quite positioning it correctly over the mirror, it just felt like the frame took away from the "magical" nature of the project. Without the frame, you had a piece of glass hanging in space with some info displayed through it, which was pretty cool. The frame made it seem like it was concealing some electronics, ruining the illusion.
New Mirror Glass
After much deliberation, I ordered another expensive two way mirror. This time I got it tempered, which added some cost and manufacturing time but significantly improved durability, plus if it is ever shattered it will disintegrate into small, relatively harmless pebbles instead of large dangerous shards. So the thing I was concerned about before I'm now considering a feature.
Removing the old glass
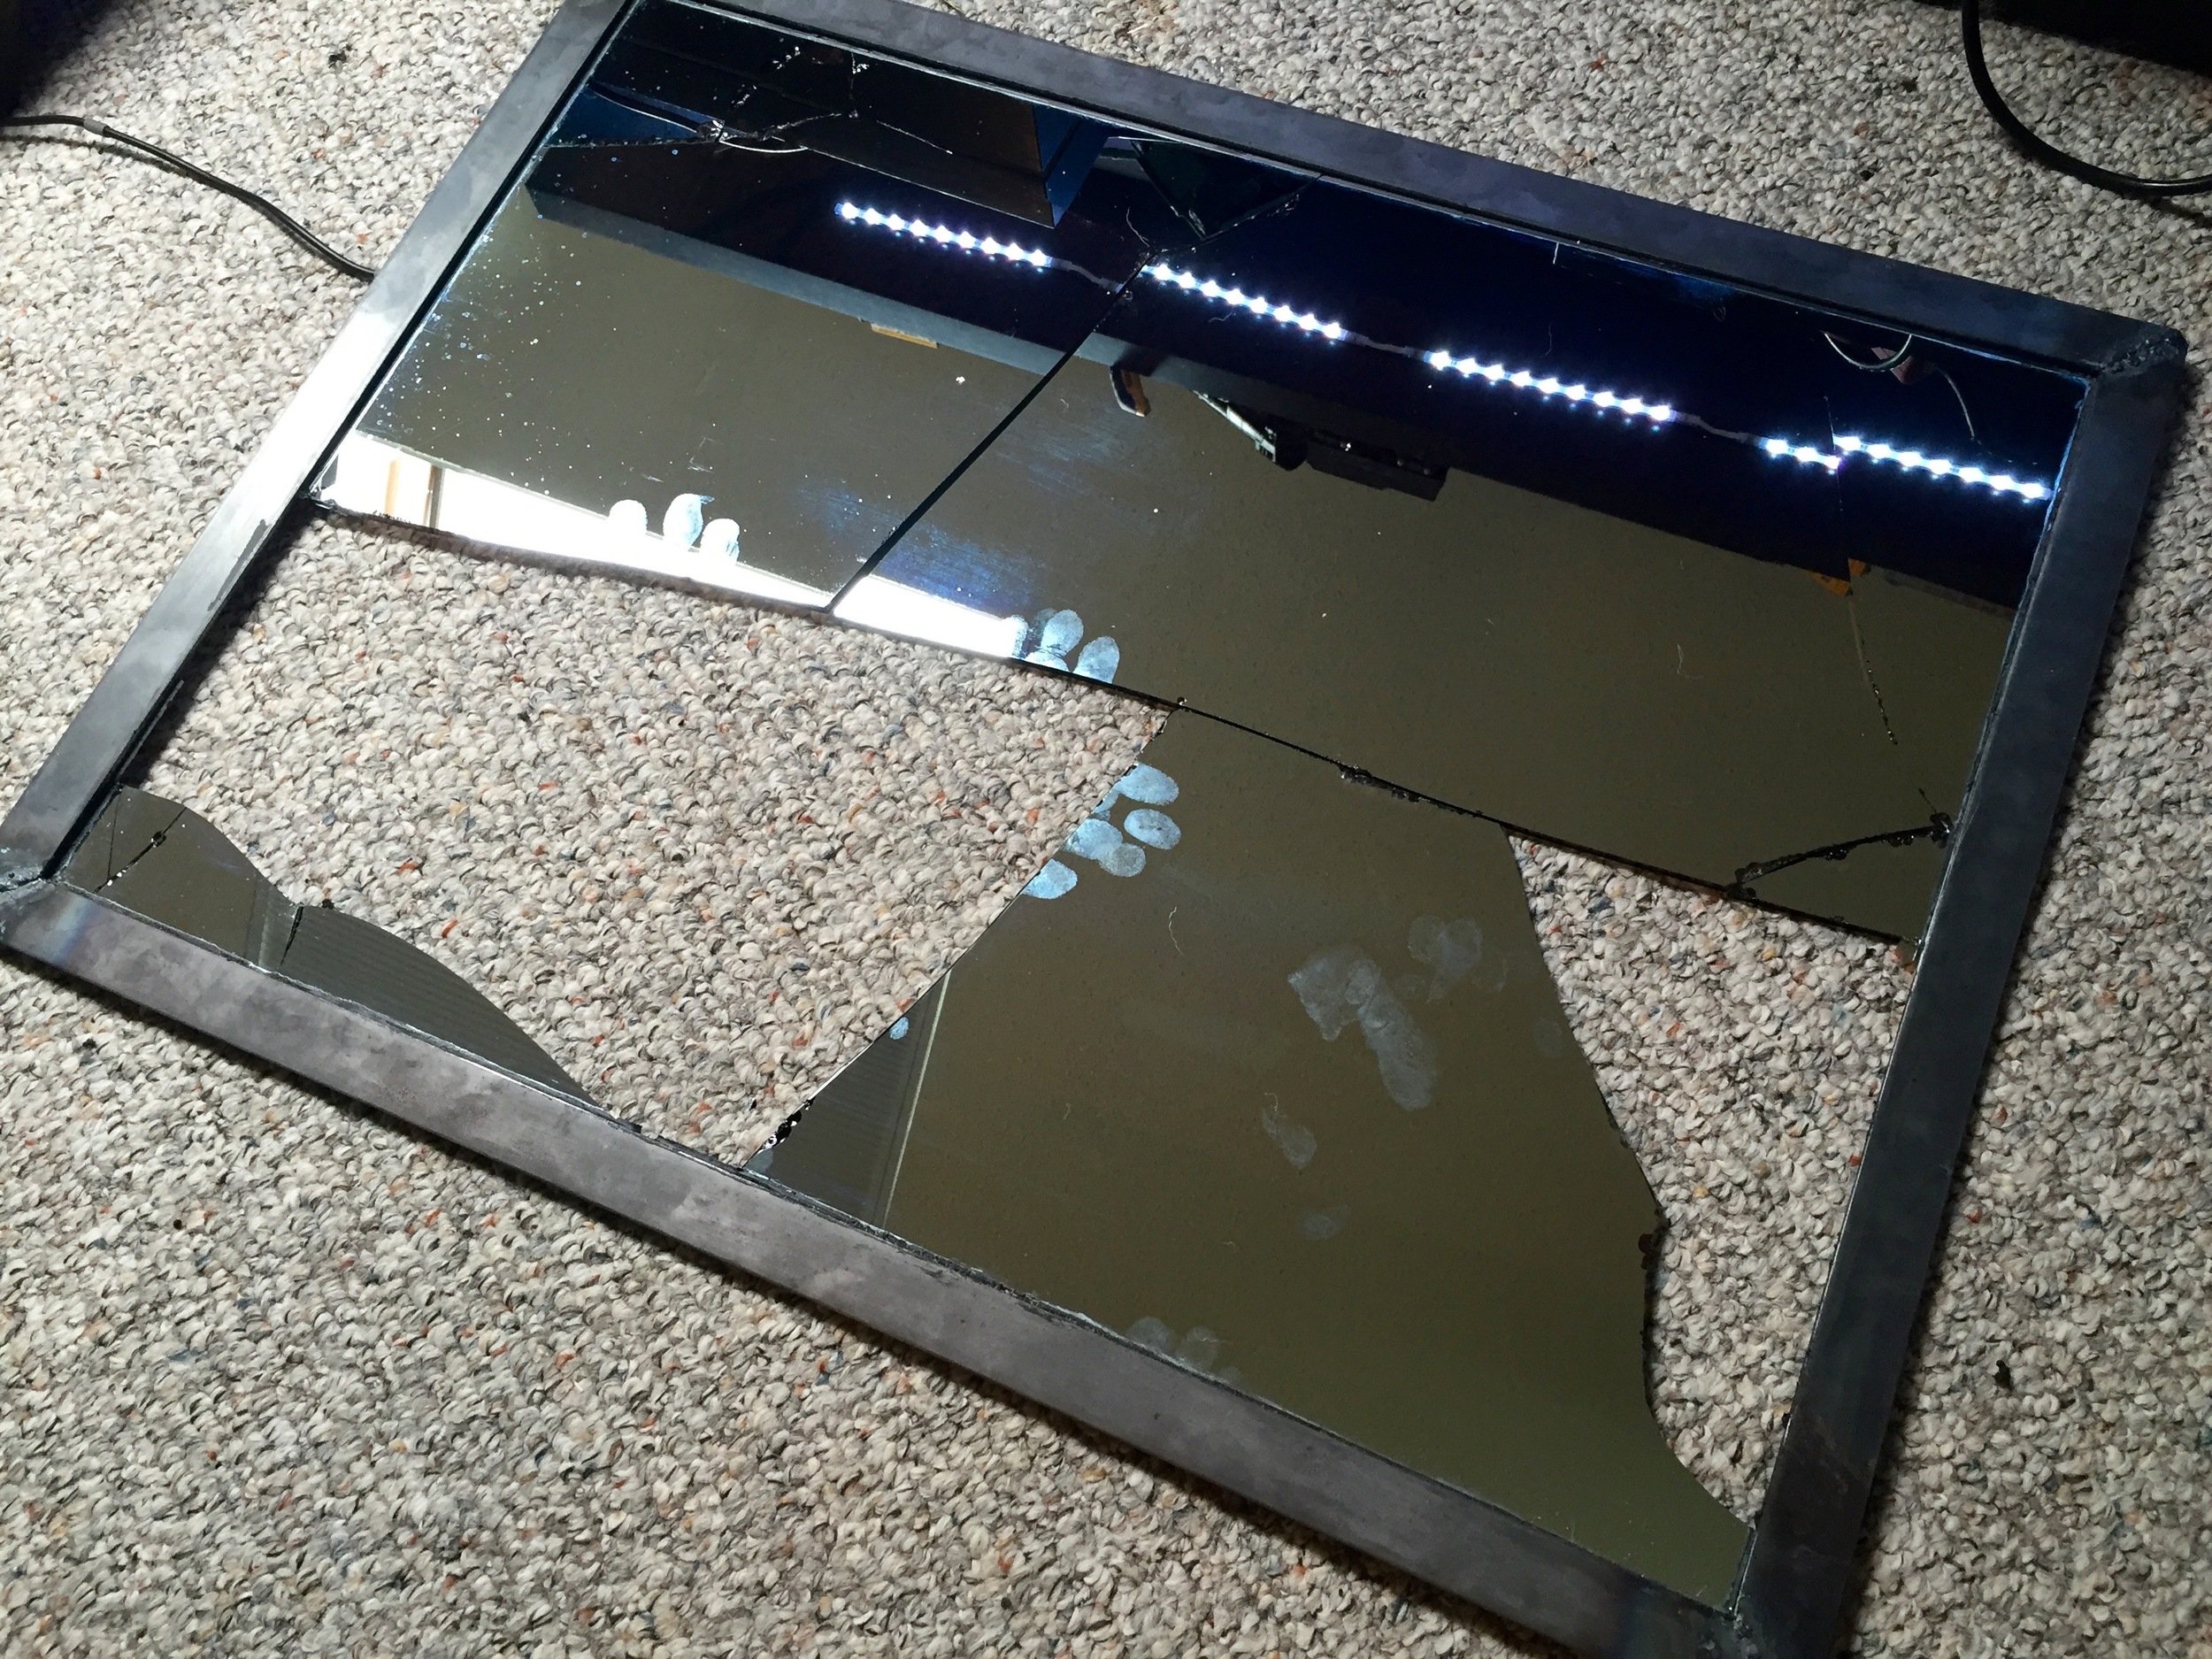
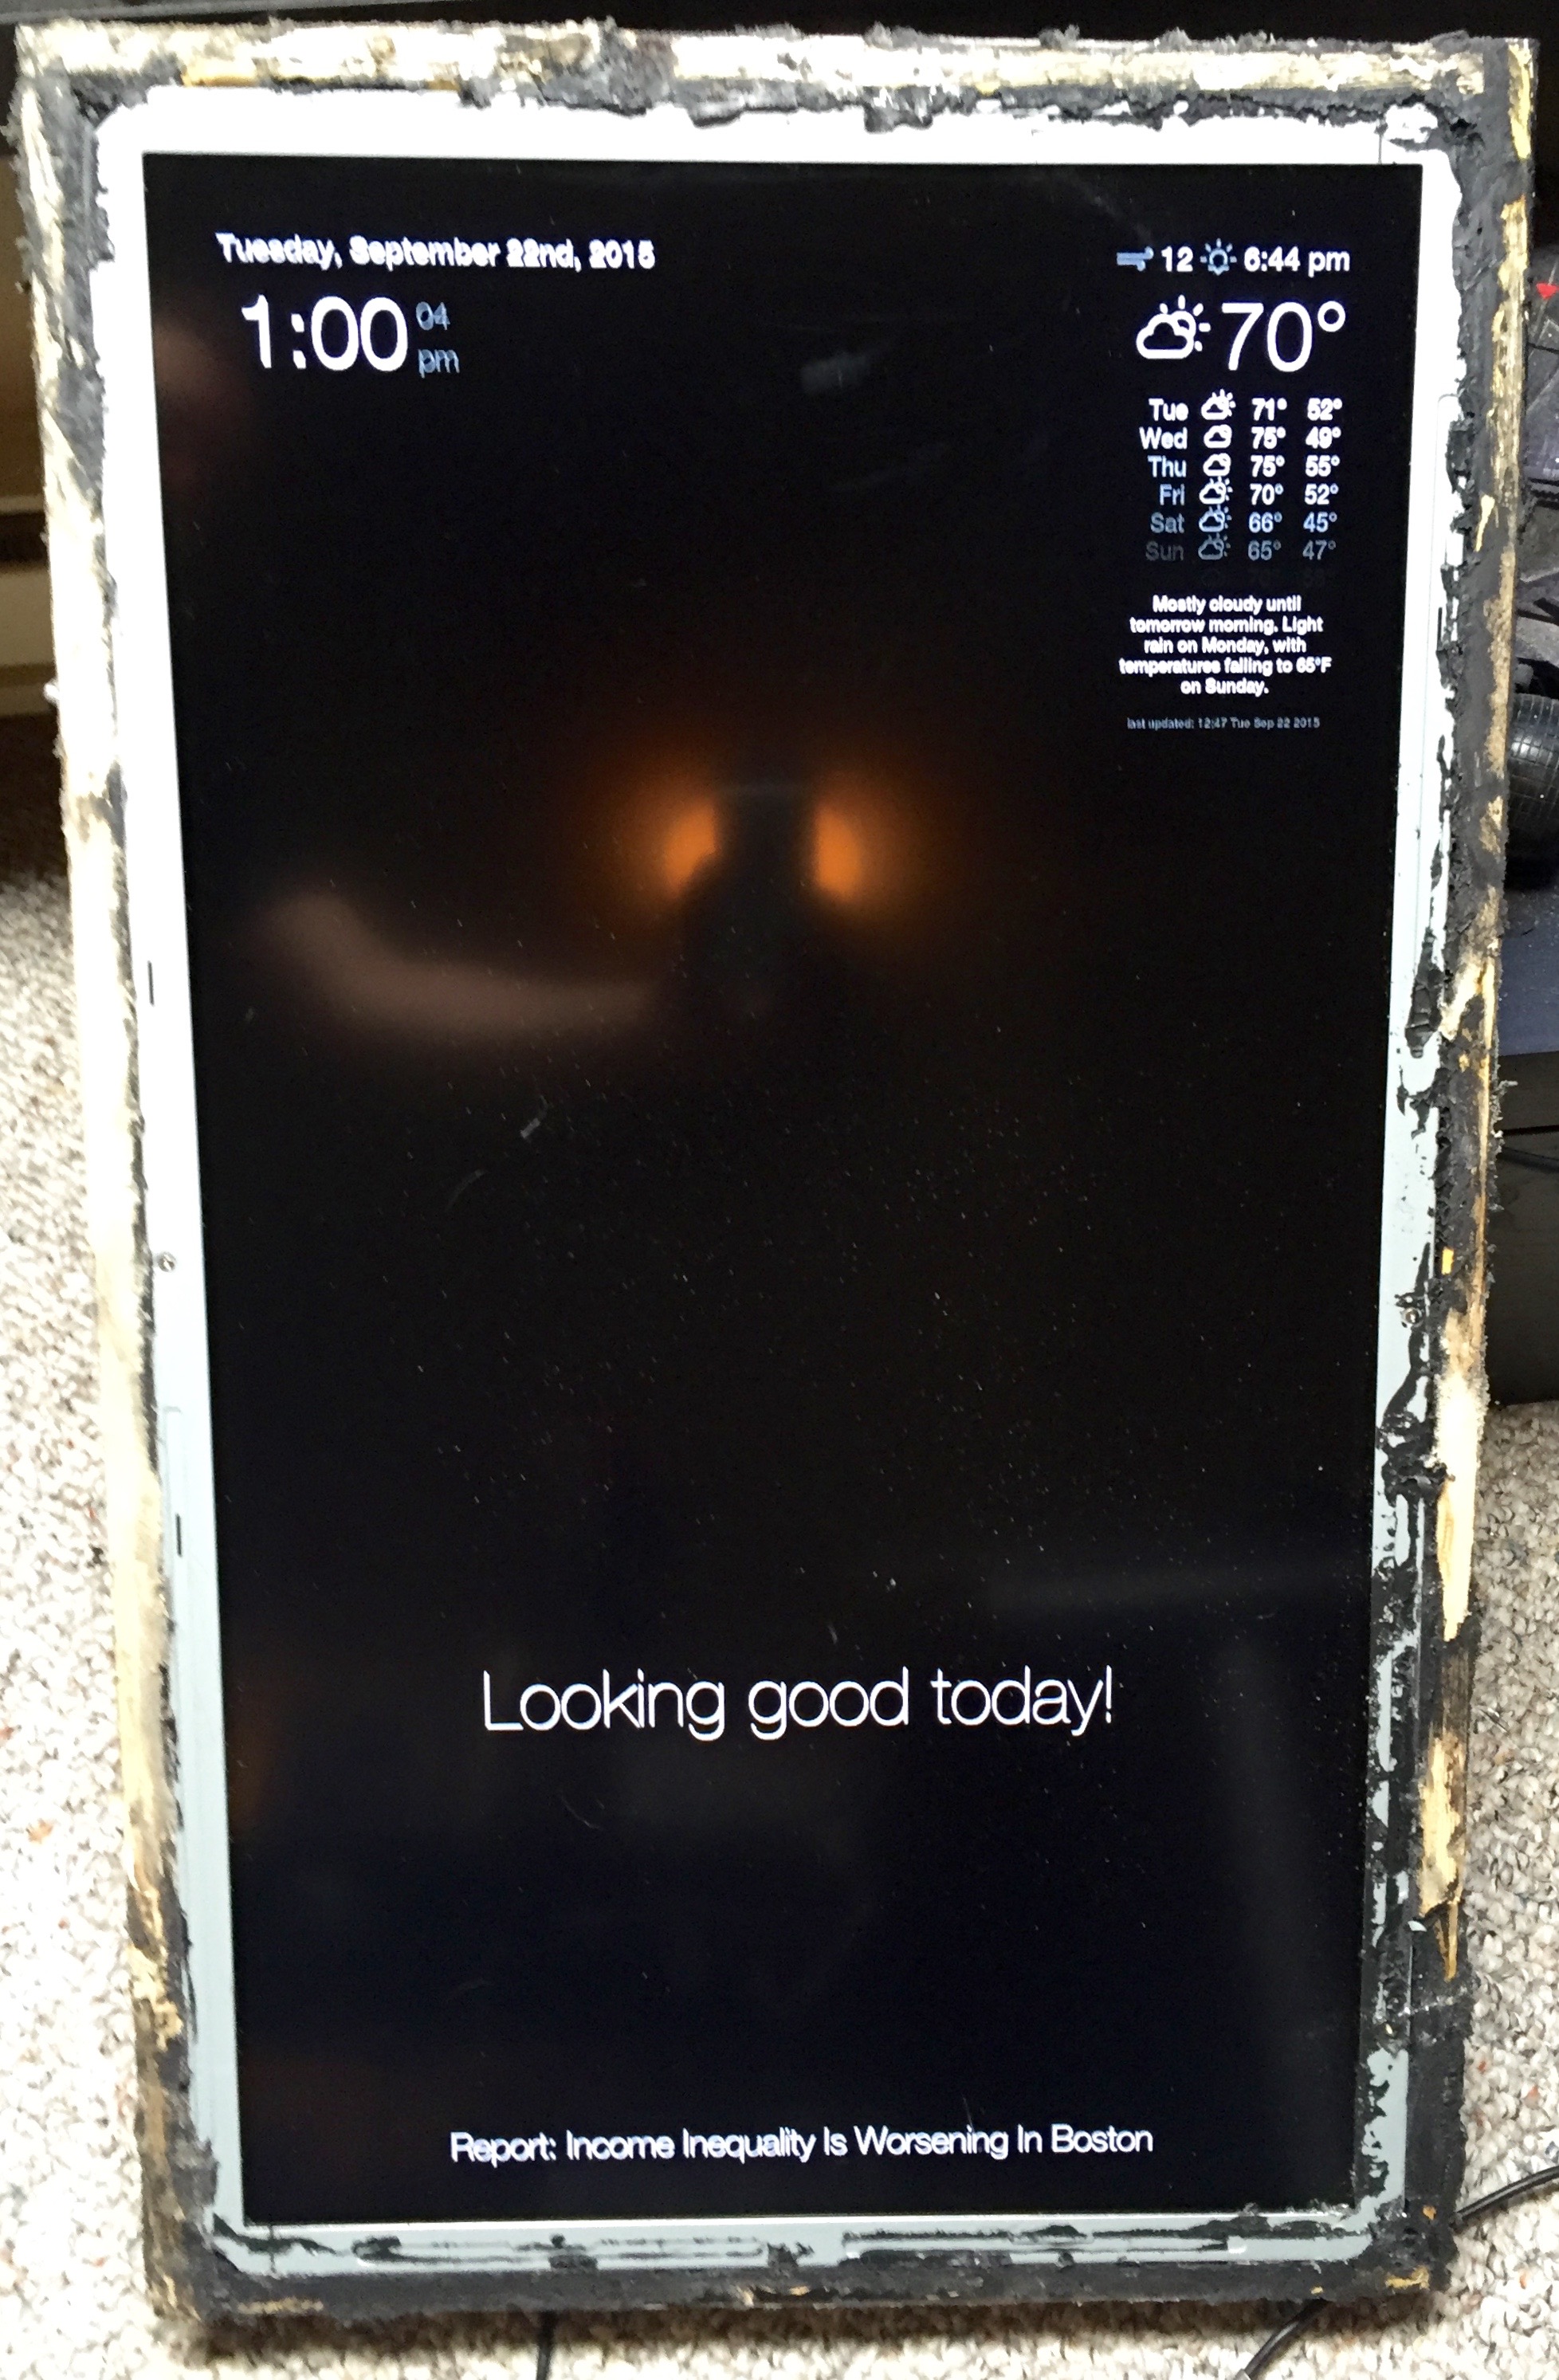
Getting the old glass off was not easy. The mastic was slightly gummy, but very strong. I wound up using an oscillating saw to cut the mastic, then prying it out with a pry bar. This required enough force that it shattered the old mirror glass. As I pulled it out I was able to slide a knife between the glass and the frame and cut away more of the mastic. Silver flaked off the mirror while I did this, but it wasn't hard to clean up with a vacuum. More worrying was the gouges that the shattered glass had put into the surface of the LCD, but this wound up being unimportant -- with the mirror over it, they were completely invisible, and the more major gouges weren't anywhere near where I was actually displaying anything.
I threw the old glass and frame in the trash. I had originally intended to keep some of it for other projects, but I had no other projects and figured I'd just hurt myself trying to cut it, so I discarded everything.
New glass mounting
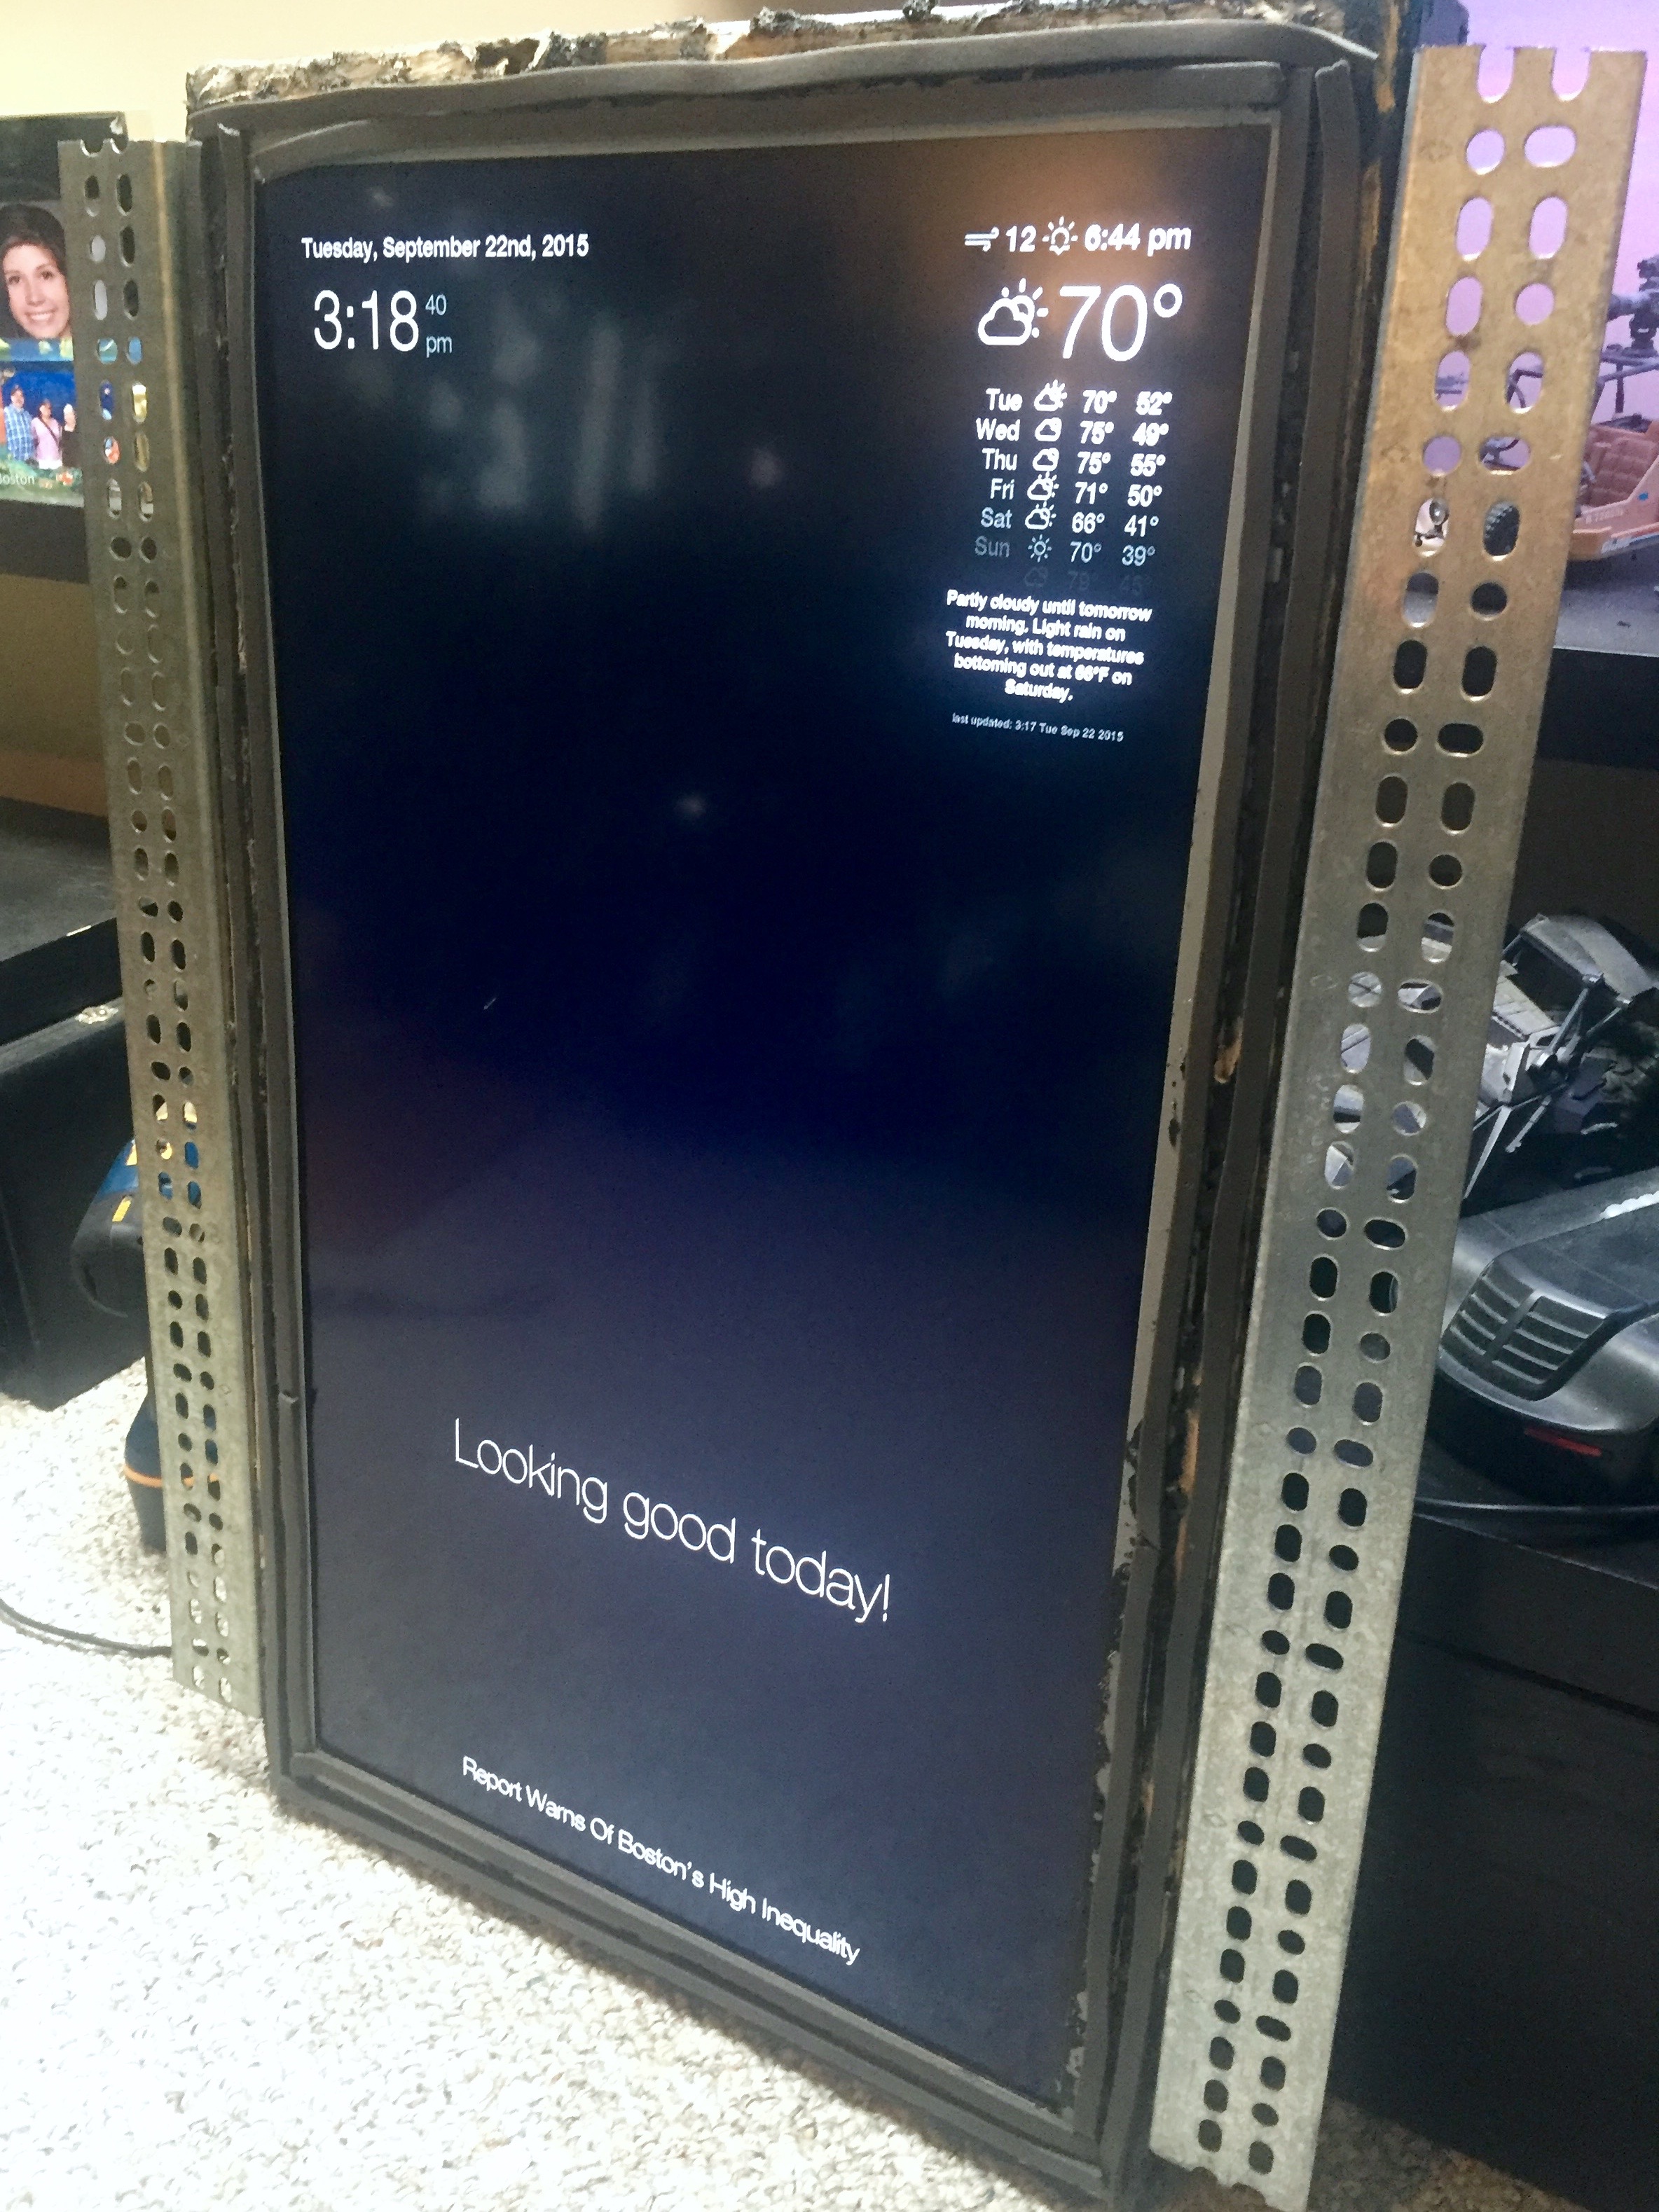
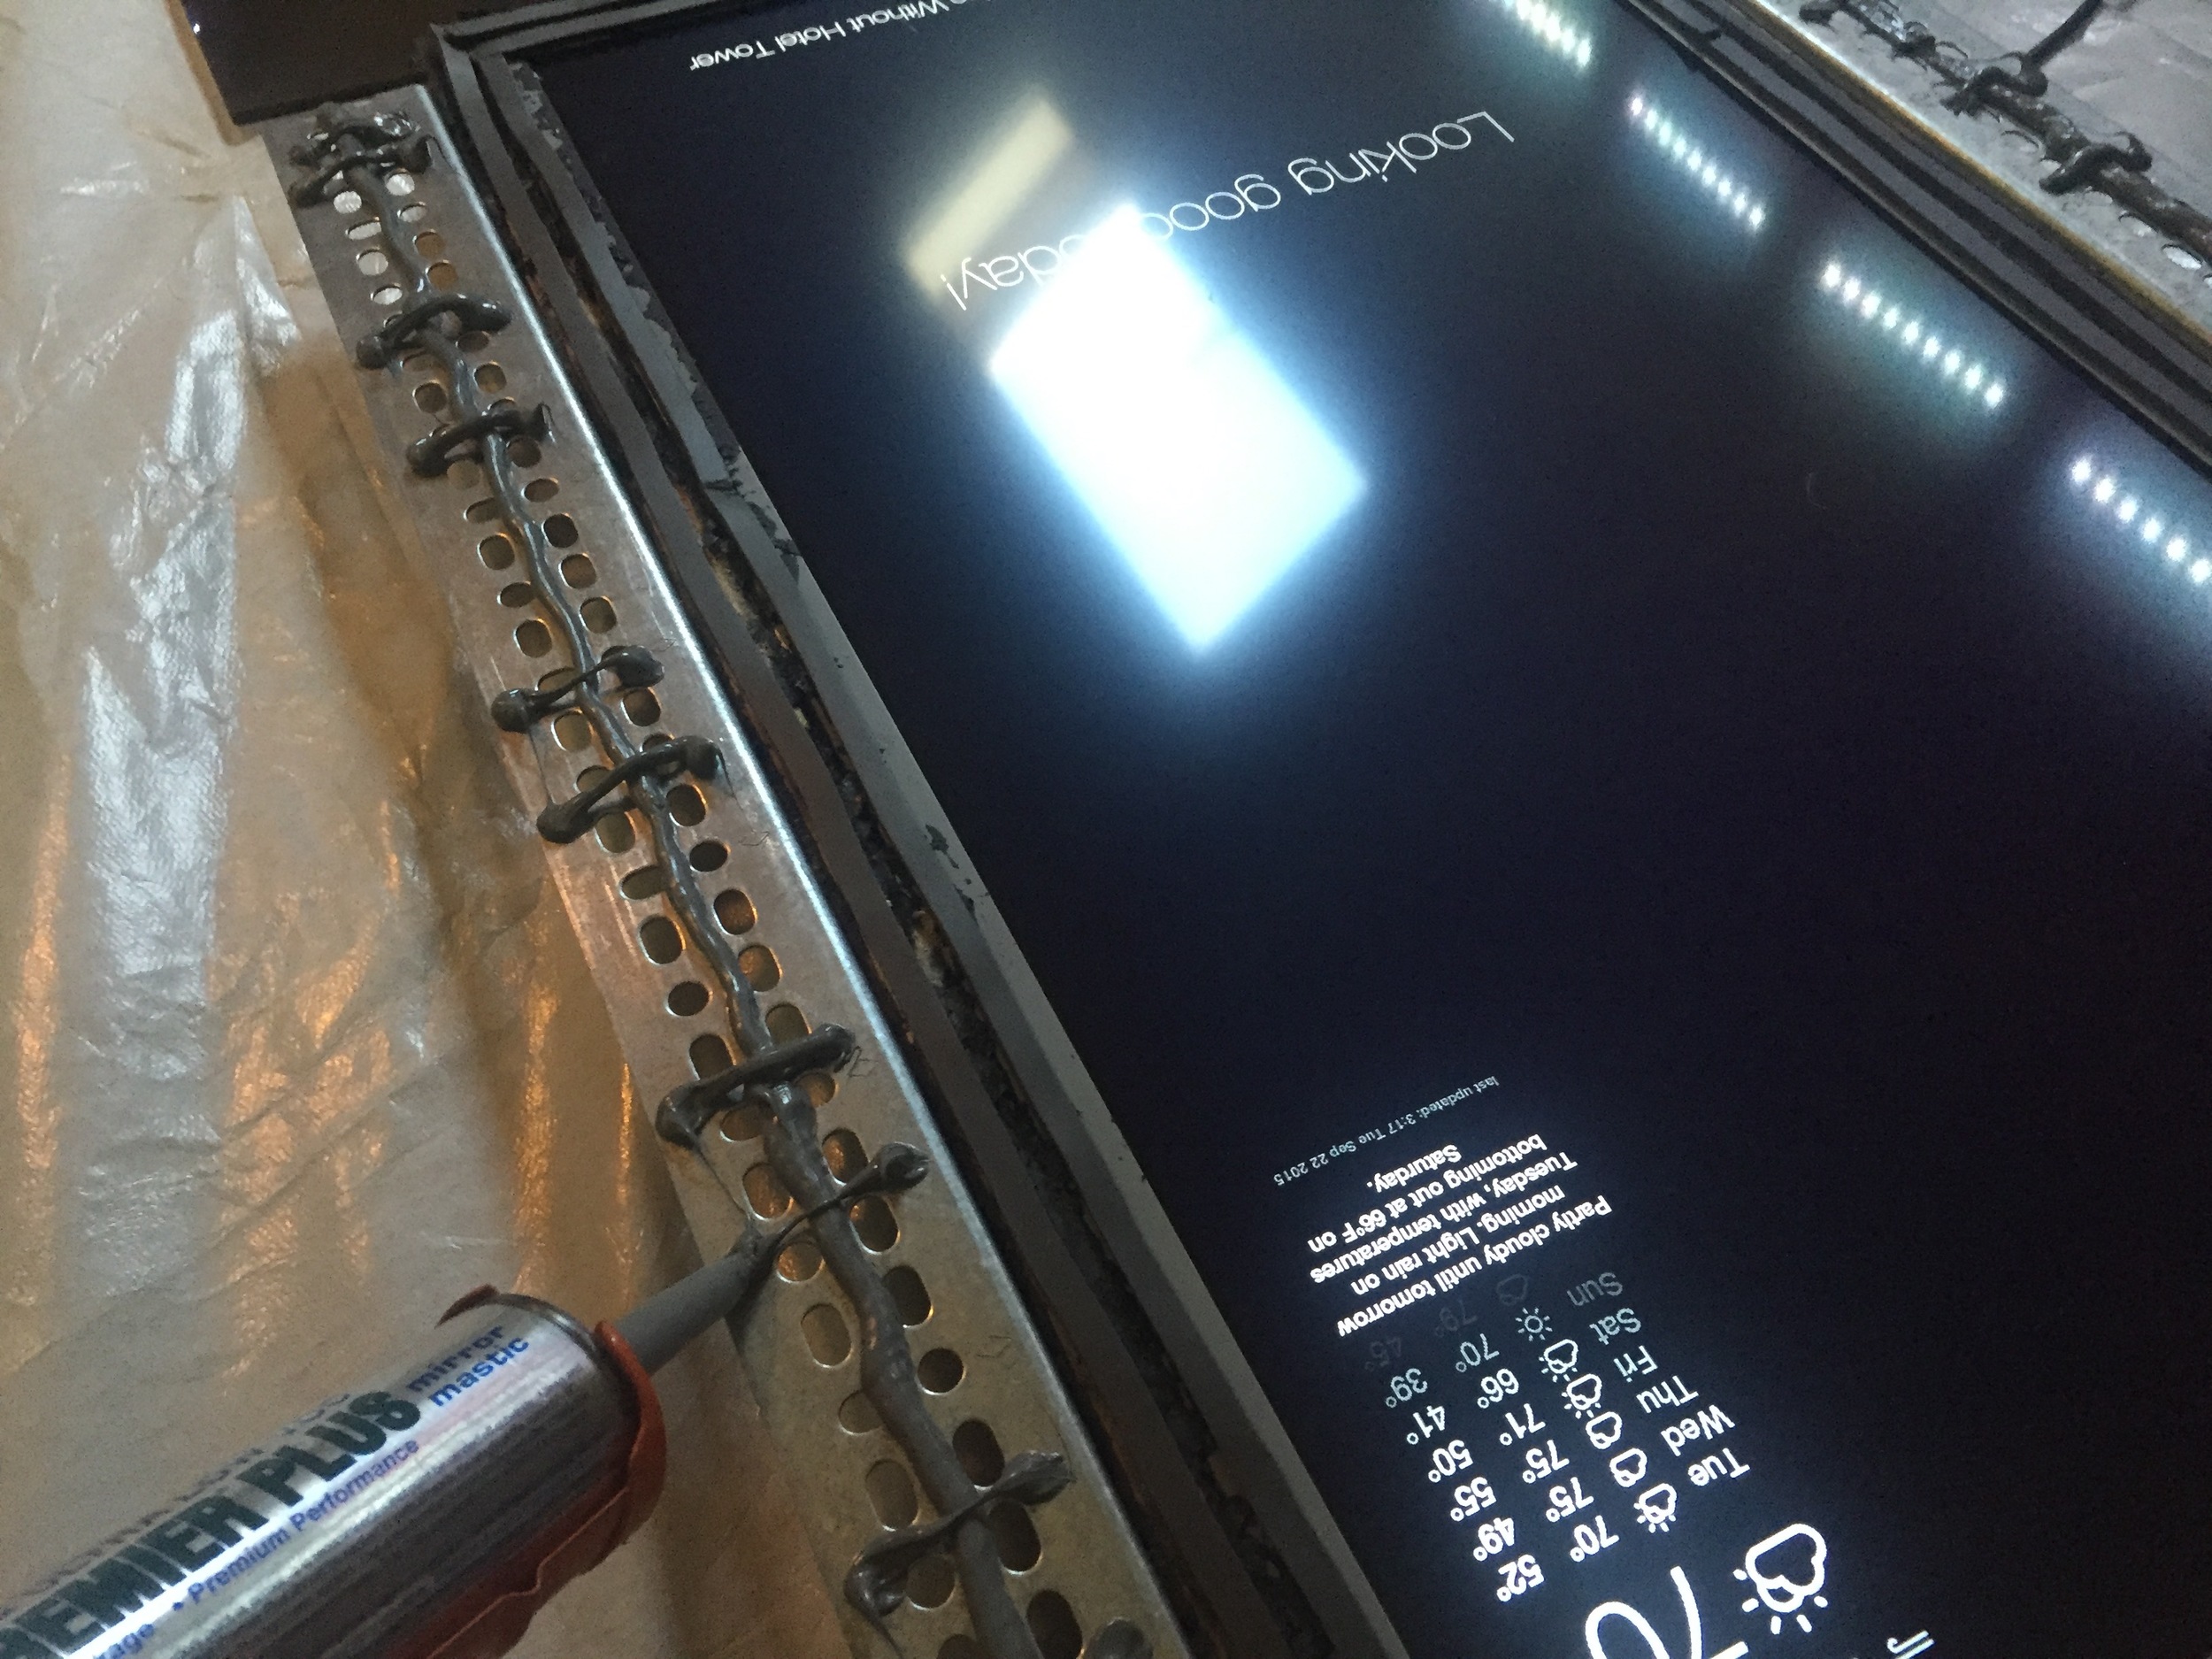
After finally removing the mirror, I decided not to glue the new glass directly to the frame. I wanted something I could easily remove if the need arose. I bought two pieces of slotted angle iron from Home Depot, cut them down to a few inches less than the mirror height with an angle grinder with a cutting disc, and screwed them into the side of the mirror frame. These wings were positioned so that they stuck out beyond the edge of the frame; once they were glued to the glass, I'd unscrew them, push the frame up against the glass, and screw them back in again.
I ordered another tube of CRL Gunther Mirror Mastic, and although they sent me a slightly different gray formulation instead of the black I'd wanted, it's functionally the same so I didn't bother returning it. To make sure I got the alignment right this time, I placed the glass face down, applied mastic to the angle iron "wings", and then placed the frame onto the back of the mirror. The weight of the frame ensured that the wings would stick to the glass as expected.
Painting the back
After a few hours, I used black enamel paint to again cover the back of the mirror glass. This wound up not being enough, though, as the mastic caused the angle iron to sit just a bit off the surface, and the paint was too thick to get into the gaps. This caused light to leak through the back of the mirror. To solve this, I bought a tube of black caulk and used that to fill in the holes in the slotted angle iron, and the gaps around the edges. I shined a flashlight through from the back to make sure it was truly opaque.
I removed the glass/wing assembly from the TV frame while I was painting. This allowed me to apply a bead of caulk around the inside of the mirror where the frame would rest against it. I also used some thin black air conditioning foam strips to further create an opaque seal between the frame and the mirror in order to avoid any other light leaks.
Reassembly and hanging
The frame just slides between the two wings, with screws going through the sides of the wings into the sides of the wooden frame. This was harder than I'd thought -- the wings just barely fit around the frame. It was so tight that I barely needed to screw it back together again.
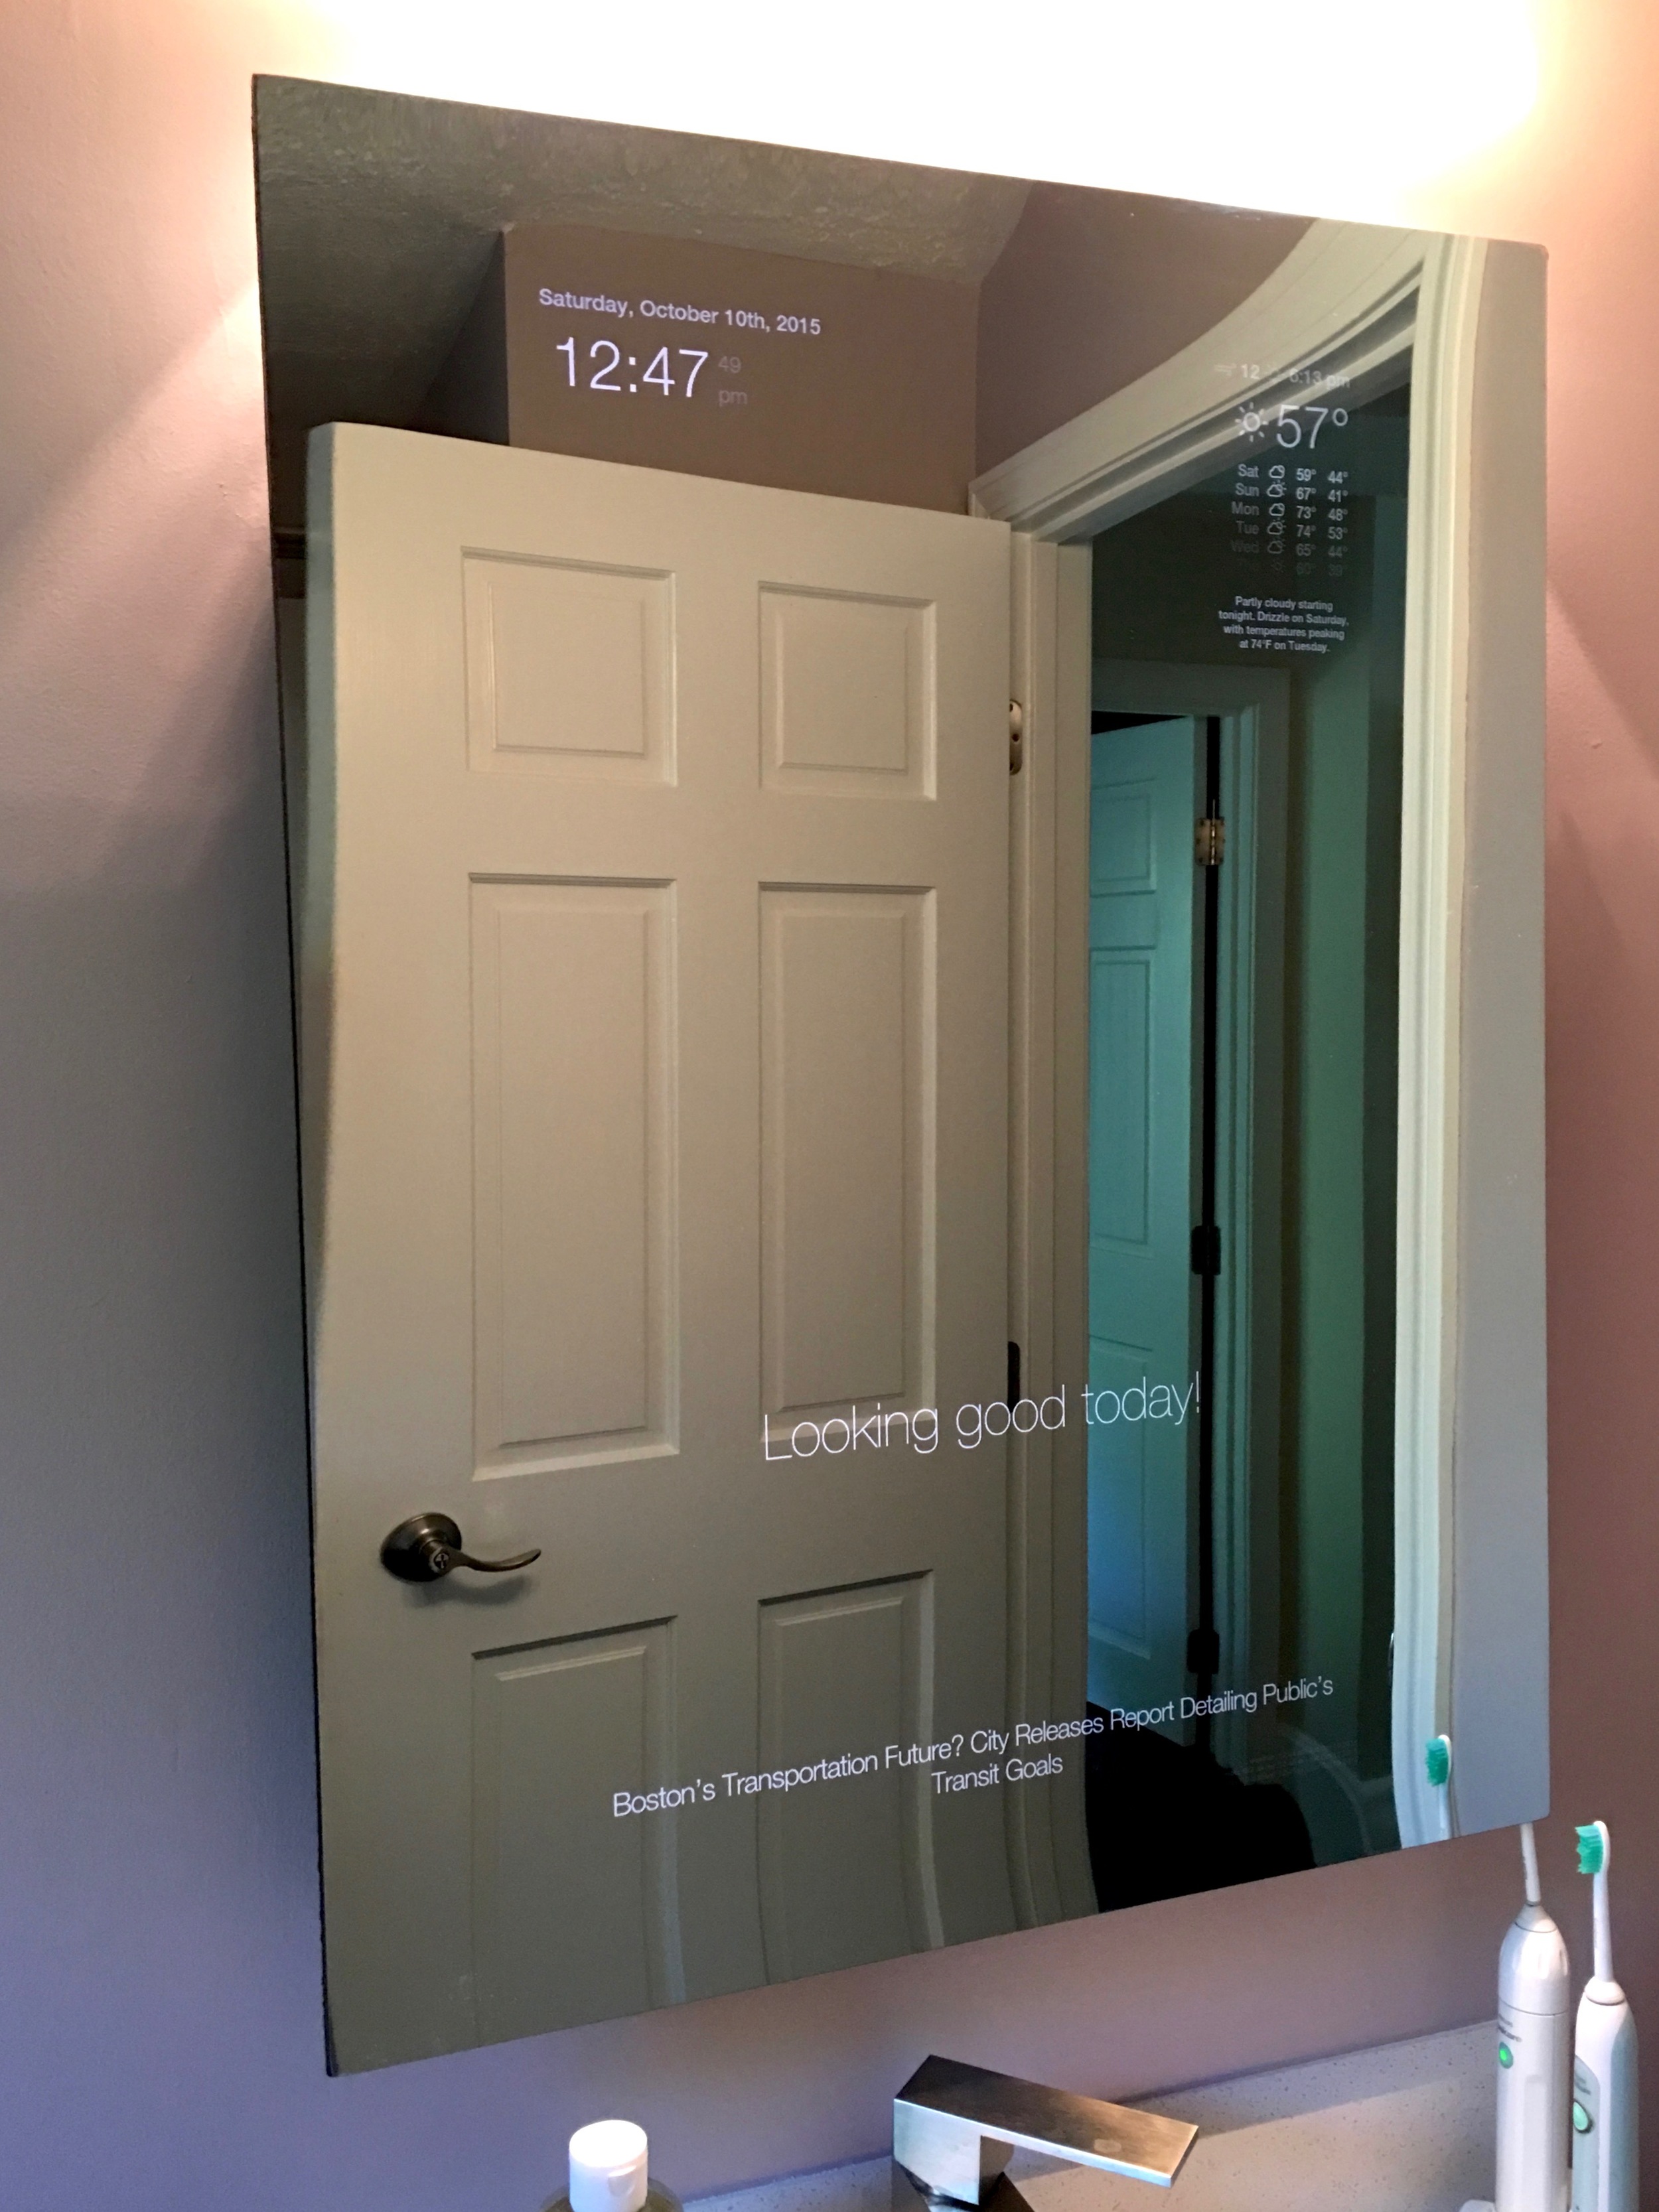
Hanging was the same as before, and I had no problems here. After a few days, I did notice an interesting phenomenon, where about an inch all around the edges of the mirror you could see some warping. I'm attributing this to the tempered glass for now. I thought it might be from the gluing process, but the mastic is only on two vertical strips, and the apparent distortion is on all sides. It doesn't affect general use, as the center is nice and flat, so I'm not worried about it. That, and the fact that it took a few days for me to notice means it's not a big deal.
Bonus Feature: Anti-Fogging
As I mentioned before, the LCD puts out a fair bit of heat. But there's a bonus positive to this -- the mirror doesn't fog. With a warm mirror surface, moisture won't condense and the mirror stays completely fog free where the monitor is.
Experimental Feature: Weather Station Mode
(added January 21st, 2016)
Neal Thomas wanted to use the mirror codebase as a weather station. Rather than covering it with a mirror, it would be a straight LCD. He asked about being able to display a background image based on the current weather.
I did some quick research and set up basic support for this by using a dictionary of arrays of images. The dictionary is the different weather conditions from the Dark Sky API, while the array is specific images to display for the condition. If multiple images are provided, they are looped through randomly at a customizable interval. Since the images may obscure the interface, there is also an option to darken the images through the config.
By default, this feature is disabled by simply having empty arrays of images. To enable it, you just have to find images for each of the weather conditions and plug them in.
Jamie Kenyon
Awesome!!
Michael Broyles
This is pretty awesome! This is the web build I plan to implement into my mirror. I'm deployed for a few more months still so have to wait till I get home, but I can figure out what I am looking for in the mirror now. I'm definitely a Linux guy, but I'm way new to Raspberry Pi. I'm not a web developer either but I have a project to look forward to.
Joe Angell
Thanks! Let me know if you have any questions and I can try to help where I can. This was my first Pi project, and I'm not really a Linux guy (I tend to do Mac and Windows dev), but I followed Michael Teeuw's instructions and got it set up without too much trouble. Once the Apache server is up and running, everything is really just Javascript on web pages after that, which I've been doing on my Windows box with Chrome and then pushing to the Pi via SFTP. I'm not much of a web dev either, but luckily there's lots of documentation out there. I'm pretty happy with the results.
Good luck with your version of the mirror!
Jordan Elder
So being completely new to Linux and programming in general, utilizing your files from the zip on git-hub, I wasn't sure where to place them or copy them to. Any information for a complete noob would be much appreciated. I have already loaded jessie and chromium and have gotten to the creation of the localhost portion. Thank you.
Joe Angell
No problem; that took me a bit to figure out as well. Web site files go in /var/www on Linux. If I remember correctly, one issue I hit is that I didn't have permission to write to that directory. I had to google around for "can't write to /var/www" to figure that out. I've updated the "Apache and PHP" section above to with a link to how to do it, which is to add your account to a the www-data group and change the ownership of the /var/www to that group, assuming it's not already in it. After that, you just drop the contents of the zip directly into that dir, point Chronium to localhost, you should see the web pages.
James Simpson
Great little write up and code, I can see me modifying this a lot for my case. Thanks :)
Zac Pappis
Hey -- thanks for this, Joe! I just got everything up and running. Really awesome stuff.
Nita Cristian
Hi. Thank you for your post. You really inspired me to recreate this project. Right now i'm stuck, i can't manage to make the degrees in celsius. Can you please help me and point the lines that i have to change to make the mirror show the temperature in celsius degrees? Thank you !
Joe Angell
The original mirror code didn't have a switch either, so I just forced it to F from C. I've updated the code to let you choose the unit system from Dark Sky, defaulting to "auto" (ie: figure it out based on the location you requested). You'll likely also want to add "var tempDecimaplPlaces = 1" to your config if operating in C.
Download the latest version of the source if you want to give it a try.
Joe Angell
Obviously that should be "var tempDecimalPlaces = true". There are a number of other small changes, and I restructured the config slightly, so you want want to compare your config to the one on GitHub. Let me know if you have any more problems.
Nita Cristian
I just installed the latest version. It's all ok. Thanks, you're great man! I just want to ask one more thing. I really like your ideea of "Warning Times". I would like to use this function in the morning when my kids are going to school. It works perfect, except the fact that i can't make it work only in the weekdays , from Monday to Friday only. My java coding is very low and i don't now hot to create something like that or if already exist in the code. Thanks man!
Joe Angell
Right, that's something I've been thinking about as well. Mostly I just have to decide exactly how you'd specify the days in the config. Once I figure that out I can look at implementing it, maybe this weekend if I have some time.
Nita Cristian
It would be great. Thank you.
Niarfe e
Excuse me, where you bought the mirror?
You know as it is called apart from two way mirror?
Thank you!
Joe Angell
I bought mine from TwoWayMirrors.com . Since I built mine, they seem to have added a specific "Smart Mirror" glass option, but it's more expensive than the simpler two way glass I used. That's the trade off -- a lower for simpler two-way mirror glass price, or pay more for better transmittance. There's also shipping to consider -- the 31" x 24" one I got cost $80 just for shipping, it was extremely well packed.
Two -way mirrors are also called one-way mirrors, observation glass, spy mirrors, see-through mirrors and half-silvered mirrors. They all mean the same thing.
Niarfe e
Thank you very much, you've been a great help.
regards
Paul Bell
Hey Joe-- I just downloaded and uploaded and configured the code to my personal web server. I intend on making a mirror, but wanted to play around with the code beforehand. I've also thought of using it as my browser's home page since it contains relevant and helpful information. However, I can't seem to get the weather section to work. I signed up for and updated both the config and mm-weather js files, but unfortunately it's still not displaying. Have you been able to run the latest version successfully? Here's the link to current hosted page, in case anything jumps out at you ... http://paulmbell.com/mm/
Joe Angell
I always run the latest version on my mirror. It's working fine here.
Your web server must support PHP. This is used to work around cross domain scripting protections provided by modern browsers when you try to access things like the weather and MBTA train information without using JSON-P. I just couldn't get JSON-P to work for some reason, so, I use a PHP proxy script instead, which makes the browser believe that the URL is coming from the server itself and not from another site. PHP is also required for the calendars to work. When I'm doing development on Windows before sending it to my Pi, I use XAMPP to run Apache with PHP.
So I'd check to see if you have PHP working on your server. That seems like it would be the most likely cause for the weather to not work.
Also, when I checked the debug console console for your mirror's page, I noticed that part of the mm-weather seemed to be bombing because it can't find the variable weatherBGImages. I've checked in a fix for that, but I'm fairly certain that's not causing errors, as introducing the same issue here still allowed the weather to display properly.
Paul Bell
Hmmm. I have PHP working and proxy.php seems to be working fine when I navigate to it alone with my forecast.io api code and coordinates in the URL variable. And since the calendar section is working, it makes me think something else is wrong.
How did you get to the debug console?
Also, in config.js there appears to be a missing semicolon after var darkSkyLon.
Joe Angell
I get the console by RMB'ing on the page and choosing Inspect in Chrome. That shows an inspector/debugger/etc.
Unfortunately, it's hard to debug remotely (I can't step through the source running on your server). Can you email me your config.js?
I'll update the Github source for the missing semicolon for consistency, although they're optional in Javascript, so that shouldn't be causing any problems.
Paul Bell
Managed to figure it out... for some reason, this line was throwing the error.
After removing it, it works fine. Thanks for the quick response earlier.
Great work on all this, thank you for sharing!
Joe Angell
That's weird... the purpose of that line is to detect if you didn't enter your API key in the config. Can you email me your config anyway? I'd like to figure out why that error is happening. You can clear out your calendar URL first; I just need the rest of it to track this down. Thanks.
Paul Bell
I thought you had to also update mm-weather with my api key too. Clearly, I misunderstood that section. But once I returned that if statement to the original, everything worked like a charm.
I'm now working to replace the MTA and MBTA with WMATA api. I don't have much JS experience, I'm more of PHP/MYSQL oriented, but slowly going to try my best to modify the transit section for my local transit.
Joe Angell
MBTA is probably the most full-featured one, but also the most complex, due to the need to make multiple JSON calls. Both MBTA and MTA use the same function to populate the div -- basically, you build an array and call updateMBTAServiceAlerts_UpdateDiv() to refresh that part of the page. This lets you keep your code contained in its own file, and avoid needing to modify anything else.
Email me and I can give you more details on the structure and how I went about handling the MBTA data.
Amanda Roscoe
First, THANK YOU. I've been researching how to build a magic mirror and haven't come across a post as detailed as yours, so thank you. I landed on your site because I was searching for heat issues. You briefly touched on it regarding anti fogging. Do you have any heat issues with the tv being on all the time or any issues with images burning into the screen? Also what did you do for power with the tv?
Joe Angell
Thanks!
I haven't had any real issues with heat. The speaker holes I drilled into the frame seem to keep it cool enough. There's also a Linux command you can run, "/opt/vc/bin/vcgencmd measure_temp". that will return the CPU temperature (mine's at 53C at the moment, and is running slightly overclocked; the Pi FAQ says that 70C is a good maximum temp, so I'm well within range). I've not had any problems with heat. You can attach a heat sink if you're concerned about it, but that's probably only really necessary if your Pi is overclocked as high as it will go, or if it's unusually warm. An OLED would emit even less heat, I expect, but they're also quite expensive.
I've also had no problems with moisture, even though it's in a bathroom.
I don't think burn-in is a thing on modern TVs, or at least I haven't noticed any such issues with mine. I expect the mirror will also hide many of those issues even if they were there, as it isn't completely transparent to light.
The only problem I've had with it being constantly powered is that sometimes the TV will just go black and I have to unplug it and plug it back in. It's rare, but it happens. However, it will often run for months without issues. I really don't have to fiddle with it much.
For power, I installed an outlet behind the TV so that I could completely hide the power cables. I used a recessed outlet like you usually see for wall-mounted TV installations.
Good luck with your build!
Martyn Gierlicki
Hi Joe - brilliant write up!
However, I hope you can help.......
I have followed all instructions and have the web page up and running - but with similar issues to Paul Bell's as per your discussions below. I have installed PHP but the similarly to Paul the weather and calendar sections are not showing. The weather must be working somewhere in the background as it is changing the compliments based on weather. I have seen from Paul's link that his page is now up and running (http://paulmbell.com/mm/).
How was this resolved? What could I be doing wrong?
Joe Angell
That's interesting. Does the weather comment change, or is it always the same set of comments (there are 1 to 3 comments for each weather type). I'm wondering if it's just using the default weather, which would imply that the weather isn't working.
As long as you have the Dark Sky API key set in your config, it SHOULD work. It's pretty hard to debug this kind of thing remotely. What I usually do is use the Chrome debugger (right click on the page and choose "inspect element") to look for errors. I'll also add "debugger" lines to the Javascript at certain points so that it will break execution in the debugger so that I can better see what it's doing (so, find a line you're interested in, such as in the weather update function, add the line "debugger" without quotes before that, save the page in your editor, and then reload the page in Chrome and it'll stop at that line, assuming the line is hit).
I don't suppose you have this on a public server, do you? I'm not sure how much it would help to see the page without access to the code, though. Perhaps you can send me your config? You can email it to me via the address on the contact page.
Good luck!
Thomas Nierychlo
Hi Joe, Thanks alot for your blog. But I've a question: from one day of another my calendar wont work with office 365. I get no content. my private Exchange works perfect. I've also trouble with RSS feeds and mixed compliments. for RSS feeds I've for testing your 5 reuters urls but get no articles. the mixed compliments works but give me wrong compliments by temperature-type. I'm using CELSIUS. Could help me please?
Joe Angell
It's possible I didn't consider celsius for the weather comments. I can take a look at that this weekend, and add a conversion factor and a pref to decide how you're specifying the temperature compliment range. The other option is just to change the comments yourself to C -- they're all in the config -- but really you shouldn't have to deal with that and it should be automatic.
The RSS section uses a Yahoo service to get the feed as JSON. I believe this goes through the PHP server, but if the weather and calendar in general are working then RSS should work as well. Very strange.
I don't actually use the calendars on my mirror. That's basically Michael's original calendar code. I'm afraid I'm not overly familiar with it, but I can try to help.
Can you send me your config fail? I might see something there if I can test it with my setup. My email address can be found on the Contact page.
Joe Angell
It took me an extra weekend, but I finally got the time to update the temperature compliments to support celsius. You'll need to update your config to add the new variable in addition to getting the latest version of the mm-weather.js, but you should be good to go there.
Les Szombat
It's probably just me, but I haven't found instructions for how to install this into MagicMirror 2. The main thing I would like to get is the hourly + weather forecast. Can someone link to the instructions. Thanks in advance!
Joe Angell
You're not missing anything -- this is a branch of the original Magic Mirror project. Since it does everything I need it to, I haven't had a reason to rework everything for Magic Mirror 2.
I haven't looked at the Magic Mirror 2 APIs, but if you want to try porting the weather portion, I can try to help by explaining how my code works.
Good luck!
꾜뷱꾜뷱
i have problems with my speaker
my speaker doesnot speak
help me please
Priscilla Gomez
Hi I am not all too familiar with coding but I had a question about installation and why you chose to include your modules in the js folder as opposed to the modules folder? Also do you modules pull in info from you config.js or Michael's? I'm just confused by the same file names for different purposes. Thanks
Joe Angell
My mirror is based on Michael's original Magic Mirror codebase, not Magic Mirror 2 (which I'm guessing you're using). MM1 didn't have a modules directory, or any modules at all. Everything was originally in the main.js file, if I remember correctly; I started splitting them out into weather, MBTA and other files to keep things a bit more organized. My config.js is where all of my modules get their prefs from. My code diverges quite a bit from the original, but it's still pretty similar in a lot of ways. MM2 was a completely redesign, as I understand it, so my MM1 code isn't directly compatible with it (you can't just drop it in).
Someday I'll probably build a new Magic Mirror with a brighter LCD that supports local dimming (OLED would be nice, but is likely far too expensive) or maybe some kind of software controlled brightness to help counter the new blazingly bright lights we installed in our bathroom, as well as upgrade to a Raspberry Pi 3 (or 4, by the time I get around to it) and port to Magic Mirror 2, but for now my mirror does basically everything I've needed to, so it hasn't been a priority for me.
Priscilla Gomez
ah ok, totally makes sense now.. thanks for getting back to me!