Cleaning the Oil Pan and Lower Crankcase
Joe Angell
Years of slight oil leaks (first from a bad oil sender, then from the hole in the block) had turned my engine and parts of my frame nearly black. Since the 2.8L's oil pan and lower crankcase were going to be mounted on the 3.0L's engine, I decided to clean them up while I wanted for my 3.0L gasket set to arrive. I also had to remove the old gaskets and clean the surfaces before re-installing on the 3.0L.
Cleaning the Oil Pan
I first tackled the bottom of the oil pane. This has fins that presumably act as a heat sink to further cool the oil in the engine as air passes over them (the 3.0L oil pan has a simple flat bottom, and feels much less substantial). They are also a pain to clean out.
I used some shop rags, Simple Green cleaner (any detergent that breaks down oil should work fine; I used Simple Green because I found it was recommended on some forums in my Google searches), and some plastic (aka "composite") scrapers to clean the oil. Remember that this is an aluminum part, and metal tools will put nicks in the metal. That's not too much of a problem on the outside of the parts (it would just be cosmetic), but it could be a real problem if you damage the surfaces that the gaskets sit on.
On the flat surfaces, I was able to use the plastic scraper to remove large amounts of oil, turning the black surface into a dirty grey one. I sprayed some Simple Green on and wiped with a shop cloth or a paper towel to get dirty grey to a cleaner grey. I wasn't able to get it completely due to the rough surface of the metal, but it was far better than it used to be.
For the fins, I sprayed Simple Green between down, jammed the shop rag between a fin and pushed it along with one of the plastic scrapers. This got out a pretty good amount of the gunk, but again I couldn't get it perfectly clean. Even so, it looks cleaner in real life than it does in the photos.


Cleaning the Lower Crankcase
I used the same procedure to clean the lower crankcase. A lot of partially dried oil had filled up deep recesses on the outside of the engine. The mounts where the engine attaches to the car, for example, were completely filled with this stuff. I first cleaned those out with the scraper, then sprayed Simple Green in to break down some of the remaining oil before scrubbing it out with the shop rag.
The left image shows the very dirty external parts of the lower crankcase (right side of the picture), while the right shows how much they are cleaned up. This is the bottom of the lower crankcase, with the old oil pan gasket is still attached.
Removing the Old Oil Pan Gasket
My oil pan gasket was firmly attached to the lower crankcase, with just a little still on the oil pan. Removing it should have been simple: use the plastic scraper to remove all of it, leaving bare metal, and many some gasket remover solution to remove any residue.
Composite/Plastic Scraping
Using a composite/plastic scrapper to remove the remnants of a gasket from a cylinder head.
First, an important note: do not use metal tools to remove the gasket. The engine is made of soft aluminum, and metal tools will gouge it and you won't be able to get a proper seal with the gasket, which will lead to an oil leak that you won't be able to fix. Only use non-metal tools for this. I got a set of four composite gasket scrapers (they're basically plastic, and certainly not metal) from Amazon.
Trying to scrape the gasket off was slow going. It wouldn't come off as a single piece, or even in chunks -- I could only remove it in very small bits at a time. I spent a good fifteen minutes removing just an inch of material to metal.
Later, I found three ways to use the scrapers to help remove such gaskets:
- Hold them at a steep angle (mostly parallel to the surface) and scrape the gasket away. This can be slow going.
- Chip at the gasket by stabbing at it like an ice pick. Hold the scrapper a few inches a way and quickly and repeatedly jab at the gasket. The scraper won't damage the metal, and it tends to work faster than the first method
- Hold the scraper perpendicular to the surface, and quickly side it back and forth like you're revealing a scratch-off lottery ticket. This does a fairly good job of breaking up the surface of the gasket .
Once most of the gasket is off, you can remove the remaining material with a corner of the scraper, holding it like a pen. I found using the next technique more effective for the remnants, though.
Bristle Discs
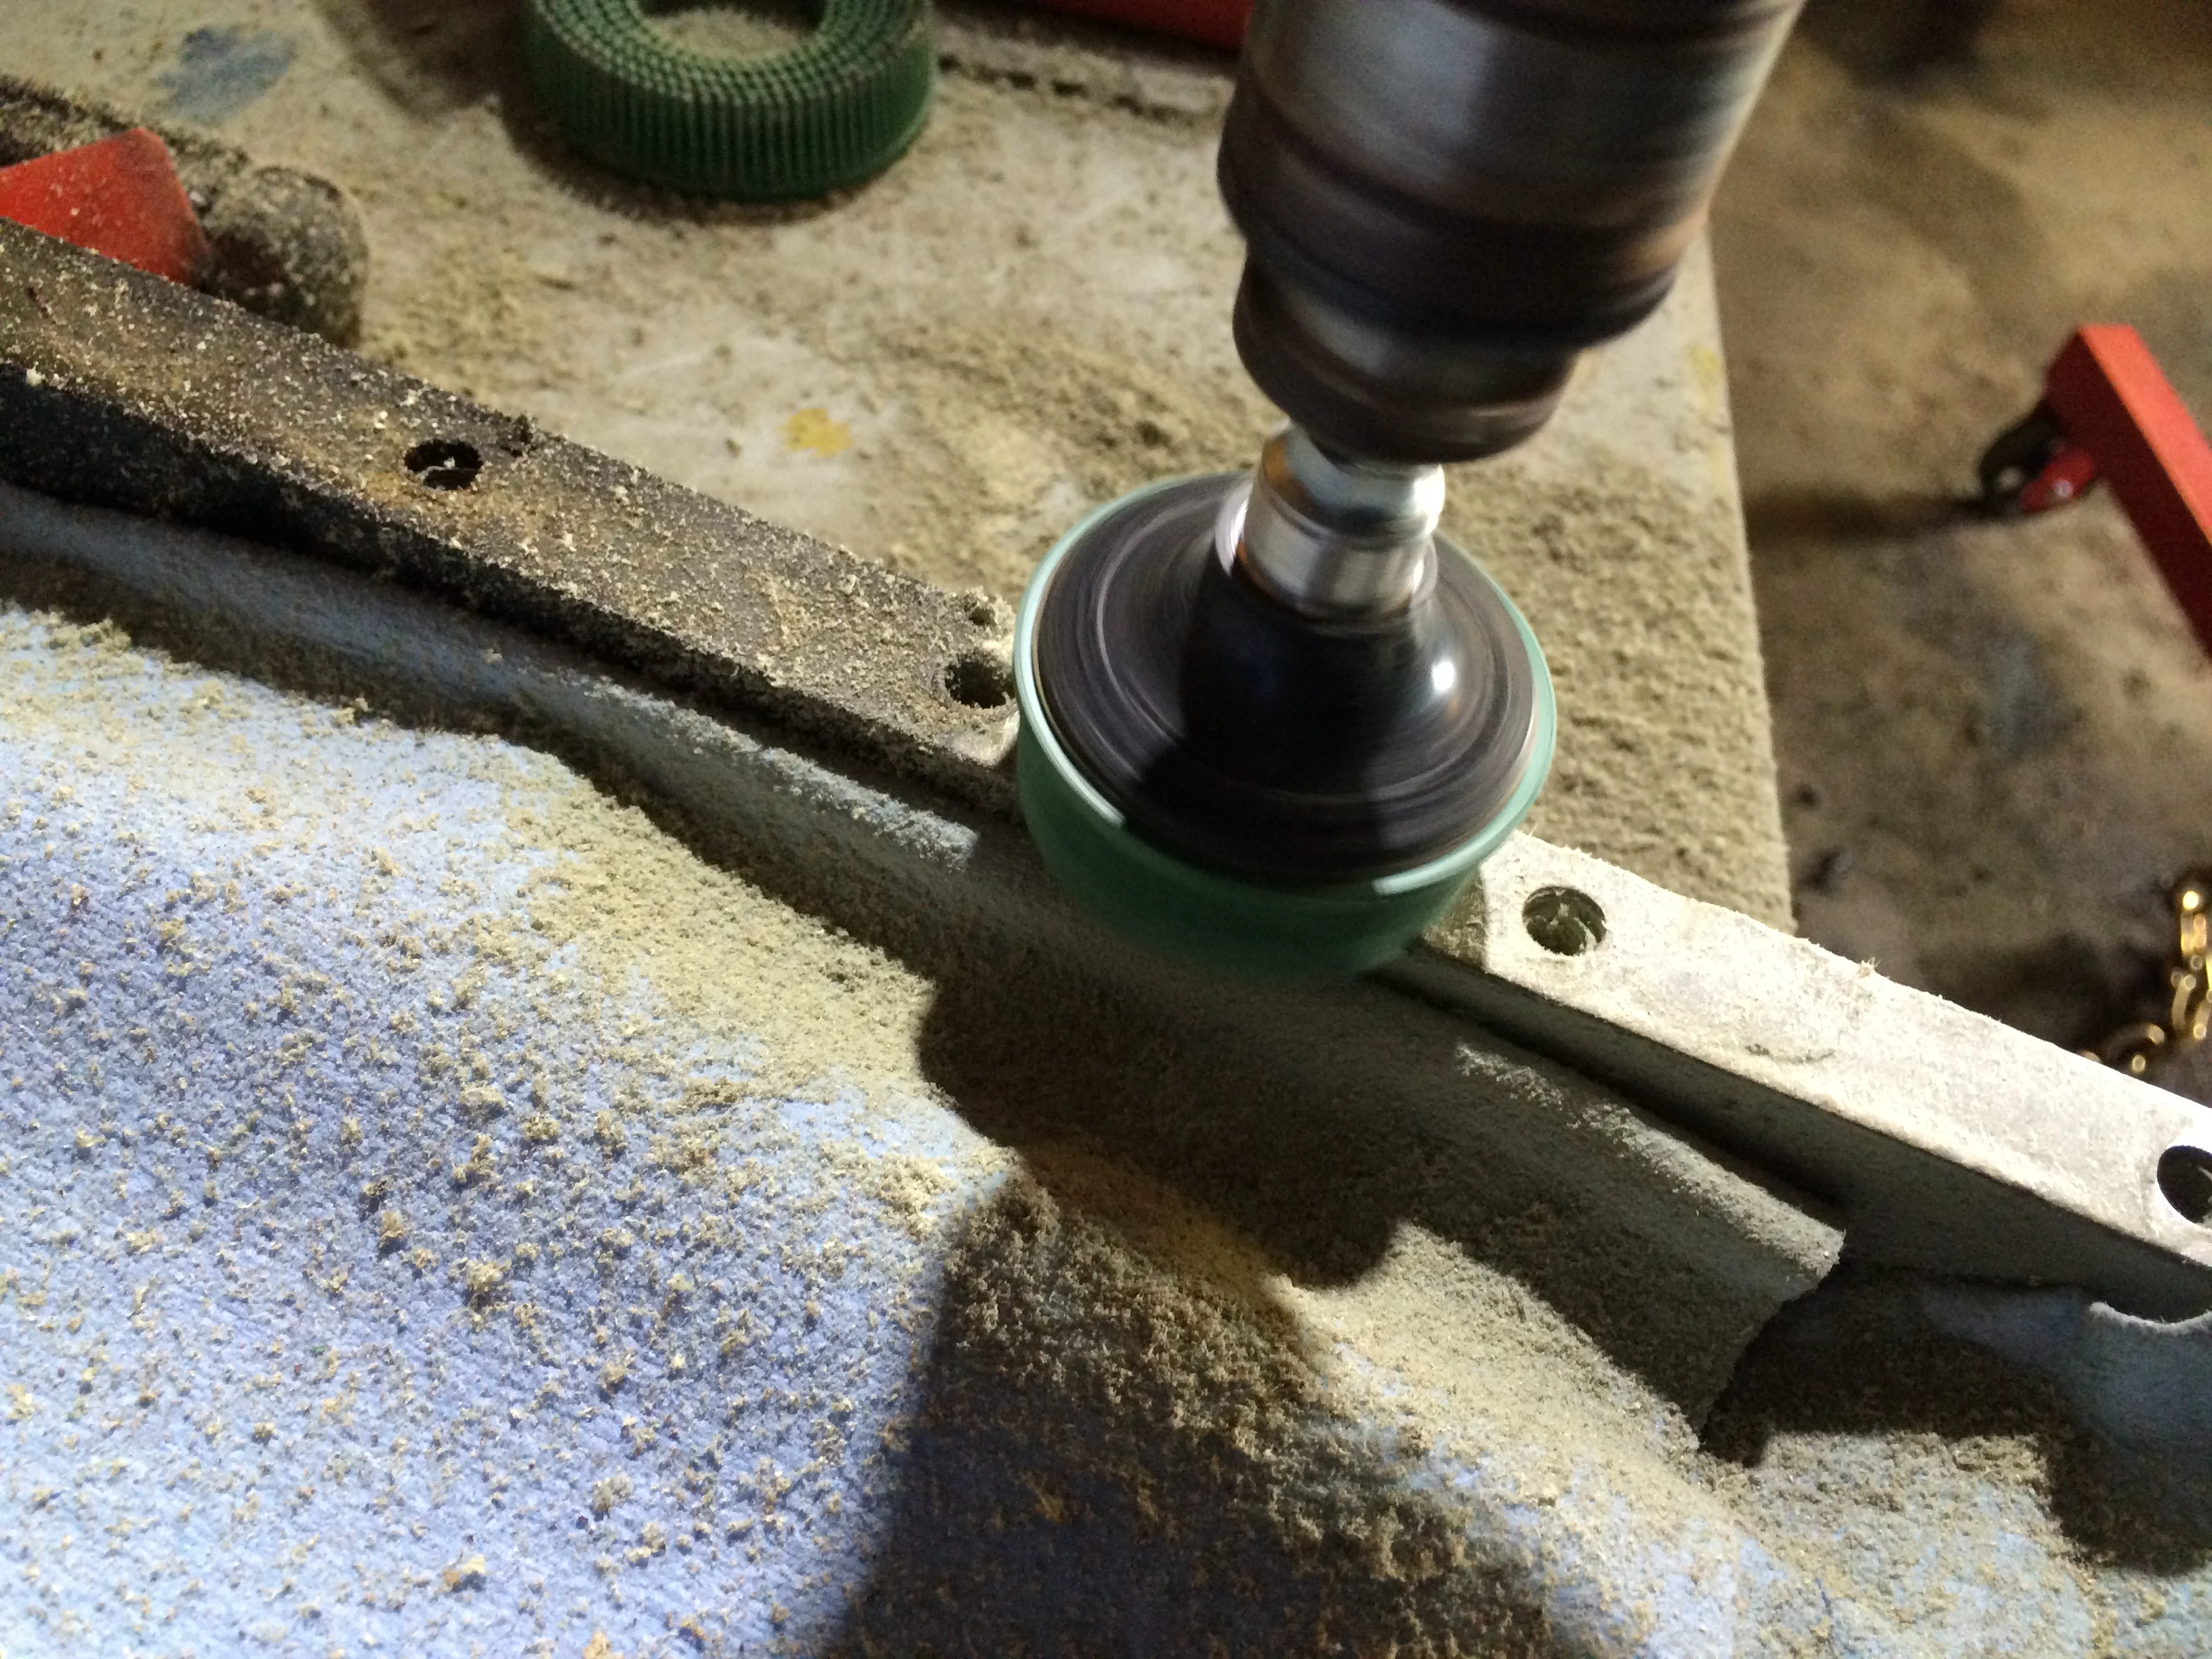
I decided to take the advice of jawn101 on DMCTalk, who posted an excellent article on how to re-assemble a PRV engine and seal it against oil leaks that I plan on referencing frequently as I put the engine back together. There he suggests a 3M Bristle Disc, which is a round head with a series of plastic pins that attaches to a rotary tool. The disc won't damage metal, but it makes short work of gaskets. They come in different colors representing different strengths. I got the green one because that was what was in jawn101's post, but some brief research suggested the yellow one would work as well. I didn't look hard enough to figure out what the different strengths were of the different colors, and just stuck with green.
I ordered an official green 3M three inch disc from Amazon. What I didn't realize at the time is that the bristle disc is meant to screw into a Roloc adaptor, so I had to get one of those well. I chucked the Roloc adaptor into my power drill, twisted on the bristle disc, and got to work.
The disc worked quite well, cutting through the gasket without much trouble -- and sending dust into my newly cleaned lower crankcase. I laid some paper towels in side the crankcase to keep most of the dust out. You may want to wear a mask so you don't break the dust in, but I decided it probably wasn't too bad (aren't the gaskets cork?) and didn't bother. Make sure that you don't snag the paper towel with the pins on the disc, or else it will wrap around the disc and throw dust everywhere. Also make sure your drill is set to forward, or else the disc will unscrew itself from the Roloc disc holder.
Unfortunately, I only got through a few inches of gasket when the disc snapped off of the Roloc adaptor. I used a drill bit to remove most of the material from the adaptor, and a knife blade to twist the remaining bits out. Back on Amazon, I ordered a ten pack of two inch green discs (cheaper, as they were not 3M, but they seemed the same) and a two inch Roloc adaptor, which together cost a bit more than twice the single 3M one.
The two inch discs seemed to work just as well. While this was much easier than using the scrapers, it still took about two hours to remove the entire gasket, including a few short breaks to let my hands rest from the vibration of the drill. Some slight swirling patterns were left on the aluminum when I was done, but these are nothing more than graining -- my fingernail wouldn't catch on them when dragging across, meaning they were very light scratches and were unlikely to affect seating and sealing a new gasket. And all of the gasket was completely gone.
Bristle Discs and Too Much Force
There's an important caveat to be aware of with bristle discs -- the green ones are not actually recommended for aluminum, and can damage the surface. The white ones are softer and approved for aluminum, but I'm told that they are so soft that they have trouble cutting into the gaskets. If you use green discs, you should be gentle to ensure that you don't create depressions in the aluminum.
Using a straight edge to test for depressions and low spots from the large amount of force I used to remove the gaskets with the bristle disc.
I was not gentle. I was pushing quite hard to remove some of the stuck-on gasket. You don't actually have to get it all off like I did -- you just need a smooth mating surface, and if there are some stubborn bits that are nearly flush with the metal you can just leave them. I only realized I needed to be more careful after I finished, when a new DMCTalk thread appeared and I did some web searches about issues with the discs. I found horror stories of cylinder heads damaged to the point that the machine shop couldn't mill off any more and the head needed to be replaced. This worried me, making me think I might need the mating surfaces milled or possibly replace the parts entirely, although the less critical tolerances here as comported to a cylinder head made the latter unlikely.
A week later I got a chance to check the straightness of the lower crankcase/oil pan mating surface with a metal ruler. I verified the straightness of the ruler against the known flat surface of my aluminum laptop. The engine mating surfaces were perfectly straight -- there were no depressions or low spots not he surface -- it was for all practical purposes perfectly straight.
Clean Up
Unfortunately, a lot of dust still got into the lower crankcase. It wasn't too hard to clean, though; some more Simple Green and paper towels, which I pushed into narrow crevices with the plastic scrapers when necessary.


Removing Gasket Residue from the Oil Pan
Some of the old gasket was still attached to the oil pan, so filled it with paper towels and used the bristle discs to remove that as well. This was slightly tricky because of the shape and lighter weight of the pan, casting it to shift around the table. I was finally able to wedge it between myself and the wall to keep it from moving around. It took about fifteen minutes to remove the remaining gasket pieces. I then cleaned up the dust that got inside the pan with some Simple Green and paper towels.
In the end, I went through five discs total, two of which snapped off at their screw-on mounting points; I would swap them out when I felt that one wasn't working as well anymore, but I'm not sure that was totally necessary. The pins on the discs wore down over use, but the aluminum was undamaged and the gasket was gone. The pints would tend to bend and taper as they wore, but it's not clear to me how much that affected how well they worked. You can't really just run the drill the other way to straighten them back out, since that tended to cause the disc to unscrew from the holder.


